• Hi all and welcome to TheWoodHaven2 brought into the 21st Century, kicking and screaming! We all have Alasdair to thank for the vast bulk of the heavy lifting to get us here, no more so than me because he's taken away a huge burden of responsibility from my shoulders and brought us to this new shiny home, with all your previous content (hopefully) still intact! Please peruse and feed back. There is still plenty to do, like changing the colour scheme, adding the banner graphic, tweaking the odd setting here and there so I have added a new thread in the 'Technical Issues, Bugs and Feature Requests' forum for you to add any issues you find, any missing settings or just anything you'd like to see added/removed from the feature set that Xenforo offers. We will get to everything over the coming weeks so please be patient, but add anything at all to the thread I mention above and we promise to get to them over the next few days/weeks/months. In the meantime, please enjoy!

Holiday Toolchest

I have to admit that I'm approaching this like I approach camping, long distance cycling, or how I approached racing for tools I had to carry to the meet. what can I strip out, do I really need a full socket set, will I really attempt to strip and rebuild a holed piston while I'm in the middle of a field? why am I taking the massive rivet gun, I'm at most going to be replacing 10 rivets in the weekend, I can do that with the small one.
I'm even worse with camping. I don't need a 2 hob burner, there is only me, I can use a penny stove. my legs don't need to be on a matteress, I only need a 3/4 pad. my tent is tiny, my sleeping bag is light weight you get the idea.

Because even little things turn in to big things when there's lots of them.

from what you've said, you are approaching this more with the knowledge that have the space to take a box that is X big, weight isn't an issue really so how much can you get in that space. slightly different mentality to mine.
I'm interested to see where you get to, I'll try to not to chip in on your selection anymore as I think you've actually got that down to where you think you'd like to be.
 
novocaine":28bzsm9j said:
I have to admit that I'm approaching this like I approach camping, long distance cycling, or how I approached racing for tools I had to carry to the meet. what can I strip out, do I really need a full socket set, will I really attempt to strip and rebuild a holed piston while I'm in the middle of a field? why am I taking the massive rivet gun, I'm at most going to be replacing 10 rivets in the weekend, I can do that with the small one.
I'm even worse with camping. I don't need a 2 hob burner, there is only me, I can use a penny stove. my legs don't need to be on a matteress, I only need a 3/4 pad. my tent is tiny, my sleeping bag is light weight you get the idea.

Because even little things turn in to big things when there's lots of them.

from what you've said, you are approaching this more with the knowledge that have the space to take a box that is X big, weight isn't an issue really so how much can you get in that space. slightly different mentality to mine.
I'm interested to see where you get to, I'll try to not to chip in on your selection anymore as I think you've actually got that down to where you think you'd like to be.

I think that's a fair summary of my approach to this. I do like to travel light (especially when travelling by motorbike), although my camping kit is probably bigger than yours - mainly because once you restrict yourselves to tents with a sleeping area long enough for a 1.98 m (6'6") person to lie in, you've cut out 99% of the tents on the market (including most of the enormous ones, which have lots of short rooms). The tent I use is a 3-man one so I can lie diagonally!

I may well revisit this tool chest in a few years and make another version with a much smaller kit. However, at the moment my wood bothering skill levels are such that I'd rather give myself more options rather than fewer. Perhaps when I get more skilled I'll be able to make everything with 2 chisels, one plane and a saw but for now I need all the help I can get!

It reminds me a bit of one of my ex-boss's favourite aphorisms: "an engineer can do with a resistor, a diode and a capacitor what any backyard hacker can do with a microcontroller development board and 1000 lines of code". I'm probably more in the backyard hacker territory when it comes to woodwork at the moment!
 
Back in my backpacking days (several coast to coasts across Scotland) we would cut down the handle of a toothbrush to save weight. Glamping more my style now.
 
I haven't had much time near a computer to carry on with the design work, but I did have a nice trip out to Wentwood Timber yesterday. I'd never been there before so wasn't sure what to expect, but I liked it a lot. I'd also been to Bristol Wood Recycling Project the day before (another first), but I'm less tempted to go back there unless I want construction timber (and can face the god-awful Bristol traffic again!). They sold hardwood, but Wentwood was much better value. I did come away from BWRP with some bits of birch plywood and a couple of lengths of unknownium though, including one that looks like maple to me.

Wentwood hardly had any poplar (one short piece, which I bought just to experiment with since it was only £7). They had loads of sweet chestnut though and, despite not having finished designing the box, I couldn't resist coming away with quite a lot of that. I've now got four long planks stored in the garage so I expect that I'll make the chest out of that.

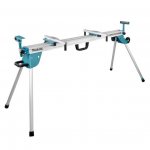
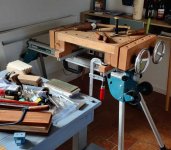
I'm going away on holiday relatively soon and I'm going to have a go at making something or other (possibly just practice joinery) while I'm away. I obviously don't have a tool chest yet so I'll take my portable workbench. It also occurred to me that I have one of these in the shed:

makwst07_4.jpg

I got this as a result of someone on another forum offering it free to a good home. I don't have a mitre saw any more as I sold it a year or two ago, but I kept hold of the stand just in case it came in handy.

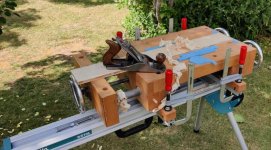
It isn't especially robust, but the mounts for the mitre saw are a good size for holding my portable workbench and it fits behind the front seats in the car so won't be a problem to transport. I'll take it away with the workbench and see how I get on with that combination and it might help guide me in my design of the chest (and possibly a collapsible bench to go with it!) I wouldn't be surprised if I end up finding the mitre saw stand too flimsy as soon as I start chopping dovetails, but it won't hurt to have it with me.
 
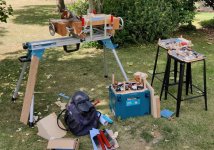
I've been having fun practising the idea of woodwork on holiday...

woodworking_in_the_loire.jpg

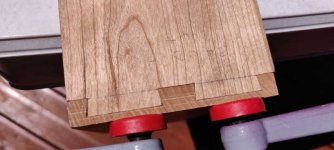
close_up.jpg

(I turned those clamps over after taking the photo as they were, quite predictably, getting in the way!)

I'm sure I brought a lot more stuff than I needed too, but I didn't want to be frustrated on my first attempt at taking stuff with me. The woodwork-allocated boot space was dominated by the portable workbench anyway (which will be much better when I've got a toolchest-cum-workbench). One thing it has convinced me of is that I want the top part of the tool chest (not modelled at all yet), which will hold the bigger stuff like planes, to be completely detachable so I can carry the two "halves" separately to minimise the amount of weight I have to lug around in one go.

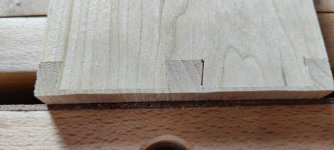
I haven't done very much so far: just planed a few planks flat and shot them square. I'm going to turn four of them into a very simple dovetailed box (with through dovetails); the other two were used for a bit of practice for when I start making drawers for my "holiday toolchest":

first_blind_dovetail.jpg

I was quite pleased with that, given it was my first ever half-blind dovetail. It looks a lot worse without the clamps holding it together as it's very slightly loose, but it's still a lot better than I expected for attempt #1.
 
Very sensible giving it a dummy run, I’m sure you will learn a lot about what works, and doesn’t, just wondered if it might be an idea to replace the legs on the stand? Something chunkier might do it, good that your vice thingie works well on it, and yes pretty good for a first attempt at a lap dt. Ian
 
I'm impressed by the refusal to accept that a holiday means idleness, when doing something you enjoy doing (and don't have enough free time for) makes so much more sense.
 
Cabinetman":yoi94kcp said:
just wondered if it might be an idea to replace the legs on the stand?

It's a lot sturdier than it looks (and that I initially thought it would be). Amazingly, it's rated to 225 kg!

Having said that, I'm quite tempted by the idea of making something wooden instead. I've no idea what form it'll take, but it'll be fun thinking of ideas!

AndyT":yoi94kcp said:
I'm impressed by the refusal to accept that a holiday means idleness, when doing something you enjoy doing (and don't have enough free time for) makes so much more sense.

Absolutely. If the holiday just involved idleness I think I'd be itching to get back home within a few days!
 
Wooden is going to be heavy isn't it? I would have thought keeping the weight down would be an important consideration.

i think this is a cracking idea BTW.
 
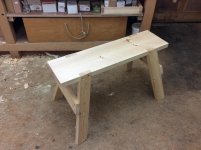
For transportation I’ve always rather liked this idea.

2-D97-A662-F0-AD-41-EA-A0-B9-C4-D768069-A8-A.jpg


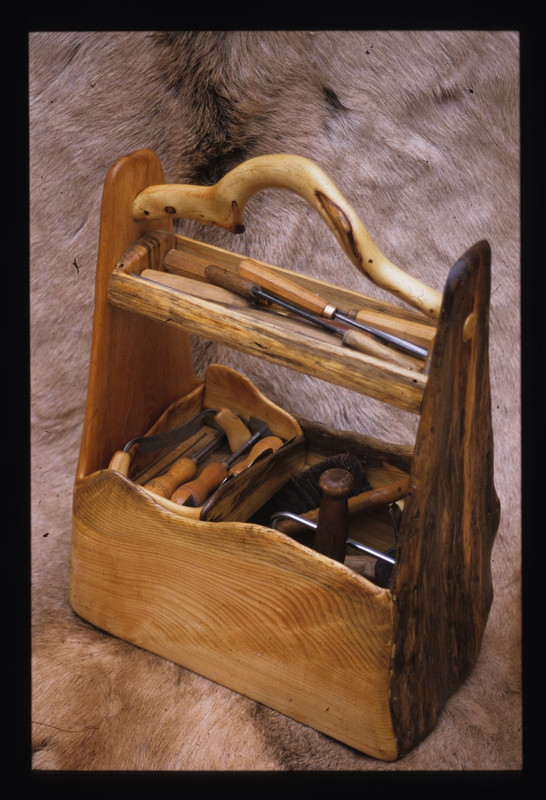
Or you could go more rustic? :lol:

5-B0105-A9-C21-A-4642-BEFD-F3-D78-EC70-E7-B.jpg
 
Cabinetman":2o2os1v5 said:
Trouble is the higher it is the more it will move, mentioned this before, 36” long 8”wide top and 18” high.
Another idea for the melting pot.
View attachment 2

Yes, that's certainly a concern. I've honestly no idea what I'll do yet: I may well make something, decide it's rubbish and then make something else (and then rinse and repeat!)

I like the idea of the Moravian thing suggested by BucksDad, but it would need scaling down quite considerably to be easy enough to lift on my own and get into the car without taking too much of the available space. I can also see the benefit of something I can sit on (to add rigidity) as long as the ergonomics end up okay (which I doubt they will!). One thing that could work in my favour is the toolchest being the top workbench surface for most things: that'll move the height of the "bench" up by the height of the toolchest, which will probably help my back a bit.

All needs a lot more thought...

Andyp":2o2os1v5 said:
Wooden is going to be heavy isn't it? I would have thought keeping the weight down would be an important consideration.

That is definitely a consideration, but I don't know how important. I'll be moving it around by car mostly, so as long as I can easily lift the constituent parts and put it together quickly, it should be okay I think. I don't mind the idea that I'll have multiple trips back and forth to load the car up.

Woodster":2o2os1v5 said:
For transportation I’ve always rather liked this idea.

2-D97-A662-F0-AD-41-EA-A0-B9-C4-D768069-A8-A.jpg

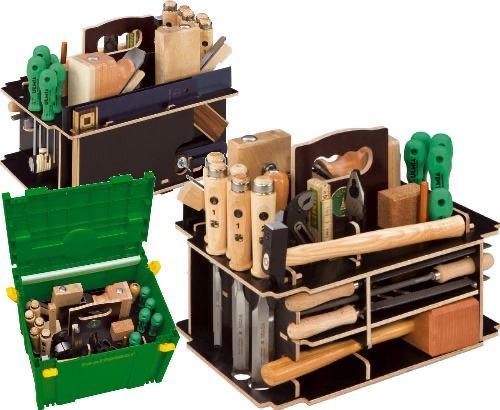
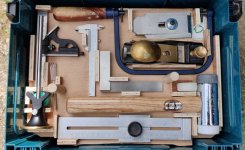
That actually looks relatively similar to (but more polished than) what I've used for this trip. I wanted something I could knock together very quickly and settled on a three-level thing to go in a Makita tool box. You can see the layers spread out in this photo:

toolbox_layers.jpg

and a close-up of one layer:

toolbox_layer.jpg

As you can see, it's just made up of some plywood sheets with scraps of plywood nailed into place to keep things from moving around. There are some lengths of dowel screwed to each piece to separate he layers and to act as handles to lift the layers out of the Makita box (the one shown in the close-up above is the top layer, so they're just acting as handles, hence only needing two). For transit I oiled all the metal bits and chucked lots of silica gel packets in for good measure.

The marking gauge you can see on the left of that picture is quite a handy one for travel: it has a flat brass face and two rollers, so you can use it against a flat edge or a curved surface and it has replaceable heads: a couple of normal wheel things and a cross-drilled thing that'll accept either a pin or a pencil. It seemed a good choice for travel as it can act as either a wheel marking gauge or a pin marking gauge (I can't imagine me cutting many mortices while on holiday!)

Woodster":2o2os1v5 said:
Or you could go more rustic? :lol:

5-B0105-A9-C21-A-4642-BEFD-F3-D78-EC70-E7-B.jpg

That's rather lovely (and way more artistic than I'm capable of), but it wouldn't help much with my desire to have a combined toolchest and work surface. I'd love to be able to make something akin to that though!
 
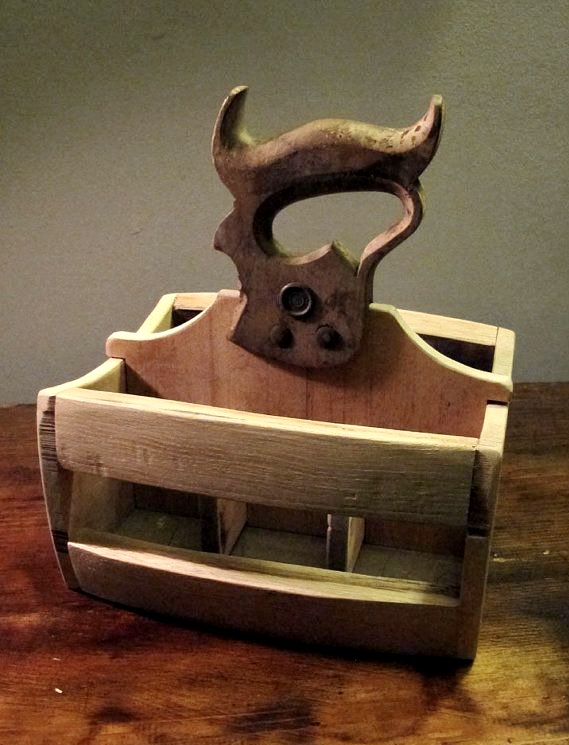
This popped up on Pinterest - I’m sure I’ve got an old saw somewhere … :lol:

Some folks come up with some clever ideas. ;)

408-D61-A3-A08-A-48-F8-B4-BE-2-F68-B7-C9-EEB6.jpg
 
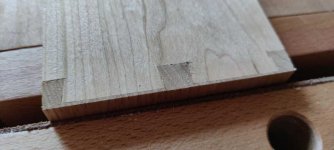
Another practice today (I made the tails a bit long for the pin board really, but it worked okay anyway, surprisingly):

as_cut.jpg

... and with an attempt to hide the gap:

bodged.jpg

In many ways, these seem easier than standard dovetails. They're a bit more tedious as you can't saw out the waste in the pin board, but that means there's no accurate sawing required. Only having one joint face visible also hides all manner of sins!

I'm still slightly daunted by the idea of cutting 16 of these joints (plus 16 normal dovetails) reasonably accurately in order to make the drawers for my tool chest...
 
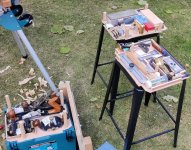
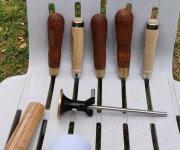
One of the fun things about trying to do woodwork away from my garage has been finding ways to repurpose stools, side tables and such-like as temporary tool holding places. One of the plastic outdoor chairs at the cottage has worked very well as a handy chisel rack:

chisel_rack.jpg

After a few goes moving stuff outside, chasing the shade around the garden and then moving stuff back in again, I decided to set up in the corner inside:

working_inside.jpg

Alas, it's time to head back to Blighty tomorrow, so I've had to pack everything away. I've only been woodworking very intermittently (between doing more conventional holiday stuff :lol: ), but I've really enjoyed having the stuff here so I could potter at it in odd bits of free time. It's convinced me that doing woodwork on holiday is viable and that it's worth making a better tool chest to make it easier.

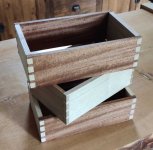
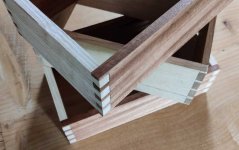
As the tool chest thing is going to involve a LOT of dovetailed corners (four for the bottom chest thing plus 20 through dovetails and 20 half-blind ones for the 10 drawers; I haven't even thought about the top part yet!), I thought I'd use my time in France to get lots of dovetail practice in, so I made this lot all at the same time (12 dovetailed corners in total):

three_boxes.jpg

The shadows on that top box look really weird (almost Escher-like!) in that photo... I promise I haven't broken any laws of physics while making the boxes :D

There are gaps here and there and there were definitely one or two things that didn't go quite to plan, but I'm really pleased overall and I've definitely learnt a few things along the way.

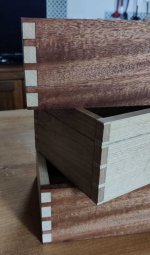
Close-up:

close_up.jpg

Top and bottom "boxes" are greenheart (probably) and ash (definitely); the middle one is cherry and sweet chestnut.

top_view.jpg

As you might be able to see in this view, they are just (unglued) frames at the moment. I haven't thought about bases or lids to make them into boxes or whatever (I just wanted to practise the dovetails); that'll have to be something I think about when I get home.
 
Lurker":2d9ewmq2 said:
They are excellent…….. what did your wife make?

She's always got lots of knitting and crochet projects on the go, but I must confess: I slightly lose track of what's what :oops:
 
Those look really good 8-)


Cabinetman":2qlyp2e7 said:
Just shows, it’s true what practice makes!

Fully agree on that one, don't think I will be publishing my very easy straight forward box joints :oops:
 
Cabinetman":1dncorxl said:
Just shows, it’s true what practice makes! Suggest you look back at your first attempt and see how far you’ve come.

Thanks Ian, although some of the credit has to go to the 3D printed saw jigs! They make it a heck of a lot easier.

One thing that made a big difference was clamping (with some little spring clamps) a thick-ish steel rule to the tail board (flush with the bottom of the tails) when offering it up to mark the pins. The rule provides a solid edge to push up to the pin board so it's not necessary to faff around trying to align the two boards (looking for light through the fibres or whatever). I'd always found this step a bit hit and miss, but with the ruler clamped to the tail board, it was quick and every joint seems to have been spot on.
 
I've been very quiet regarding this project for quite a long time, but believe it or not, I haven't given up on it. I've just been pondering the design quite a bit and still haven't quite reached any conclusions. Of course, I also wanted to give AndyT a run for his money in the "slowest project ever" competition :D

Anyway, after dillying and dallying and never quite concluding how best to do things, I decided yesterday to just get started and figure things out as I go. Off the racks came the bits of sweet chestnut I'd bought from Wentwood last year and I decided to cut them up a bit and see what happens. I had a few pieces, each a bit under 3 m long and about 200 mm wide. They weren't especially straight and each had a substantial bow across the width. Rather than trying to flatten the pieces out, I figured it would be best to cut them up lengthways into three pieces, each of which would be somewhere near flat and in some cases the outer two pieces would be close to quarter sawn, which might be beneficial I guess.

I started by cutting all the pieces in half to make them a bit more manageable (at the very least, they'd fit on my bench that way!). That gave me a small pile of pieces between 1.3 and 1.5 m long.

Then I got my extra large (300 mm) ryoba (seen on the left of this image next to the "normal" size one) and started ripping the planks into pieces. After pondering on a few different ways of doing this, I settled on holding the wood vertically in the bench vice:
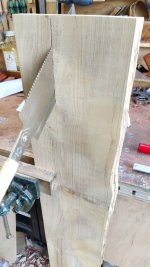
sawing_1_800.jpg

There was a bit of wobble in the board at the start of the cut, where it's about 500 mm above the bench, but once I was down to about 300 mm above the bench, the cut proceeded very quickly. If I had any sense, I probably would have put my portable workbench on the bench to lift the clamping point up a bit higher. Well, if I really had any sense, I would have used the bandsaw, but that's another story...

Working in the vice like that seemed to be a good choice as it kept my back in a comfortable position and after spending a few hours cutting yesterday I didn't have even the slightest twinge, which is a bit of a luxury for someone of my height (1.98 m / 6'6").

As I cut, I moved the pieces further up in the vice and very quickly ripped along the length. That big ryoba works really well for this sort of cut. In the past I'd mostly used it for resawing (which wasn't fun by any stretch of the imagination), but that's a job I'll definitely do in the bandsaw in future.

When the workpiece hit the ceiling, I could go no further in the vice, so for the first "batch" of boards that I cut, I clamped them to the bench and the vice (with the vice out a bit so the cut line was over the edge of the bench) and completed the cut like that (in some cases I also squatted on the floor so I could pull down rather than pull up to cut):
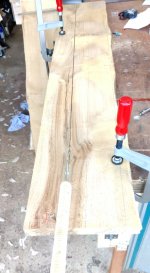
sawing_end_on_bench.jpg

That was less comfortable for my back, but it worked okay. For someone at my level of experience and skill (which is to say, not very much), it was really satisfying to get to the end of all of the 1.5ish metre cuts I did within a millimetre or two of the line.

After a couple of hours sawing away with the garage door wide open but without feeling the cold at all (unsurprisingly consider what I was doing), I ended up with a pile of planks that looked like this:
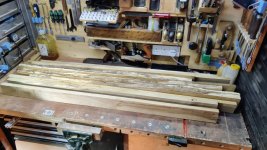
pile_yesterday.jpg

Some of them are straight but some (the ones from the middle of the planks) have a taper on them due to the shape of the source planks and the fact I wanted the edge pieces to be straight.

This morning I got on with remove the edges from the 5 planks that still had bark on. Again this proceeded fairly quickly and mostly in the same way:
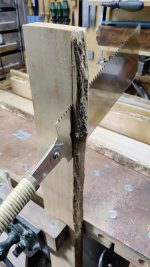
sawing_edge_1.jpg

The only difference with these ones was that I decided to saw the last bit underneath the bench so I could continue to look after my back and stand in a relatively straight manner:
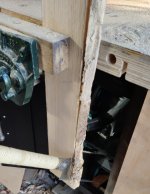
sawing_under_bench.jpg

The result: a pile of straight planks on the bench and a stack of slightly tapered ones leaning up against the portable workbench...
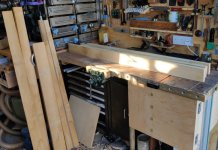
planks_1.jpg

... the next step is to decide what to do with this lot:
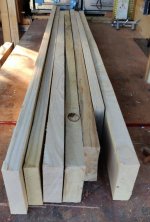
planks_2.jpg

They're a mixture of completely unplaned and planed on one side but bowed a bit since planing. None of them sit on the bench completely flat in any orientation.

One option now is to get them sitting somewhere near flat and then feed them through the thicknesser. That would be quick, easy and very much in keeping with my skill level, but would be noisy, dusty and unless I stop shy of the thickness I want, would waste a bit at each end of each plank as a result of the snipe.

Another option is to do everything by hand, in which case I'll probably cut them to length first (as I won't have to worry about snipe) so I've got easier bits to manage (and less to throw away if I completely c*ck up the hand planing!)

I think I'll probably start by doing one or two pieces by hand and then deciding what to do for the rest based on how it goes. Some of the pieces are a lot thicker (30 mm vs about 23 mm), so they may go through the thicknesser to get rid of the bulk, even if I do the last bit by hand to be sure of no snipe.

Do I get any awards for the most boring collection of photos in any single forum post?
 
Not boring at all - this is real life woodworking, in a limited space, exploring different possibilities and extending your skills.

That's far better than some carefully staged video demonstration designed for clicks, not to help other woodworkers.

That big Ryoba looks a very practical option, with the great benefit of knowing that it's properly sharp when you get it. And presumably not outrageously expensive?

As for your pace of work, I don't see anything wrong there! ;)
 
AndyT":1r56xccc said:
Not boring at all - this is real life woodworking, in a limited space, exploring different possibilities and extending your skills.

That's far better than some carefully staged video demonstration designed for clicks, not to help other woodworkers.

Thanks Andy. Comments like that definitely help with the motivation!

AndyT":1r56xccc said:
That big Ryoba looks a very practical option, with the great benefit of knowing that it's properly sharp when you get it. And presumably not outrageously expensive?

It was £49 (vs £37 for its little brother). I've no idea how long it'll last before it needs a new blade (I don't think Japanese saws are realistically sharpenable), but I imagine it'll be much longer than the little one, which I use much more. It looks like a new blade for the little one is £22.50 (vs a new blade for the small one at £19).

AndyT":1r56xccc said:
As for your pace of work, I don't see anything wrong there! ;)

:D :D :D
 
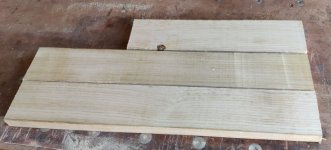
Sticking with the theme of "sometimes you've just got to start and see what happens", I decided to take the thinnest bit of wood and chop it into three pieces:

thinnest_board_chopped.jpg

The two longer pieces are 560 mm; the shorter one is whatever was left; about 360 mm. The current plan for the chest is to make it 550 mm wide and 300 mm tall, so cutting the piece into those lengths should work quite well I think. It'll be 350ish mm deep, so each face will be made up of several pieces joined together.

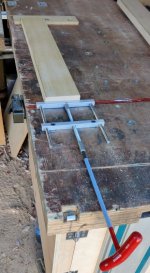
Next up was to clamp it with my dog hole tail vice and start cleaning up the first face:

tail_vice.jpg

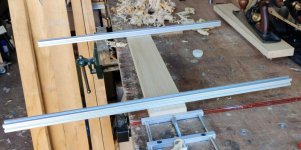
I used my simple winding sticks (just some lengths of 2020 extrusion I pulled out of a skip) to check for twist:

winding_sticks.jpg

and gradually worked at it until I was happy that it was flat and untwisted.

I'm aiming for about 20 mm thickness and after checking this first piece (remember that I picked the thinnest board for my first attempt), it was tapered such that one end was only about 18 mm.

I think it was partly that I'd looked (not very closely) at one end and seen some yellowy colour and thought I hadn't planed enough of the saw marks off. Looking at it more closely later, I realised that the yellowy colour was quite deep in the material and is presumably just a characteristic of the wood.

yellowing.jpg

Rather than carrying on with that one, I thought I'd put it aside for now (I can always use it elsewhere in the project) and get the second 560 mm board out.

That one came flat and untwisted a lot quicker and was thick enough that I thought I stood a chance of getting 20 mm after planing.

I got my pin marking gauge out and set it to 20 mm and then used it to mark all the way round all four sides.

marking_thickness.jpg

After that I got on with the bit I was most nervous about: planing it to thickness. I've tried this a few times in the past with mixed results (hence buying a thicknesser :) ). I'd like to get better at doing this by hand so I'll use this project as an opportunity to practise (although I'm not ruling out using the thicknesser rather than a scrub plane when there's a lot of stock to remove).

Anyway, after taking it steadily and checking the line very very regularly I got a thicknessed board:

thicknessed.jpg

Checking with some calipers, the thickness on the corners varied from 20.05 mm to 20.25 mm, which is good enough for me :D

The next job was to stick it in the vice and get the first edge square:

squaring_first_edge.jpg

I didn't want to move the setting of the pin marking gauge, so I thought this was a perfect opportunity to get out the panel gauge that I picked up late last year in a junk shop:

panel_gauge_marking.jpg

That gauge was just set to the thickness I thought I could get out of the board rather than a specific target number; I'll work out what thicknesses I want later. I could then work my way down to the line, trying to get it square and at the right thickness all at the same time, which I always find a bit of a challenge. Nevertheless, on this occasion at least, it worked and the board was amazingly about 0.1 mm difference in width across the 560 mm length 8-) - I'm sure that was as much luck as judgement!

Anyway, that's one piece done. There's one more to do out of that plank and another 9 planks; with 3 pieces per plank I've probably got 28 more attempts to get good (or consistently bad :D ) at this. At some point along the process I'll have to work out how many of these I actually need so I don't end up with a huge pile of perfectly squared pieces of completely the wrong length for their intended purpose :)

Anyway, here's a picture of the one board I've done along with all the tools I used:

one_board_done.jpg
 
Looking good, and I applaud you for having a panel gauge and finding an excuse to use it.

How are you liking the chestnut? I've only used it once, for a simple garden chair, but found it really pleasant to work. An excellent choice for your chest, I'd say.
 
AndyT":3q12ky1o said:
Looking good, and I applaud you for having a panel gauge and finding an excuse to use it.

It was bought on a bit of a whim because I'd never seen one in the flesh as it were (although I knew of their existence). I really like it, although I find the wedge a bit more fussy to set than the screw on my other gauges. When the width being marked is substantially larger than the size of the body of the standard marking gauge, I find the panel gauge much easier to track along the board.

AndyT":3q12ky1o said:
How are you liking the chestnut? I've only used it once, for a simple garden chair, but found it really pleasant to work.
It seems very nice to work with so far. I've used it to make a couple of boxes and it seemed nice from that limited try-out. I guess I'll get to know it a lot better over the course of this project.

It's got a lovely smell when it's being sawn. Much less obvious when planing though, although that might just have been my nose getting too cold to smell anything!

AndyT":3q12ky1o said:
An excellent choice for your chest, I'd say.

Well, it was your suggestion :lol:
 
AndyT":9j1hiial said:
I've only used it once, for a simple garden chair, but found it really pleasant to work.

What's it like for something like a garden chair? How does it stand up to weather? Did you treat it with anything and if so, how often does it need attention?

The reason I ask all those questions is that I want to have a go at making a garden table at some point to replace our glass topped one that's getting a bit shabby and also gets unpleasantly shiny in bright weather. I'd wondered about either making one out of sweet chestnut or trying to source some western red cedar, so I'd be very interested to hear how chestnut stands up to outdoor use.
 
It's lasting very well. The chair stays outside except for the winter time, when it comes indoors.

I could have left the wood unfinished, but I chose to varnish it. I used Le Tonkinois, which is excellent stuff. (It's used a lot on wooden boats, including Tally Ho.) It's a soft varnish which can stretch or shrink with the wood movement.

I've touched it up a bit this winter. There was a bit of deterioration on some horizontal surfaces and where the neighbours cats like to scratch, but on the whole the chair is keeping its nice light colour.
 
You’ve put a lot of hard work into those (and the wip thank you) I do feel you need a plan to work to though, it would be a shame after all that if you couldn’t do what you wanted. But coming on well!
 
I used to turn a lot of Chestnut at school back in the 60s. It always came up well.

Chestnut is also cleft for fencing, so it is intended to last outdoors untreated.
 
AndyT":2ufcvvyq said:
It's lasting very well. The chair stays outside except for the winter time, when it comes indoors.

I could have left the wood unfinished, but I chose to varnish it. I used Le Tonkinois, which is excellent stuff. (It's used a lot on wooden boats, including Tally Ho.) It's a soft varnish which can stretch or shrink with the wood movement.

I've touched it up a bit this winter. There was a bit of deterioration on some horizontal surfaces and where the neighbours cats like to scratch, but on the whole the chair is keeping its nice light colour.

Thanks, that's really useful. On that basis, I'm definitely tempted to use sweet chestnut for the table. It'll only be a small and fairly simple thing (given space constraints both in the workshop and in the garden), but that's good as it might be within my capabilities!

Cabinetman":2ufcvvyq said:
You’ve put a lot of hard work into those (and the wip thank you) I do feel you need a plan to work to though, it would be a shame after all that if you couldn’t do what you wanted. But coming on well!

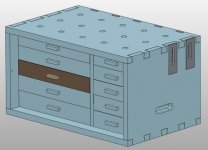
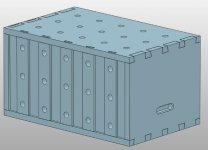
Thanks. I do have a vague plan (hence the rough dimensions I've mentioned. It's going to be a drawer unit with some means of clamping stuff on the top or on the back. It's never going to be as stiff as a proper workbench, but hopefully it'll be okay. There are lots of details still to flesh out, but all being well it'll probably end up looking a bit like this:

model_front_2023-01-21.jpg

model_rear_2023-01-21.jpg

The main change from that model is that I'm going to change the right-hand set of drawers so that there's a deep one at the bottom. It occurred to me that if I don't take the #5 or LA jack plane with me and make sure the biggest plane is a #4 (which should be fine for the sort of stuff I'm likely to get up to on holiday), then it an go in the base unit rather than needing to be in a separate top box. I'm not completely convinced I'll get everything else in that base section, but it's certainly worth a try.
 
Malc2098":2te2o3ly said:
I used to turn a lot of Chestnut at school back in the 60s. It always came up well.

Chestnut is also cleft for fencing, so it is intended to last outdoors untreated.

Good to know, thanks.
 
AndyT":1owleh4r said:
.....How are you liking the chestnut? I've only used it once, for a simple garden chair, but found it really pleasant to work.......

I love it. It's a great wood, and much under-used. It planes and saws absolutely beautifully, and it is really pretty stable. The only slight negative is that chiseling in mortices and dovetails can be a little bit crumbly now and then. On the whole, for an outdoor project it would be one of my top choices (and it's great indoors, being very hard to tell from oak).
 
I didn't make it out to the garage during the week, so I've still got lots of bits to plane; I'm gradually working through them though and I'm getting quicker and more accurate as I go so that's quite nice. It's amazingly satisfying when planing the second face of a piece of wood to see the gauge lines appear all the way round the perimeter of the face during a single pass with the plane :)

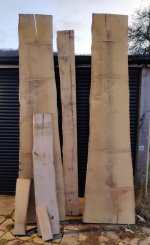
Yesterday I had a trip out to Wentwood and came back with some more sweet chestnut; this lot should keep me going for a while and will hopefully mean I've got enough for the tool chest and also the garden table when I've figured out what that's going to look like.

more_sweet_chestnut.jpg

Garage for scale :D

The big pieces (which seem to be cut across the centre of the tree so have something close to quarter sawn grain on either side) are 3 metres long and about 550 mm wide in the middle. The narrower long one is 50 mm thick and also pretty close to quarter sawn - I thought that might be good for the legs of the garden table. All the bits apart from that one are about 30-35 mm thick.

I had some help loading the longer pieces onto the roof:

helping_hand.jpg

Hopefully I won't need to get into any of my drawers (in either this unit or the one under the milling machine) any time in the near future :lol:

blocking_drawers.jpg

While I was planing the pieces I'd previously cut, I also got the saw out on the two little offcut pieces from Wentwood. This one will be long enough to make part of the sides of the tool chest:

sawing_offcut.jpg

This one (which I couldn't clamp in the vice as the big planks under the bench got in the way!) will be long enough to make part of the top surface:

sawing_offcut_2.jpg

After sawing those two up, it was back to planing. I'm going to have to sweep the floor pretty soon I think :eusa-dance:

need_to_sweep_up.jpg
 
Wow!
Shifting those around a few times will give you a good workout to get you warmed up for a planing session :lol:
 
I bought similar quantities of chestnut a few years back to bake a gate and an garden "picnic" table. Lovely stuff to work with.
 
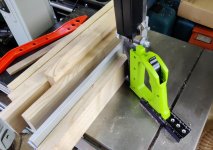
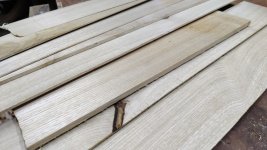
Quite a few of the boards I had to plane were closer to 30 mm than 20 mm, so rather than planing all that thickness off, I just fed them through the bandsaw (after planing both sides flat so that the offcut would have one planed face, just because it seemed like a good idea):

bandsawing.jpg

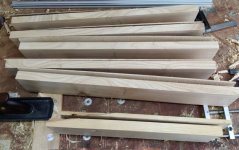
That resulted in this pile to deal with.

split_boards.jpg

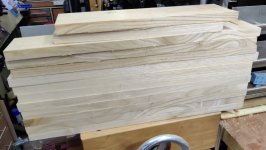
They were quite quick to plane as I only had a millimetre or two to shift and the bandsaw had cut parallel with the face side so I didn't have to spend much effort in making sure the second face was even and not twisted. With all those dealt with, I could pile them on top of the ones that hadn't been near the bandsaw to see how things were going:

planed_boards.jpg

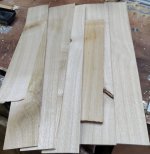
I've also got this pile of offcuts that I'll find something or other to do with in due course. They vary in thickness from about 8 mm (just one) to several that are about 3–4 mm thick and one from a piece that probably didn't need bandsawing really given how thin the offcut was:

bandsawn_offcuts_1.jpg

bandsawn_offcuts_2.jpg

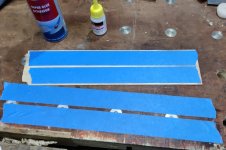
Just for fun, I thought I'd take the thinnest piece and have a go at hand planing it smooth. I stuck some masking tape on the smooth side and also on the bench and then used superglue to hold it down:

tape_on_thin_piece.jpg

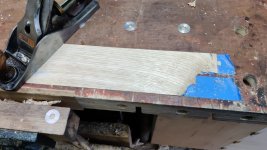
I then attacked it (in a gentle manner) with a finely set #4 until the saw marks were gone:

planed_thin_piece.jpg

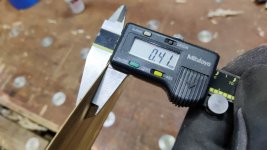
The result:

thickness.jpg

I then cut it up with a knife and oiled it with MMM, just because, well, why not?

oiled.jpg

To be honest, I think it's far too thin to be of any use (as a bookmark). I made some bookmarks out of thin wood a year or two ago. They were made using my thicknesser (taped down to a sled in the same manner as above), which took them down to 0.8 mm. They seem sufficiently robust, but 0.4 mm seems way too flimsy so I'm sure they'll break. It's nice to know it's possible though.
 
Back
Top