• Hi all and welcome to TheWoodHaven2 brought into the 21st Century, kicking and screaming! We all have Alasdair to thank for the vast bulk of the heavy lifting to get us here, no more so than me because he's taken away a huge burden of responsibility from my shoulders and brought us to this new shiny home, with all your previous content (hopefully) still intact! Please peruse and feed back. There is still plenty to do, like changing the colour scheme, adding the banner graphic, tweaking the odd setting here and there so I have added a new thread in the 'Technical Issues, Bugs and Feature Requests' forum for you to add any issues you find, any missing settings or just anything you'd like to see added/removed from the feature set that Xenforo offers. We will get to everything over the coming weeks so please be patient, but add anything at all to the thread I mention above and we promise to get to them over the next few days/weeks/months. In the meantime, please enjoy!

Oak dining table build (complete, and inside)

My old moisture meter came with printed tables for making allowances relative to temperature and timber species:
That's the kind of chart I was referring to, only I'd omitted to mention (because I'd forgotten) some of the factors such as temperature. One of my moisture meters had a similar chart, but I've lost it, and that's probably because the moisture meter it came with broke and I binned it, most likely with the chart.

I'm still curous about this stuff of Mike's testing out at 5% MC. As one of the tables in your chart suggests that anything below about 7% MC is best suited for high heat/excessively dry environments. I'm curious because it just seems so unusual to be supplied with wood destined for most interior applications to be as dry as that. Slainte.
 
I worked on a big joinery project years ago, to save money, client went to France and picked up sawn Oak straight from the mill, bought it back to the UK and made a simple kiln, and basically cooked it all, terible stuff to work with, very brittle, hard as nails and prone to fracturing.

cooked Oak.jpg
 
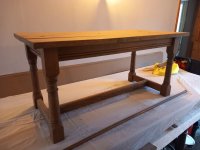
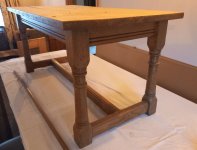
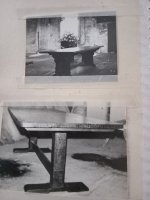
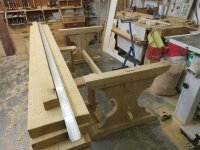
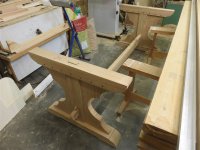
Retrieved, along with the dust!, my scaled down version of our Multiyork table, I made this in the early ninties:

Oak table 1.jpgOak table 2.jpg

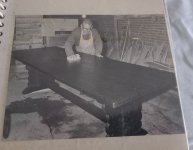
At the time I was being mentored by a dear old furniture maker, with a plan to carry on his work and my own, but he suddenly and sadly passed away, and the family decided to close his shop, I have an old photo album of his work, and somewhere, his price lists and drawings:

Mentor.jpgMentor 1.jpg
 
That is a very intersesting article, Richard, thank you.
So am I right in thinking that the MC measurement is how much water the sample holds as a percentage of the dry wood itself, rather than as a percentage of the sample tested? If so then I've misunderstood MC all these years.
Every day is a school day, eh?
S
 
... am I right in thinking that the MC measurement is how much water the sample holds as a percentage of the dry wood itself, rather than as a percentage of the sample tested? If so then I've misunderstood MC all these years.
Yes, the weight of the oven dry wood is the base line against which the moisture content is calculated. It's calculating wood MC on the 'dry basis' aka db. What I find rather incongruous is the the biofuel sector uses the wet weight of the wood as the base line known as the 'wet basis' or wb. I hope the description I provided of my confused student at the end of the link I gave earlier explained it sufficiently for you.

The wet basis (wb) always results in calculating a lower MC than working on the dry basis (db). Government legislation, specifically for England, not the rest of the UK, says that the logs supplied in small quantities such as those Ready to Burn bags found at garages and the like must be at or below 20%MC wb. 20%MC wb basis is the same as 25%MC on the dry basis, so if you're a woodworker, and a log buyer and burner, perhaps what you buy is not as dry as you expect.

There's a lot more to the fairly recent government regulations relating to the biofuel sector than the little snapshot I've provided here. The most recent print run of Cut & Dried discusses it in some detail. Discussion of this topic wasn't included in the first and second print run of the book. Slainte.
 
That is a very intersesting article, Richard, thank you.
So am I right in thinking that the MC measurement is how much water the sample holds as a percentage of the dry wood itself, rather than as a percentage of the sample tested? If so then I've misunderstood MC all these years.
Every day is a school day, eh?
S
Me too. I assumed (clearly wrongly) that a published moisture content is an absolute measure, whereas it appears to be a relative measurement.

Oddly enough we buy split oak (and sometimes apple) for the log burner, and the young man who sells it always says it's been seasoned for a year. We buy a year ahead so it gets seasoned for another year in the south facing log store beneath a pitched roof (so sunny and dry). We do have a log probe meter but I doubt it is even slightly accurate as it can only measure the surface 1mm or so.
 
I didn't mean to cause so much disruption to Mike's table build thread, so this really should be be my last input in this thread so that I don't become a complete pest. But, if you really want to find out more about the the biofuel sector go to the following links ... and that's just to begin with, ha, ha. Slainte.

Ready to Burn- HETAS
GOV.UK. Selling Wood for domestic use in England
Totally daft regulatory regime, widely ignored as ludicrous paperwork that just adds cost and disrupts supply. A lot of wood is sold by tree fellers and, frankly, travellers. Half the price of the registered places. Delivered, and in some cases stacked. Oddly enough this country has been burning wood for centuries and it does not need regulating except in inner cities.
 
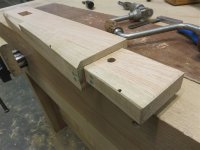
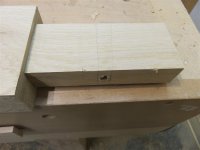
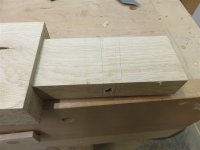
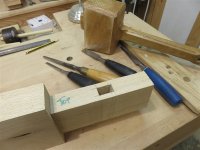
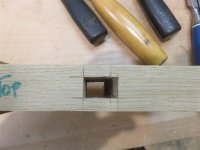
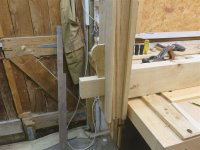
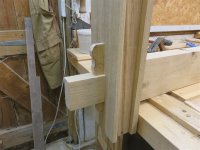
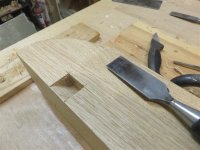
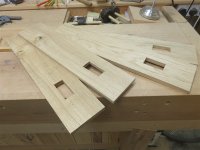
I told you that the central post was going to be totally encapsulated. Well, here are the covering pieces. Firstly, rough cut to length, with a small mortice:
IMG_8622.jpg

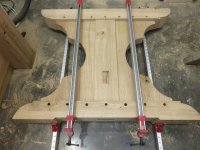
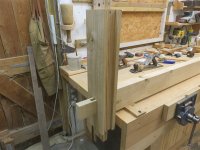
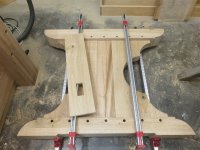
You might notice that they are of varying thickness. Well, that's because I was re-sawing a non-thicknessed board, with the intention of thicknessing everything afterwards. However, I reaslised that this was unnecessary. I squished up the pedestal with some clamps to simulate the finished article pulled together with draw-bored pegs:
IMG_8625.jpg

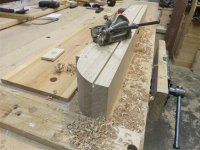
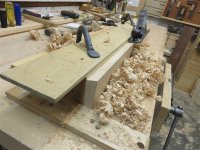
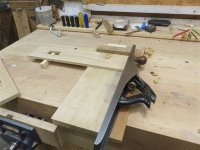
Then put the roughly cut piece on the shooting board and snuck up on a tight fit bit by bit. Turns out my new no.7 is excellent on the shooting board:
IMG_8623.jpg

It soon fitted perfectly:

IMG_8624.jpg

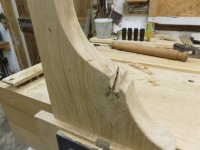
This enabled me to transfer the marks for the mortice to the post behind. Whilst everything was carefully in its final position, I took the opportunity to mark the centre of the peg holes by tapping in a pointed bit:
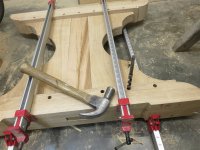
IMG_8626.jpg

Annoyingly, I had tapped too hard, leaving an awkwardly deep mark, as we'll see in a second. Firstly, there was a mortice to chop out:
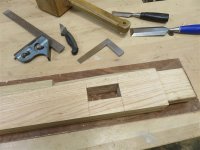
IMG_8628.jpg

IMG_8629.jpg

Those who have seen draw-bore pegging before, feel free to skip ahead a paragraph or two. I marked up for drilling holes 1-1/2 to 2mm closer to the shoulder than indicated by the mark I had made:
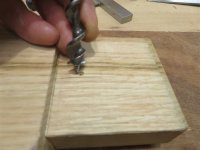
IMG_8630.jpg

Because thse holes need to be absolutely spot on, and because of the over-deep marking-out hole ready to drag the point off location (into line with the outer peg holes), I decided to do the drilling manually, with a brace, for extra control. Note the washer to assist in keeping the hole level:
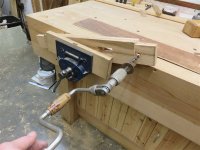
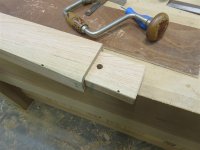
IMG_8631.jpg

IMG_8632.jpg

This is always a difficult photo to take, and to understand. I reassembled the pedestal when all the holes were drilled, and tried to show through an outer hole how the inner hole doesn't quite line up:
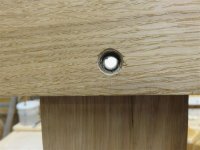
IMG_8634.jpg

When the pointed peg goes through that hole it will pull the tenon upward, tightening up the shoulder joint. Unfortunately, that's not the end of peg holes.........

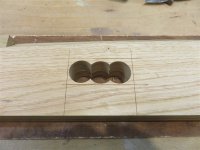
The bracket is nearly a foot wide, and meets the head and foot with grain at right angles. Therefore, we've got to allow for movement. Who knows where this table will end up, but my daughters live in Spain and Sweden, and so there's a chance it will go to either in due course. That's very different environments for it, and thus I've got to make big allowances for movement. Elongated holes, done with a chisels and gouge, are the answer:
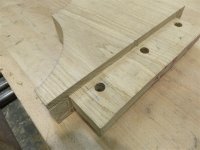
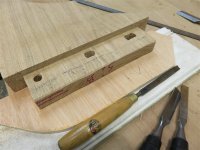
IMG_8635.jpg

IMG_8636.jpg

The following photo shows my strategy for movement. The edges of the brackets/ wings will be glued to the central post, and thus the inner edge will be fixed. It's the outer edge which will be allowed to wander in and out as necessary:
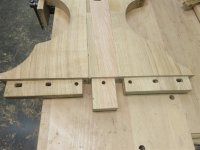
IMG_8637.jpg

For the avoidance of audience boredom, I have omitted almost all of the next phase, which was simply to build the other pedestal. If you wan't to, you could always go back to page 1, as I did everything the same........

Here's a little trick which I didn't show previously. When planing these big tenons flat (acrtoss the grain) it's quite difficult to keep an eye on flatness in the along-the-grain direction, particularly as I don't have a reference face to work from (remember these boards aren't thicknessed, and have been just hand-flattened). So, to keep the tenons parallel to the bench-top, I just used back-to-back squares:
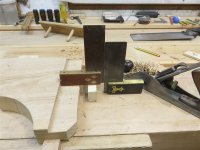
IMG_8638.jpg

Sooner or later, I finished the second pedestal. Guess what.......it looks identical to the first:
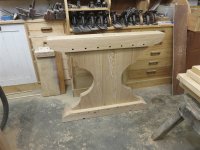
IMG_8639.jpg

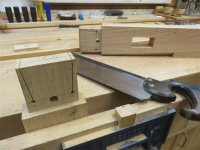
At this point I cut and drilled the post tenons for their wedges. I've always been a little worried about how weak a parallel cut and a hole leaves the edge of the tenon, so I thought I might try angling the cut somewhat:
IMG_8640.jpg

I told you previously that I generally leave a straight bit at the beginning of a mortice in a wedged through-mortice situation. I just feel this means you can make things a little snugger, but it also means you can lift the hole and the end of the cut for the wedge away from the shoulder, reducing the chance of showing an unplanned split caused by the wedge.

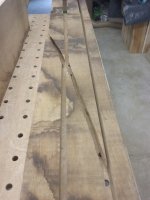
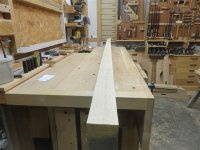
So, that's the legs made. They need to be joined by something. The stretcher is ex 130 x 55, but as you can see, the stock was far from straight:
IMG_8641.jpg

That was going to mean lots of planing!

Back in a bit.....
 

Attachments

  • IMG_8633.jpg
    IMG_8633.jpg
    139.3 KB · Views: 1
Last edited:
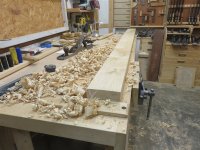
Passing a bent piece of wood through a thicknesser leaves you with a thinner bent piece of wood. It's esential to get a flat reference face first. So, I planed.......

IMG_8643.jpg

Lot's of checking with winding sticks and a long straight edge, and lots of planing. Then thicknesser, plane, thicknesser, plane.......and eventually I had a four-square planed bit of stock, ready for some joinery. Actually, it's the joinery that made it important to be straight and square , because I need shoulders reliably parallel to each other, and square.

Can your ply bench hook do this?:

IMG_8644.jpg

As I was cutting the shoulders with a tenon saw, I was running through in my mind all the ways to cut the cheeks of a large tenon. I couldn't come up with anything risk-free and sensible other than the bandsaw. I rigged up a prop:

IMG_8645.jpg

Next, I fiddled about with the wedge shape a bit. Firstly, in the mortice (this is a tusk tenon):

IMG_8646.jpg

Changed my mind:

IMG_8647.jpg

Small deep mortices are difficult. I'm quite proud of the two I did here:

IMG_8648.jpg

IMG_8649.jpg

Note the dotted pencil line, which is the approx location of the face against which the wedge will back. Having the mortice for the wedge sit a little behind the line of the leg/ post means that if the latter shrinks, the wedge still works. I have a friend whose elm pedestal dining table has wedged tusk tenons where the back of the wedge is a couple of mm clear of the pedestal, and thus doing nothing at all. The table wobbles all over the place. Note also the massive shoulders, particularly top and bottom. This stretcher is doing a lot of work in resisting end-to-end wobble, and it's the shoulders which do all that work.

The next job was to clean up the bandsawed faces, and make the tenon fit the mortices (plural):

IMG_8650.jpg

IMG_8651.jpg

I mocked up a wedge:

IMG_8652.jpg

Waaaay too big!!

IMG_8653.jpg

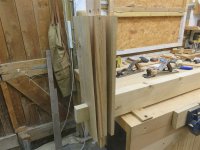
That's a better size. It'll clean up into something presentable. I made a couple of them and decided to assemble the entire sub-assembly. I'm a bit tight for space with that big pile of wood occupying the middle of the room:

IMG_8654.jpg

IMG_8655.jpg

When I swapped to a proper wedge in the second photo, the whole structure became absolutely rigid. That's 17 pieces of wood, no glue, and utterly zero movement at all. That's not the end of my strategy for keeping this table rigid, though.

I popped the top bearer off, and ploughed a groove about 27mm from the top edge:

IMG_8656.jpg

That is such a lovely little plough plane! So simple.

After clamping on a guide board, I then used my coach-builder's rebate plane to form a dovetail shape:

IMG_8657.jpg

......before chopping out some little pockets on the opposite side. To find the purpose of both of these details, you'll have to wait a while:

IMG_8659.jpg
 
Last edited:
Mike, is the cladding on the central part of each "leg" (leg feels inadequate!) just aesthetic to give the look of a thicker central post? I know it covers up some minor sapwood, but presumably you'd have included it anyway?
 
Mike, is the cladding on the central part of each "leg" (leg feels inadequate!) just aesthetic to give the look of a thicker central post? I know it covers up some minor sapwood, but presumably you'd have included it anyway?
Yes, it's just for looks. There are a number of ways I could have done it, and maybe one or two of them would have been a better idea (such as just having a thicker post). However, when I looked through the stock I had this seemed like the easiest approach. I was always going to show a thicker central post of some description because I'm not keen on a big flat expanse of wood, and because I really wanted a wedged through tenon holding the whole thing together. In my mind it's the strongest of all 90 degree joints.
 
......before chopping out some little pockets on the opposite side. To find the purpose of both of these details, you'll have to wait a while:

View attachment 37267
About 3.00 last night I woke up and realised I'd put this in the wrong place.

The cock up will be invisible, and luckily that's the only one I'd chopped out, so no great harm done.
 
About 3.00 last night I woke up and realised I'd put this in the wrong place.

The cock up will be invisible, and luckily that's the only one I'd chopped out, so no great harm done.
I reckon you intentionally made a mistake to keep up the pretence that you're human.
 
If only I could get my chisels that sharp..
I'd just done a major once-in-a-year-or-two re-grind and restablishing of the correct hone angle. It was as sharp as sharp can be. Luckily, it landed on the floor on the end of its handle and gently subsided into a thick pile of shavings, so no harm done.
 
Last edited:
I've just come in from the workshop where I was cleaning up the pieces of the pedestal for final assembly and gluing.

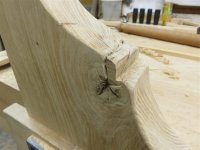
This knot broke apart in the process:

IMG_8696.jpg

Now, I'm trying to get this table to look as old and hand-made as possible without faking scars and damage, so I'm tempted to just smooth over the rough edges, and leave it at that. Or, should I glue the broken piece back into place?

IMG_8697.jpg

Whaddyareckon?
 
If it was wood turning I'd sort it with thin CA and very fine coffee grounds.

Need to seal adjacent wood surface (temporarily depending on final finish?) to prevent CA staining.
 
I would glue it back in but not try to hide the repair. You want it to look old. Old stuff is always damaged. And this is natural damage. The old craftsmen would have glued it back with hide glue.
 
Smooth it.

Pete
Smooth it as is, without gluing the piece back in? That's my instinct. My wife will be back later, and we'll see what my instincts look like then........
 
Last edited:
Apart from your good self, how many of the future users of the table will ever lie underneath it with a torch?

Just pretend it happened after it was finished and in use for a few months.
 
Apart from your good self, how many of the future users of the table will ever lie underneath it with a torch?

You won't need to to see this. It's deliberately in the most prominent position, on view as you walk into the room. This wood is plainer, cleaner, than I'd like, so knots have been given prominent positions whenever possible.
 
Smooth it as is, without gluing the piece back in? That's my instinct. My wife will be back later, and we'll see what my insitncts looks like then........
Yep, throw the chunk away give it some sanding to look like wear.
Thats what would have happened.

Pete
 
I'd glue it back in, and fill the cracks with dark coloured resin. That could possibly prevent any sort of dirt etc getting into the cracks.
 
Back
Top