• Hi all and welcome to TheWoodHaven2 brought into the 21st Century, kicking and screaming! We all have Alasdair to thank for the vast bulk of the heavy lifting to get us here, no more so than me because he's taken away a huge burden of responsibility from my shoulders and brought us to this new shiny home, with all your previous content (hopefully) still intact! Please peruse and feed back. There is still plenty to do, like changing the colour scheme, adding the banner graphic, tweaking the odd setting here and there so I have added a new thread in the 'Technical Issues, Bugs and Feature Requests' forum for you to add any issues you find, any missing settings or just anything you'd like to see added/removed from the feature set that Xenforo offers. We will get to everything over the coming weeks so please be patient, but add anything at all to the thread I mention above and we promise to get to them over the next few days/weeks/months. In the meantime, please enjoy!

Post a photo of the last thing you made...

Mike G":3vfkv4mm said:
Doug":3vfkv4mm said:
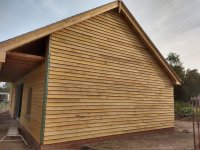
This might appeal to the fans of English green oak, I’ve been asked to clad a new workshop in 180mm high feather edge green oak boarding, at the moment all that needed doing was part of a gable & the out standing bit of wall from the main part of the workshop so the roofer & lead workers can get the rooves finished.

Should be back in a couple of weeks but this was yesterday’s progress.

View attachment 3

Doug, be really careful will this. Be sure to warn your client to expect massive movement, and to have to replace the odd board. There is an oak supplier near here called Whippletree, or something like that, and one of their buildings was clad with green oak boards. When it started drying some of the boards started to curl, and they were powerful enough to rip nails out of the timber frame. They even won an arm wrestle against screws. Some of the boards curled so much they were standing out at 90 degrees to the wall when I visited, and would have had to be replaced.

The chap knows all about green oak Mike, he has supplied everything even down to the rather fancy A4 stainless steel ring shank nails, this work is to match the green oak cladding on his house all I’m supplying is the labour.

The back of the workshop catches a lot of the afternoon sun this was clad over a week ago & whilst it’s already shrunk to use his words it’s behaving nicely especially considering the rather hot sunny weather we’re having.
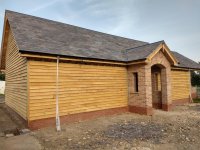
90FA266E-FFE3-461A-A949-F50CF7D28F40.jpeg

He really does like the traditional style from the reclaimed slate tiles to the lead cover mop sticks which form the ridges.

I’m just back from doing the last main part of the cladding on the gable end this is where I got to on Tuesday
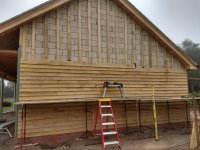
366B16EA-FAF4-402D-85DD-361CBD31D652.jpeg

& this was end of play yesterday

1FD7A6E1-5A8E-4D3C-9BB8-2F1A6ABABA77.jpeg

I can’t get back for a few weeks now as I’ve made a start today on a shed that’s gonna take a couple of weeks, plus I’ve some small jobs to take care of.
 
Cabinetman":2yfjntfj said:
Very nice Doug, if you’re on your own that’s a lot of up and downing!

Thankfully I've a mate giving me a hand, he's on the chop saw whilst I'm nailing, all the boards are drilled before being nailed by hand so it's very time consuming.
 
Doug":fm4yx0f5 said:
Thankfully I've a mate giving me a hand

There was me thinking you were all on your lonesome.

I've been looking out for nearly a year for someone "useful" who could help me, since my work mate passed on, think I'll give up.
 
HOJ":3pxr54k0 said:
Doug":3pxr54k0 said:
Thankfully I've a mate giving me a hand

There was me thinking you were all on your lonesome.

I've been looking out for nearly a year for someone "useful" who could help me, since my work mate passed on, think I'll give up.

No, don’t give up, in a former life I employed a lot of retired people who had run their own businesses who were extremely glad of the odd days work and their attitude and keen-ness to work was wonderful, they did it for a lot of reasons but mainly to get out of the house and feel valued I think.
It used to be a case of putting an ad in the paper, probably have to rethink that bit lol.
Edit, you could put a wanted ad on here maybe?
Ian
 
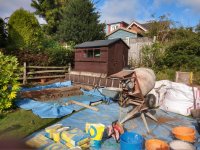
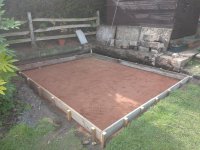
Made a start on a garden shed last Thursday, this shed is at the top of quite a steep garden photo 2 gives you some idea of the incline with how high the shed is in the garden behind.

Barrowing 2 tons of ballast up to the proposed site & starting digging out took all Thursday, I have to admit the heat slowed me down quite a bit but by Friday the digging out was completed & the shuttering was finished

186BFF73-C2AF-49DE-A5BF-8340306BD37C.jpeg

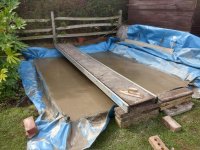
So today it was concreting, my good lady wife is a dab hand with a shovel so was drafted in to help with mixing

A5076695-CB17-4442-A5A7-6AF659122DE2.jpeg

& by 11 o’clock I gave it it’s first once over with the trowel

49A8E7E1-1A16-49C2-95B3-50C97CFB1245.jpeg

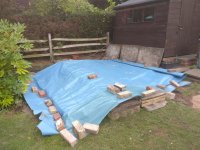
Luckily buy 4 o’clock with heavy spots of rain falling I was able to cover it all up for the night

2F50A4DA-B03D-4DA9-BCA4-8CCBD70594E5.jpeg

Tomorrow looks like being a complete wash out but hopefully Wednesday will see some brick laying & Thursday some woodworking.
 
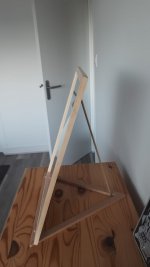
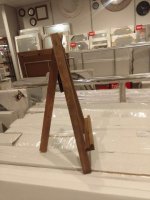
Taking loose inspiration from Phil’s very fine picture frame stand I knocked this up for my daughter who is not allowed to make holes in the wall of her rented flat.

IMG-20230911-WA0000.jpeg

IMG-20230911-WA0001.jpeg

Simple beech triangle with walnut splines, on the edge this time. Couple of beech dowels and a longer dowel to support the frame which just rests inside the triangle’s apex and the shop bought picture frame’s hook. Not sure we have the angle quite right, easy to cut a longer dowel if needed. Finished in less than a week, a record for me.
 
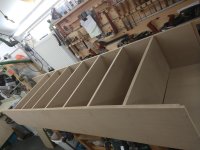
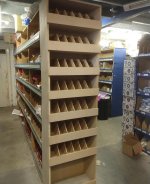
Dreadful weather today meant a workshop day, the sides & back of this unit had been CNC’d out last week so it was mainly just assembly today with trimming up the smaller components.
This was initial assembly with the shelves glued & screwed to the side rebates & a test fit of the back, all 18mm MDF

CAD7C683-5F04-42E3-A56F-26BC4FEB911D.jpeg

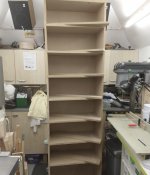
Getting the unit upright was no mean feat but it made fitting the fronts easier

50EC5514-E2DF-46EB-A691-10E122ABCDE9.jpeg

Once the pigeon hole pieces had been cut & fitted it was off to the plumbers merchants to fix it to the end of of the existing racking

BDA729BE-9435-492D-9953-13A779F3A368.jpeg

Hopefully tomorrow will see a return to better weather & a few days without rain so I can carry on with the shed.
 
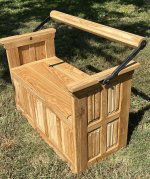
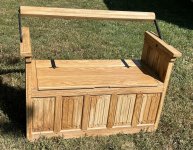
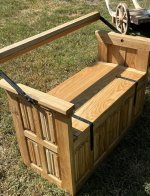
I just got this done on Sunday for my girlfriend Lisa, and now it's on it's way to Massachusetts as a wedding present for her eldest daughter.

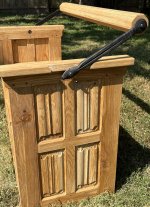
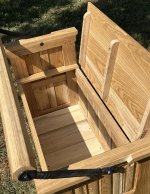
It's a settle with a crossbar back. The Dutch name is "strycsitten", but I've never seen a specific name in English. The crossbar is made to flip back and forth so that you can either warm your feet at the fireplace or move the bar and warm your back. Mine has 18 linenfold panels. All wood is white oak except the bottom of the box, which is shiplapped poplar. It's about 40 inches wide and the seat is about 17 inches high.

complete_5.JPG
Front quarter.

complete_6.JPG
The heartwood/sapwood color difference is much more pronounced with a couple of coats of finish, but it will all darken up over time.

complete_8.JPG
The pivot bars are bolted on just under the armrests and notches in the armrests limit the travel.

complete_1.JPG
Crossbar swung the other way.

complete_2.JPG
Inside showing the poplar bottom.

complete_4.JPG
Very happy recipient.

strycsitten_painting.jpg
Many of these show up in late medieval paintings. They came in two styles, with panels & box seats, and just bare frames with some tracery as shown here.

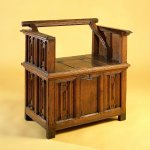
Museum_strycsitten.jpg
An original, in a Dutch museum. Many had wood pivot arms like in this example. I went with iron arms (well, really steel) so that I could make it wide enough for two people but narrow enough to fit in Lisa's car for the trip back east.

I have lots of build pics so will try to put together a thread. I was too busy to post while building--I did all of this in 3 weeks.

Kirk
 
A build thread would be very welcome, at least showing how you tackled the linenfold, which is something I've had on my list of things to try for rather a long time.
 
kirkpoore1":2thwi3ed said:
AndyT":2thwi3ed said:
A build thread would be very welcome, at least showing how you tackled the linenfold, which is something I've had on my list of things to try for rather a long time.


Andy, here's a linenfold tutorial:
http://thewoodhaven2.co.uk/viewtopic.php?f=20&t=9024&p=149558#p149558

This guy works in a similar manner to how I do it, except I don't use any hollow planes.
https://www.youtube.com/watch?v=SiKLIc8gRso

Kirk

Brilliant!

Thanks for that. I know I'm not alone in my admiration for this sort of work.
 
Malc2098":3mdzpiee said:
thetyreman":3mdzpiee said:
I made a prototype guitar, it's a through neck 12 string telecaster, mostly made from 4 x 2, currently just starting to make the real one, I made a video slideshow showing how it's made, enjoy! https://www.youtube.com/watch?v=foMFqfAtWJc

Nice slideshow. Be interesting to hear how it sounds when you're finished.

thanks, I'll post another video once it's done.
 
Andyp":2umynboa said:
Taking loose inspiration from Phil’s very fine picture frame stand I knocked this up for my daughter who is not allowed to make holes in the wall of her rented flat.

View attachment 3

View attachment 2

Simple beech triangle with walnut splines, on the edge this time. Couple of beech dowels and a longer dowel to support the frame which just rests inside the triangle’s apex and the shop bought picture frame’s hook. Not sure we have the angle quite right, easy to cut a longer dowel if needed. Finished in less than a week, a record for me.


Very nice Andy :eusa-clap: :eusa-clap:
Not as bulky as mine.

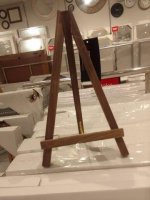
Wife arrived home from shops with some pics of another type of stand.
Filed away for another day, day, day ............

IMG_20230822_104248.jpg

IMG_20230822_104319.jpg
 
thetyreman":3rmd6jbf said:
I made a prototype guitar, it's a through neck 12 string telecaster, mostly made from 4 x 2, currently just starting to make the real one, I made a video slideshow showing how it's made, enjoy! https://www.youtube.com/watch?v=foMFqfAtWJc
That’s brilliant Ben, some lovely details you’ve added in the shaping of the top to reveal the through-neck. That’s an awful lot of work to go through for a prototype! Were you not tempted just to go straight for the main build?
 
BigMonka":1yn9x84u said:
thetyreman":1yn9x84u said:
I made a prototype guitar, it's a through neck 12 string telecaster, mostly made from 4 x 2, currently just starting to make the real one, I made a video slideshow showing how it's made, enjoy! https://www.youtube.com/watch?v=foMFqfAtWJc
That’s brilliant Ben, some lovely details you’ve added in the shaping of the top to reveal the through-neck. That’s an awful lot of work to go through for a prototype! Were you not tempted just to go straight for the main build?

thanks, yes I was tempted but decided a while ago to do a prototype first, and I was worried about messing it up, the real one has very expensive woods in it, but I now have the confidence I can do it.
 
They look tactile Pete.
Difficult to judge the size, I have a friend who sells turned stuff on his website, and he uses a Lego man in his photos, for scale.
I realise your photos are about the art though.
 
The bubinga one is 280x190x110mm bog oak is 200x140x105 if that helps.

The bubinga one could do with being thicker but that was governed by the thickness of the wood, I could have made it smaller but I wanted a big one.

Pete
 
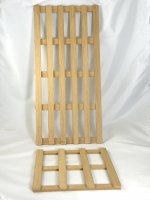
Bit on the basic side of woody work but a couple of Trivets in Oak for use by local monthly Village Luncheon Club to protect Kitchen Worktops from hot Oven Pans and Plates.

Casual request this afternoon saw half hour of repurposing a bit of donated salvaged flooring Oak ready for use tomorrow.
Dab of glue and staple pinned joints

DSCN7176.JPG

Largest one 450 X 220mm
 
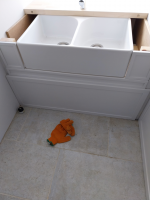
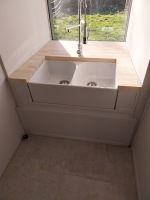
Utility sink challenge.

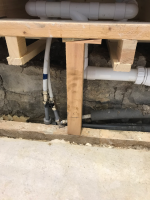
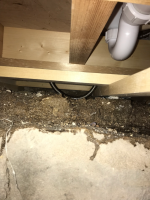
Approx 1m of stone wall in varying amounts of stability. No level base of any description. First task, create a PVA slurry to try and stabilise the stones.

Second task, knock up a very rudimentary framework. Requirements are to ensure ease of later access (if possible) to get to plumbing etc.
IMG_0428.png
IMG_0430.png

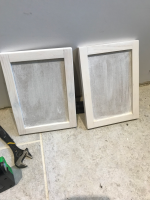
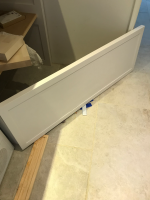
Next, decide on panel design. Panels need to be removable. Result - three panel types, made in three different ways!

Dominos, routing out the centre section of a solid piece and I can't remember the third method :oops:
IMG_0431.png
IMG_0432.png

Supports for the worktop (two parts) and held together with magnets to facilitate removal if plumbing maintenance required.
20230310_125445.png

Pulling it all together
20230310_125419.png
20230310_125358.png

Jobs a good'un.

20230310_154522.png

On my TUIT list, I have a couple of short upstands to fit. (When I can find them again)
 
The one thing to bear in mind with magnets is that their strength of attraction is at right-angles to their face. They do have a tendency to slide wrt each other in the vertical direction (as per my photo). DAMHIKT.
 
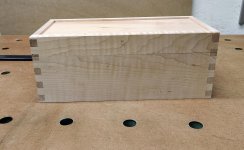
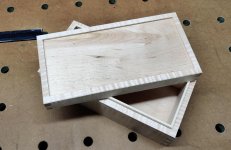
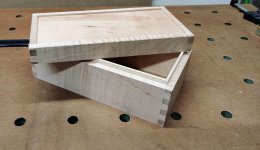
Its not much, and its far from perfect with some gappy joints where the jig moved but i had a bit of maple hanging around and it got me out the house for a bit. still lots to do so its not finished. lining was a first as i normally put hinges on things, must try harder.

IMG_20230929_164144.jpg
IMG_20230929_164127.jpg
IMG_20230929_164118.jpg
 
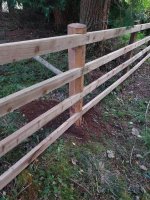
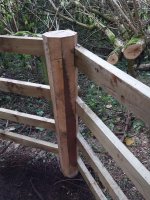
This is a sort of joint project but I've posted it here because I think the young guy (Thomas) who did the fence deserves recognition. It's post and rail. 75 metres. When I knocked down the logstore I re-purposed the oak uprights as large support posts for where the fence changed direction and also in the longer runs. Taking a leaf from the ones I had made for the gate, I chamfered them on the table saw. I then handed them over to Thomas who added a rather nice touch, I think. He did it because he wanted to.
20230929_172508.jpg

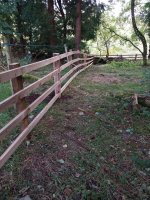
And this was carried on throughout.
20230929_172421.jpg

He closely followed the lie of the land to 'flow' the rails

20230929_172452.jpg

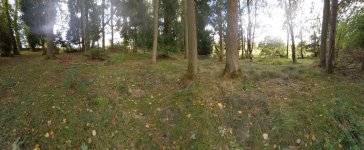
And this is what 75m of post and rail looks like as a panorama.
20230929_172252.jpg

He only charged £999 for materials and labour. :o
 
Cabinetman":2kk10vn3 said:
That looks very good to me Craig.
That was a good deal Roger, never seen anyone spend the time to do joints like those on a fence before!

Thanking you, its ok if you squint fromt 5 feet away :D, just seems like an opportunity to hide mistakes.

I do have a question though, whats the best way to secure the lining? double-sided tape or glue? they fit pretty tight but one side bends out a tad in the middle
 
Craig Salisbury":2d8n0kxw said:
Cabinetman":2d8n0kxw said:
That looks very good to me Craig.
That was a good deal Roger, never seen anyone spend the time to do joints like those on a fence before!

Thanking you, its ok if you squint fromt 5 feet away :D, just seems like an opportunity to hide mistakes.

I do have a question though, whats the best way to secure the lining? double-sided tape or glue? they fit pretty tight but one side bends out a tad in the middle

I'd go for tape as I'd be worried about bleed-through of any glue.
 
Cabinetman":2j9qm1ri said:
Is it bending out because it’s a fraction too long or just bent? Too long can be fixed obviously. Tape will do it but some tapes are quite thick, I think I would use a little pva myself.
just a bit of bow, it may well straighten out as moisture is released from resawing, they are only 4mm thick
 
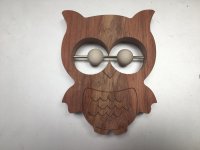
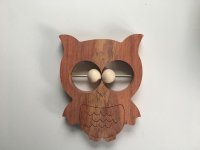
You'd be surprised how many people like owls, even stylised ones.
BD301E6B-8C22-448B-B4EB-F17C72D2ACE2_1_201_a.jpeg

F108C138-7875-4644-A624-34AEF7B50D1F_1_201_a.jpeg

Padauk body.
 
Back
Top