• Hi all and welcome to TheWoodHaven2 brought into the 21st Century, kicking and screaming! We all have Alasdair to thank for the vast bulk of the heavy lifting to get us here, no more so than me because he's taken away a huge burden of responsibility from my shoulders and brought us to this new shiny home, with all your previous content (hopefully) still intact! Please peruse and feed back. There is still plenty to do, like changing the colour scheme, adding the banner graphic, tweaking the odd setting here and there so I have added a new thread in the 'Technical Issues, Bugs and Feature Requests' forum for you to add any issues you find, any missing settings or just anything you'd like to see added/removed from the feature set that Xenforo offers. We will get to everything over the coming weeks so please be patient, but add anything at all to the thread I mention above and we promise to get to them over the next few days/weeks/months. In the meantime, please enjoy!

Post a photo of the last thing you made...

Dr.Al":1903d4h9 said:
AJB Temple":1903d4h9 said:
Presume it's just a brain teaser Al rather than having a practical purpose? Clever.

Yes, just a brain teaser (and a machinist's version of a fidget spinner!)

I am in awe of everything you do Dr. Al! Metal, wood, 3D printing. Then you also show your programming skills by writing something in C++ (!). Although I enjoy reading the builds on your website, It's a shame you don't have a YT channel because it would be very interesting!

I went to grammar school and was in top sets for everything but was firmly at the bottom of the top set. You remind me of the geniuses at school whose brain was just wired for maths & science in a way mine wasn't - everything looked effortless for them as it does for you
 
I got that wrong Al, I assumed that the threaded part had just been drilled and tapped to accept the other end which had been threaded to suit.
 
novocaine":1ki7ah5z said:
Two types of engineer, those that know and do and those that solve equations but can't do. OK it's a scale, but for me those define the end points.

most of the people I was at university with fell in to the latter with only a few of us sliding along the scale to the former. i believe most now work in banking.

nice doohicky Dr. :)

I don't know whether it's a function of the area I work in or if I've just been lucky, but most of the people I work with are somewhere in the middle of that scale and reasonably comfortable working anywhere along it. I'm probably more comfortable with the equations than a lot of the engineers around here, but there are a few who make me feel really stupid! Most, if not all, are quite comfortable building practical things.

Most of the people I went to university with went into banking (I think 40% of the class went into engineering :( ).

BucksDad":1ki7ah5z said:
I am in awe of everything you do Dr. Al! Metal, wood, 3D printing. Then you also show your programming skills by writing something in C++ (!).

To be honest, that's at the easier end of the scale for me. I'm an electronics engineer by training and a lot of electronics these days involves programming microcontrollers in C (although I still do a fair amount of analogue stuff too). Hence my day job involves programming and it's something that comes quite easily to me.

Metalwork is something I can do thanks to 11 years practice at home. Wood machining isn't that far removed from metalwork in many ways. Hand tool woodwork is something I need a lot more practice before I can claim to be competent at it.

The thing that impresses me most in the stuff that other people do on here is the artistic design side of it. I can design functional stuff reasonably easily as that's the way my mind works, but making stuff look pretty is a skill I don't have!

BucksDad":1ki7ah5z said:
Although I enjoy reading the builds on your website, It's a shame you don't have a YT channel because it would be very interesting!

It's never tempted me I'm afraid. Firstly, I have limited time in the workshop as it is and I suspect that filming what I do would double the time everything would take. Secondly, I spend enough time in front of a computer as it is and editing videos would increase that dramatically. Thirdly, I'm not exactly overflowing with charisma, so I doubt a youtube channel would be very successful! Finally, I generally prefer reading (& looking at pictures) than watching youtube videos, so it would be a bit hypocritical!

Andyp":1ki7ah5z said:
Thanks for the explanation. I had to look up four start thread…..never knew such a thing existed. Every day is a school day.

Multi-start threads are probably most common on milk bottles and things like that: they allow the cap to be screwed on very quickly but don't need much thickness of material (depth of thread). I put one on the fidget spinner thing just because I'd never cut one before and I thought it would be an interesting challenge.

Lons":1ki7ah5z said:
I got that wrong Al, I assumed that the threaded part had just been drilled and tapped to accept the other end which had been threaded to suit.

That's (sort of) how I made my first, smaller one (on the mini-lathe; visible on my monitor stand in the last photo on this post). One part had a male thread section and the other was drilled and tapped. The join was still in the middle of the threaded portion though, so both parts were threaded. For the second one I was lazy and used the threaded rod to join them - that made it easier to be absolutely sure the joining faces were flat.
 
Dr.Al":bpgo0utx said:
The thing that impresses me most in the stuff that other people do on here is the artistic design side of it. I can design functional stuff reasonably easily as that's the way my mind works, but making stuff look pretty is a skill I don't have!
Now you're dipping a toe into the murky world of aesthetics which is wholly different kettle of worms. I take the view that there's nothing (or very little) that's 'new' as over the centuries, it's all been done before, one way or another and what we do (moi inc) is a variation on a theme. What I tend to do is to use a Google search or Pinterest for stuff I like that ticks all the boxes and then alter, amend or play with the design til it suits my requirements. To actually try and design something that's a brand spanking new concept (and which looks fantastic) I think is a virtual impossibility; much better I think to take a classic design that does actually work (proportions, material etc) and play around with it - Rob
 
TrimTheKing":pivcg0u1 said:
Lons":pivcg0u1 said:
And....... a gift last week for my missus purely selfish so she stays motivated to cook my meals and wash my clothes. ;)

Rose stands around 250mm high with petals 75mm across made out of scrap copper sheet from an old water tank and stem 8mm c/h microbore, I left it unpolished to retain the colours from the annealing process. The base is a nice chunk of yew from a tree I felled 25 years ago.

Sorry the photos are cr*p. :oops:
Wow! Love that!
So do I.

I think we should exert suitable pressure for a WIP ‘cos I’d most definitely love to see how that’s made and put together.
 
I can't claim any merit Stuart, there are videos all over youtube on how to make a copper rose and it's pretty simple really, just cut out the petals then heat and dunk in water to anneal the copper peen in the markings with a pin hammer, anneal again and solder together then it's just fingers and pliers to fold and shape the petals. Leaves are similar with the base folded and soldered on to thick copper wire, nothing else to it.

I made some tulips and a group of daffs a while ago and the only thing to be careful of are that the copper work hardens rapidly as soon as you bash and bend it and cuts to your fingers from sharp edges. It helps that I'm a hoarder so always have scraps of pipe etc so the costs are nil

I've had requests from both my daughter and daughter in law so if I get around to it I'll take pics.
 
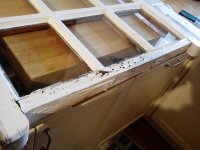
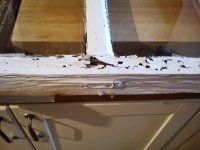
Well, if we are going down memory lane. I don’t think I have posted this particular basket case before. If I have, accept my apologies. It would have been a couple of years ago. We have loads of sash windows at our place in the Borders, and I worked my way round them in a methodical fashion.

This is one at the end of the long hall.

Sash window 1.jpg

Sash window 2.jpg

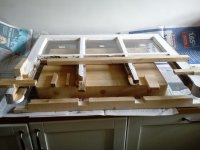
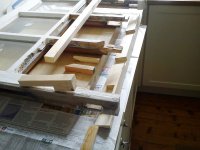
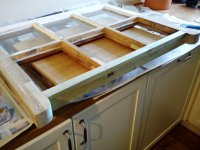
And this is the repair solution. All those minutes playing Tetris paid off.

Sash window 3.jpg

Sash window 4.jpg

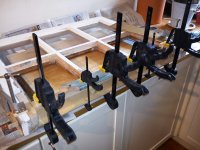
Glue up. Never have I been more conscious of open time. Actually that’s not true – it always happens.

Sash window 5.jpg

And there we go. All the old glass was saved and reused, and puttying and painting are too dull to record.

Sash window 6.jpg

And I hope that diligent readers (those that are not vapid and inattentive worms) will have observed that I carefully matched the growth rings.

Sash window 7.jpg

You may ask why I didn’t just make a new sash. Personal preference, and my time is my own. I have probably done another 30, but none as bad as that one. But a repetitive procedure is boring, so I haven’t bothered recording it.

And as an aside I do find it a little tiresome that some have expressed the view that if we are not producing innovative WIPs every week we shouldn’t be posting on here. How dull would that be? I suppose we could easily find out…
 
This I made nearly two years ago.


Posting it here for anyone who missed the original saga which can be found here
 
Ahhhh............woodwork. I have some vague memories.

I made it out to the workshop today for the first time since my operation. Faced with a dozen chisels, two planes, a saw, and 3 kitchen knives which all required sharpening, I did the knives. This was on the pragmatic grounds that if I didn't, our ham joint would need to be carved using a pair of scissors.

It'll be a couple of weeks until I can resume light duties out there (it entails walking out of the front door of the house, along the road, up the drive, across the garden, and along the path to the workshop, all to avoid the building site and steps). I'm hoping I haven't forgotten too much....
 
That’s most unusual Roger, was it a laminated curve?
I wouldn’t worry too much Mike, you won’t be away from the tools too long, I felt the same recently after nearly a year without tapping a chisel but the muscle memory soon came back. I did wonder if you were ok though as you’ve not commented for a few days. Glad it’s going well.
 
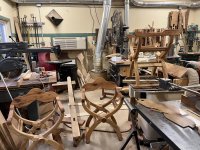
A little chair came into the workshop the other day it certainly wasn’t Hepplewhite :? It had great sentimental value but had seen better days.
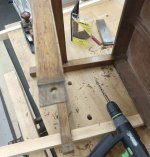
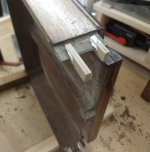
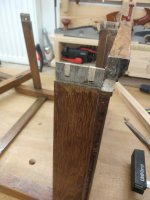
The joints on the back frame that joined it to the apron & stretchers were all quite loose, they had been pegged but still had a fair amount of movement. After drilling out the dowels the back frame came away from the seat part quite easily, two easily :eusa-think:

BFC762C8-63BD-4B72-9631-4DD9A813A7E9.jpeg

It transpired that on the apron tenons the oak behind the dowels had broken out so the first job was to patch these up.

3099154C-CADE-41AA-BD54-FDFEB6732DB9.jpeg

I didn’t need to go to the bottom of the of the slot as new dowels were going to be fitted later.


AF574856-5B6B-4430-8F32-772CCCAC74EA.jpeg


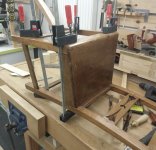
Cleaned up the chair was reassembled

9C4F14E5-D867-4C02-80F6-58A41D65CB19.jpeg

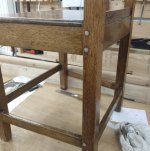
Last off I made some 7mm dowels & glued them into place.

473DAD38-8FA4-486C-8B56-10A29DC8BB8F.jpeg

These just need trimming a little & a couple of coats of oil on them & it’ll be on its way.
 
Nicely done Doug. They’re all different but the same, the last time for me there were 4 that had to be rebuilt, Georgian with the same seat arrangement, the seats had all split from being nailed down and no shrinkage allowance given, getting the nails and screws out of the joints without damaging the chairs was a nightmare.
You seem to have a varied workload, I suppose you never know what is going to come through the door next!
 
Cabinetman":7z4zxf94 said:
That’s most unusual Roger, was it a laminated curve?
I wouldn’t worry too much Mike, you won’t be away from the tools too long, I felt the same recently after nearly a year without tapping a chisel but the muscle memory soon came back. I did wonder if you were ok though as you’ve not commented for a few days. Glad it’s going well.

Which part, Ian...such a long time ago now ! It's all in the thread I linked to...including when the CUF visited on numerous times :lol:
 
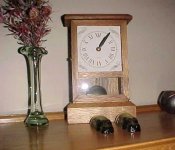
This is also an old project from 1997.

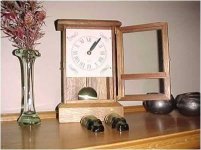
A Meranti Clock (I did post a thread back on 2015, but the fotos were hosted on Fk-Bucket, I might just re-post at some stage) all scrap meranti was used.

Back in February 1997 I bought a new DeWalt RAS DW1251. Big excitement, a new toy, an electric saw!! I then attended a 2 day course on not just how to use the saw, but also setting it up, squaring, levelling, maintenance etc.
Then came the big challenge of actually applying it at home. Many hours of blue air, sweat, blood and eventually it was in and running.
Now to actually use it.

The first project was maybe a bit ambitious as it involved cutting small bevels, mitres and very thin strips. An idea of the size and small pieces, it stands 285mm high.
The hinges and catches were made from some brass plate, also scrap.


MerantiClock.jpg


Door_Open.jpg

The clock face with makers name 8-)

ClockFace.jpg
 
Like you in the 70’s I started off with a ras, I can’t imagine cutting small pieces on it, that was really ambitious Phil, and a good result! Btw I wouldn’t know how to start making brass hinges lol.
 
Cabinetman":s3ydrmsg said:
You seem to have a varied workload, I suppose you never know what is going to come through the door next!

I don’t Ian no week is the same that’s for sure but I quite like it like that, most of my customer base are elderly & I get asked to do a myriad of things a couple of the more unusual were a wheel for a model gun carriage & a coffin for a dog.
 
Some Xmas serviette holders for the kids.
Gives grandkids something to play with while we eat.
I will have to be more creative for Xmas 2023 (need to start soon ............ :lol: )


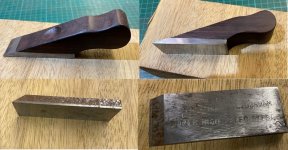
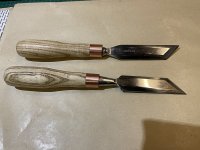
A few tool projects over the last month or so, just faffing about really.

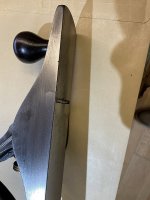
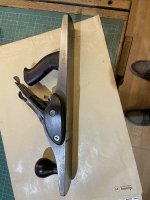
One of the refurbished planes, a Record 5 1/2 in decent condition apart from a hairline crack in the usual place so I drilled and tapped the side and fitted a rudimentary grip so it works well for me as a shooting plane.

A couple of old very sad 25mm firmer chisels which the lads had bashed around when I had my business so I ground them back and used reclaimed ash for the handles as seen by the screw holes.
The photo is distorted as they are almost identical in size and shape.

A simple little chisel plane made from an old tool blade which has a thin laminated HSS base and rosewood handle. I drilled and tapped the top section of the blade and screwed in a stud just to give extra support to the wood - steel glue joint.
 

Attachments

  • chisel plane.jpg
    chisel plane.jpg
    214.5 KB · Views: 166,635
  • IMG_1245.JPG
    IMG_1245.JPG
    106.4 KB · Views: 166,636
  • IMG_1248.JPG
    IMG_1248.JPG
    82.7 KB · Views: 166,635
  • IMG_1249.JPG
    IMG_1249.JPG
    109 KB · Views: 166,636
Now that is clever, using a reinforcement to make an old plane extra useful. All good stuff.
:eusa-clap:
:eusa-clap: :eusa-clap:
 
AndyT":2rimdmzr said:
Now that is clever, using a reinforcement to make an old plane extra useful. All good stuff.

:eusa-clap:
:eusa-clap: :eusa-clap:
Unfortunately the crack is on the other side Andy though it seems solid enough
 
8BA7E853-679D-4537-AA5E-0F081FDC86DD.jpeg

B824F23A-DE1A-491B-9D5F-F30D2E2A9BF5.jpeg
552C15DA-7A27-41CF-ACA9-9370BE832C11.jpeg

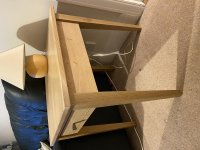
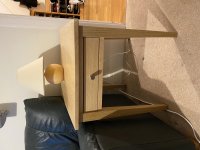
Having bought some wood at May half term I have eventually finished making this table, with many flaws at Christmas. It the first proper bit of furniture for our house that I have made, so I am quite pleased with it.

Sorry looks like all the photos have come out sideways again!
 
Trevanion":bts4otht said:
Today, I made a stool.

Then I went and made a stool.

8aUoXuf.png

2HtQAJk.png

That looks handmade! I never realised how versatile the spindle moulder can be, in the right hands! :lol:
 
Dan I like the way you have continued the shape of the top through the legs, it’s most unusual, do you have a pencil sharpener thingy for the leg tops?

Pretty good table Mark, nice clean lines. I’m hoping you have allowed for movement in the top?
 
AndyT":3bpe20ey said:
That looks handmade! I never realised how versatile the spindle moulder can be, in the right hands! :lol:

You might want to sit down for this Andy... It is mostly handmade! :o

Though I couldn't help but use a power tool for saddling the seat.

eW7Ibjw.png

Cabinetman":3bpe20ey said:
Dan I like the way you have continued the shape of the top through the legs, it’s most unusual, do you have a pencil sharpener thingy for the leg tops?

No, I did them with a bit of trial and error on the lathe. It's a Welsh traditional shape of milking stool, though this is quite a bit larger and heavier than your normal milking stool, and the seat isn't normally saddled and the legs are more often square or round than octagonal.
 
Cabinetman":37rcjufw said:
Pretty good table Mark, nice clean lines. I’m hoping you have allowed for movement in the top?


I hope so. I fitted the top on with some buttons I have made, so hopefully that will do the trick. I guess time will tell!
 
Trevanion said:
Though I couldn't help but use a power tool for saddling the seat.

eW7Ibjw.png

What is that Dan? I cant recall seeing one of those before. It’s a disc attached to an angle grinder?
 
Looks like exactly that. A couple of brands are rather incongruously sold by Classic Hand Tools if you want the marketing description. While I've not used them, they seem to be a solid choice for rapid free-hand shaping where you need to remove a lot of stock.
 
That’s the one, it’s sort of a middle ground between a chainsaw/Arbortech wheel and an abrasive flap wheel, despite being the extra coarse one it does leave a reasonably good finish on oak that doesn’t need too much work to clean up. I did the rough shaping with this wheel, refined it further with a flap wheel and went over it with an orbital sander.

Horrendously messy though.
 
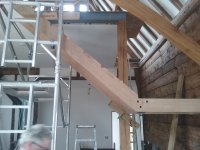
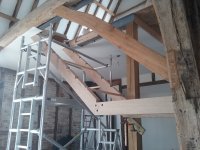
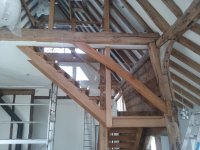
Set of Oak open tread stairs made & fitted late on last year, custom cut and trimmed to fit, to allow for all the irregularities an old barn has to offer:

stair 1.jpg
stair 2.jpg
stair 3.jpg
Poignant for me as the head shot in the first picture is my work mate who had been having treatment for leukemia which was in remission, so we all thought, he never got to see it finished after it came back, died within 3 weeks of that picture, very much missed.
 
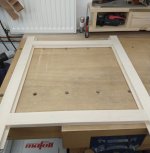
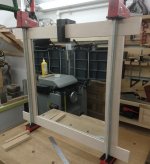
Made a start this afternoon on a Maple mirror frame it will eventually be joined by a matching cabinet hence the frame being made to match the eventual doors.
The construction is pretty basic just lap joints.

533F9193-41BD-4E36-9802-53429934B968.jpeg

The joints being reinforced with dominos

6948947B-6011-4F6B-B6F6-B62425BEF1ED.jpeg

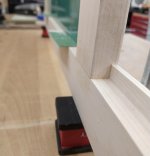
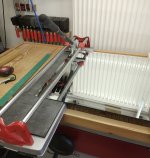
I’m recycling a fairly new mirror that’s damaged on the edge which ment just trimming it down a bit for this I find it easy to use my tile cutter.

6B9F4582-8549-4FDD-8311-1CEFE0870889.jpeg


Quick test fit to check the fit after I’d glued the frame up

C36C7262-2C51-4DDF-8274-D794086304D2.jpeg
 
Nice staircase, I’ve only done a couple but I do know what you mean when it comes to measuring up in an old building, and a bit nail biting on fitting, sad photo for you.
Doug, Maple is one of my favourite woods to work with, I always think it’s like cutting Nylon, a strange mix of hard yet soft, good looking planer thicknesser, what make is it pls. Ian
 
Cabinetman":17v244z4 said:
Doug, Maple is one of my favourite woods to work with, I always think it’s like cutting Nylon, a strange mix of hard yet soft, good looking planer thicknesser, what make is it pls. Ian

Yeah I’m a big fan of maple planes up lovely.

The planer thicknesser is a Hammer A3-41 had it just over 4 years now & I’m really pleased with it, for years I had their A3-41D stand alone thicknesser which was a lovely machine sold that to a mate who runs a big joinery shop he loves the finish the spiral block gives & the fact the tips last so long before needing turning.
It’s funny how tips are catching on, on Instagram at the moment folks are raving about a company that have bought out a bearing guided spiral trim router cutter which apparently is the bees knees giving a lovely smooth finish, not tried it myself but looks really interesting.
 
Doug":3ss0wdam said:
at the moment folks are raving about a company that have bought out a bearing guided spiral trim router cutter which apparently is the bees knees giving a lovely smooth finish, not tried it myself but looks really interesting.

CSP Tooling, in China.

https://www.csptooling.com/

I'm not sure about the legality of some of the bits they sell. According to the Provision and Use of Work Equipment Regulations (PUWER) a router bit over 16mm in diameter should be of chip-limiting design (IE, the cutter has a limited projection from the body of the tool of no more than 1.1mm) and when I saw the shear cutting trimmer that they produce the other day on there it didn't look like it would conform to the regulations.
 
Yeah that’s them Dan a couple of the blokes I talk to on a WhatsApp group have used them & are impressed, if I’m honest I don’t use my router much for bearing guided trimming so haven’t had use for one, interesting what you say about the legality of them :eusa-think:
 
Trevanion":2rsauz7r said:
Doug":2rsauz7r said:
at the moment folks are raving about a company that have bought out a bearing guided spiral trim router cutter which apparently is the bees knees giving a lovely smooth finish, not tried it myself but looks really interesting.

CSP Tooling, in China.

https://www.csptooling.com/

I'm not sure about the legality of some of the bits they sell. According to the Provision and Use of Work Equipment Regulations (PUWER) a router bit over 16mm in diameter should be of chip-limiting design (IE, the cutter has a limited projection from the body of the tool of no more than 1.1mm) and when I saw the shear cutting trimmer that they produce the other day on there it didn't look like it would conform to the regulations.

I would imagine the principle there is the cutting edges are like saw teeth - effectively the depth to which a tooth can cut is governed by the teeth in front of and behind it. I must admit the thing looks a little dangerous, though.
 
Phil Pascoe":1y26jxfs said:
I would imagine the principle there is the cutting edges are like saw teeth - effectively the depth to which a tooth can cut is governed by the teeth in front of and behind it. I must admit the thing looks a little dangerous, though.

Possibly Phil! It all really comes down to what the HSE themselves would deem legal and not legal as it can get quite complicated, with a saw blade for example it's the gullet size that's taken into account as well as if there are any built-in limitation features like the nodules you get on an anti-kickback saw blade.
 
Back
Top