• Hi all and welcome to TheWoodHaven2 brought into the 21st Century, kicking and screaming! We all have Alasdair to thank for the vast bulk of the heavy lifting to get us here, no more so than me because he's taken away a huge burden of responsibility from my shoulders and brought us to this new shiny home, with all your previous content (hopefully) still intact! Please peruse and feed back. There is still plenty to do, like changing the colour scheme, adding the banner graphic, tweaking the odd setting here and there so I have added a new thread in the 'Technical Issues, Bugs and Feature Requests' forum for you to add any issues you find, any missing settings or just anything you'd like to see added/removed from the feature set that Xenforo offers. We will get to everything over the coming weeks so please be patient, but add anything at all to the thread I mention above and we promise to get to them over the next few days/weeks/months. In the meantime, please enjoy!

Time for a new bench (dog holes)

Mike G":oi6owslz said:
I don't think it will surprise anyone when I say that I won't be doing this. The last thing I want with a bench is "bling".

Exactly, it's a workbench.
Will you put a finish on the bench Mike or leave it raw? Mine gets an occasional wipe of Danish oil which seems to make it easier to get glue and other gunk off.
 
I don't think it will surprise anyone when I say that I won't be doing this. The last thing I want with a bench is "bling". Further, the breadboard ends and the boards are designed to move independently. Gluing something in between them would potentially spoil that plan, and lead to the potential for splitting the benchtop.[/quote]

:lol: I was just fishing. Dangle the hook and occasionally they bite. Fully get the movement point of course. But on such a quality build I would want to find an aesthetically pleasing solution.

I've always worried about this issue of not fully seating when using fox wedges and so have probably undersized the wedges whenever I've done it. In my case I used them when framing the outdoor kitchen as I was worried about wind lift with the open roof. A professional framer I know suggested using softwood wedges in hardwood M&T as they could be "driven" harder when pulling up a frame with ratchet straps. I wasn't convinced by that as the wedge needs to be hard enough to push the tenon outwards, so I did a four way using oak.
 
Lons":1svcwgoq said:
......Will you put a finish on the bench Mike or leave it raw? Mine gets an occasional wipe of Danish oil which seems to make it easier to get glue and other gunk off.

It'll stay raw. And stand by this evening for another decision which is likely to be a bit controversial.
 
Mike G":1596plhz said:
Lons":1596plhz said:
......Will you put a finish on the bench Mike or leave it raw? Mine gets an occasional wipe of Danish oil which seems to make it easier to get glue and other gunk off.

It'll stay raw. And stand by this evening for another decision which is likely to be a bit controversial.

Looking a right chunky monkey Mike, well done.
Looking forward to seeing that "M.G.2024" scrawled into it with a Stanley knife :eusa-whistle: 8-)
Cheers, Andy
 
9fingers":2317lu14 said:
Some sort of finish is useful to minimise excess glue/spills from sticking the job to the bench top.

Bob

In theory, I have a finishing bench on the other side of the workshop. Unfortunately, it is crowded with stuff.
 
After de-clamping, the main task today was to flatten the top and get it fixed in place. It didn't sit completely flat initially, so I flipped it over and "backed out" at the point where it rocked. A liberal coat of wax crayon on the frames gave me a clue where I needed to plane:

oYJMYqv.png

Once it was sitting OK I screwed the apron on:

mazJcmM.png

......then concentrated on flattening the top. I approached this in the same way as I would flattening a single board: first, winding sticks, then a straight edge along the length, then scrub planing, and then.....:


IHXDEts.png

mazJcmM.png

O0D4N5J.png

Every now and then I rubbed the aluminium channel on it to reveal the high spots:

MjHNX2O.png

zfp5XYc.png

When I was getting close I filled the old board, and that little gap from yesterday:

lGm2oOG.png

Once I had it flat (about 2 hours worth of hand planing), I re-sharpened the number 6 and scrub-planed the entirety again. If finish-scrub-planing is a thing, then that's what I did.

Now, let me tell you about something that has been bothering me for days. I've been working in an ad hoc way on the top when it was just individual boards, and the planed surface has been ridiculously slippery. Bits of wood skid around all over the place, and I have pondered long and hard how to get over this. Would a finish help? Would toothing the surface with a toothing plane, or dragging a handsaw all over it, do the trick? Mentally, I was all set to do the latter.

Anyway, the more I scrubbed at 45 degrees to the grain, the more I liked the finish it gave me. If I went 45 degrees from the grain direction, it was still a bit too smooth, but if I went 45 degrees against the grain, it gave a really, really nice texture. So, chaps and chappesses, that is how my bench is going to be:

rDOCwdA.png

I'll see if I can capture it a bit better than that, but it is pretty plain to see in real life. It won't be everyone's cup of tea, but hey, it's my bench.

Next on the agenda was the shelf behind the bench, and the first task was to move this socket which was in the way:


H2K7Csv.png

4NaYWft.png

Here's a couple of pieces of "standard" grade redwood from Huws Gray in Sudbury. The "Premier" grade is better still:

AEUvS5e.png

Those are to suppoprt the shelf behind the bench. I took this photo just for Andy T, to show one of the advantages of pairs of bench-hooks:

5gxzrF5.png

Here you can see one batten screwed to the wall, and the other about to be screwed to the back of the hindmost board of the bench. The benchtop was still free to move, to allow me access for fixing this batten:

SkRqMv4.png

Here you can see the vice re-fitted. It was more of a schlep than you'd think, and involved going in to the house to wash my hands two or three times because oil and wood aren't a great combination:

9h0KKdr.png

I sat the shelf loosely in place, and will work out what goes where tomorrow:

MMjv04Z.png

It's starting to feel like a bench:

vCr8KgA.png

At the other end of the bench there is going to be a tool-well. I had rebated the back edge of the beech board previously, and today I ran a matching rebate in the under-edge of the shelf-support batten, which allowed a piece of ply to slide in:


Bq90hHQ.png

EDOo3dp.png

There's a bit more work to do in that area, so we'll come back to that tomorrow.

Finally, I made a handful of buttons:

JKiOUTd.png

I fitted the easy ones, but ran into access issues with a few of them. They may have to wait a bit. I also screwed the apron to the legs, and tapped the wedges home. It may be a while before the bench-top comes off again.
 
toolsntat":3krqx79w said:
Looking a right chunky monkey Mike, well done.
Looking forward to seeing that "M.G.2024" scrawled into it with a Stanley knife :eusa-whistle: 8-)
Cheers, Andy

Thanks Andy. Not sure I'll be carving into it any time soon!
 
Just went back to the beginning Mike, I wanted to see where your old well was, this bench is a king compared to your old one! You were well overdue a new one imo.
You obviously have got into the habit of putting your tools down way over to the right of where you are working so no problem the way you’ve built it.
Sorry, but you’ll all have to wait (quite a while) to see my innovative solution to the well problem.
 
Yes, the old one wasn't so special. I doubt I'll be rebuilding any engines on the new one, though!

I could see lots of ways of doing the tool well, and anything was better than an entire centre strip as on my old bench. I don't need a lot of space in a well, as my tools are all immediately to hand just to the side of the bench, and because of the shelf at the back. I just can't imagine working without a shelf behind the bench....tapes, rules, pencils, bench hooks, knife, drill bits, rubbers, chalk, bench chisels......and where else would you put your cup of tea? Anyway, the shelf de-clutters the bench and allows the tool well to be quite small. And I'm looking forwared to seeing yours.
 
Mike G":2v4t7tq2 said:
toolsntat":2v4t7tq2 said:
Looking a right chunky monkey Mike, well done.
Looking forward to seeing that "M.G.2024" scrawled into it with a Stanley knife :eusa-whistle: 8-)
Cheers, Andy

Thanks Andy. Not sure I'll be carving into it any time soon!

I was expecting nothing less than a rose to match the staircase. :eusa-snooty:
 
Phil Pascoe":35ofdqfd said:
I had an innovative solution - get rid of the well. They're a bloody nuisance. :lol:

Great things is a bench well; useful for keeping safe all sorts of odds n'sods when a job is in the offing. Small stuff currently needed (screws, hinges, fittings etc) are kept are kept in a rectangular 'baccy tin labelled 'job' - Rob
 
Woodbloke":33c5lupy said:
Phil Pascoe":33c5lupy said:
I had an innovative solution - get rid of the well. They're a bloody nuisance. :lol:

Great things is a bench well; useful for keeping safe all sorts of odds n'sods when a job is in the offing. Small stuff currently needed (screws, hinges, fittings etc) are kept are kept in a rectangular 'baccy tin labelled 'job' - Rob
Aaah. I need a baccy tin.
The "tool" well is also a great place to sweep the bench detritus into prior to vacuuming it all along with the small bits I needed! I even fitted ramps at either end to aid cleaning it out.
 
Yes ^^ I've got ramps in mine too, but wonder if a lift out end in slots would be even better. I want to make a bench, but this is on the wifey veto list currently.

Mike - that heater really worries me. It is bound to get saw dust in it and one of these days the fire extinguisher I can't see anywhere in your workshop is going to be needed :?

Not sure I would be super keen on cable to sockets just pinned to the wall either. But I am super clumsy and can easy knock stuff that no one else would clonk.

Just installed a load of wiring for offspring's wall hung TV and surround sound. Put it all in galvanised trunking (it's inside a big walk in cupboard) as among things he has inherited from me, being accident prone is one.
 
AJB Temple":29jkfue9 said:
Yes ^^ I've got ramps in mine too, but wonder if a lift out end in slots would be even better. I want to make a bench, but this is on the wifey veto list currently.

Mine has ramps as well, but whole of the bench well bottom (12mm ply) lifts out in two sections. This means that I can use a big F clamp (or similar) to clamp from both sides of the top if needed - Rob
 
Woodbloke":17qj5rh5 said:
Phil Pascoe":17qj5rh5 said:
I had an innovative solution - get rid of the well. They're a bloody nuisance. :lol:

Great things is a bench well; useful for keeping safe all sorts of odds n'sods when a job is in the offing. Small stuff currently needed (screws, hinges, fittings etc) are kept are kept in a rectangular 'baccy tin labelled 'job' - Rob
My bench had a well in its last two incarnations, but I got rid of it to narrow the top and much prefer it without. After years of using a bench with an apron it's good not to have one of them as well. It wouldn't do for everyone to be the same.
 
AJB Temple":1kemxue8 said:
......Mike - that heater really worries me. It is bound to get saw dust in it and one of these days the fire extinguisher I can't see anywhere in your workshop is going to be needed :?

Not sure I would be super keen on cable to sockets just pinned to the wall either. But I am super clumsy and can easy knock stuff that no one else would clonk. ....

You made me go back out and take a couple of extra photos!! :)

The heater has moved to the tail end of the bench:

ZGvwR7v.png

You can see that it is well back behind the overhang of the bench:

Cwmdhpi.png

I've had it at one end or other of the bench for the last 9 years, and I have quite a discipline with it. Firstly, it is never on if I'm not in the workshop. Secondly, it gets vaccumed every day. Finally, it gets blown through with an air-line every few weeks. And finally finally, here's the fire-extinguisher, right by the door:

hcZsQur.png

The sockets too are completely protected by the overhang of the bench:

s4YkPr7.png

z2nwBvo.png

The ones at the other end are protected by a shelf over, and by being tucked into a corner:

ZGvwR7v.png

Worry not, Adrian. :)
 
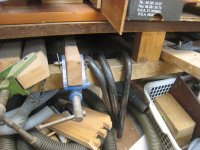
I started this afternoon with work on the tool well, and it's associated secondary bits of wood under the shelf. I shaped the end of the batten which forms the back of the toolwell, and the shelf support:
n8TKMfL.png

This allowed me to relocate the sockets at the tail end of the bench:

OK5QOUq.png

I formed a shape on the back end of the breadboard end, and then screwed the ply base of the tool well into its rebates, from the underside. A lot of today's work involved lying on my back on the floor or inside the bench cupboard working above my face, but cutting the breadboard end involved standing inside my finishing cupboard, and kneeling on the bench:

5Dcert2.png

I then shaped the off-cut from the breadboard end to fit loosely in the gap:

cDRkYVU.png

Out-of-sequence images:

DdztlvH.png

OzH3Vtj.png


This gives me a removable end to the tool well so that I can sweep it out. Having got the tool well done, the shelf supports in place, and the sockets sorted, I could move on to the shelf. This is just a straight piece of 220 x 20 redwood, with a few holes in it:

BPx0NLi.png

qMTphBA.png

e9tlueG.png

l3s1SL4.png

QidQGuD.png

It took me a couple of hours to make and fit the awkward remaining buttons, and the associated packing pieces under the thinner board at the back of the bench. I've no photos to illustrate that, you'll be pleased to read.

Here are a handful of photos trying to show the scrub-planed finish. I don't think they help much:

22hznuq.png

TexeZ8q.png

YL5D95r.png

Now that I've finished lying in it, I could stow my power tools in the cupboard:

kyHVqTH.png

I had toyed with leaving the belt sander and router in there, too, but decided to leave them where they've always lived for the time being. All those tools on the shelf have the advantage of being permanently plugged in.

Finally, a fun little aside. As I no longer have square dog holes, I was cutting up my old hold-fasts for firewood. They'd done years and years of service, but because they can't rotate they're pretty limited in their usefulness. Anyway, I thought I'd take a look at the inside of the joint of one of them:

fHqI0F6.png

mjiIjmA.png

Wedged through-tenons are such wonderful joints!

Tomorrow I have to try to find a place for this, which had lived under the tail end of the old bench. The longer bench doesn't leave room for it:

dbXoafc.png

And I need to sort out my workholding/ stops etc:

nm4HOKy.png
 
Looking pretty damn good! One last thing I think you need to do Mike is to take a shaving off the top of the vice jaw, or are you going to treat yourself to a new Beech one?
I’m surprised you feel the need to roughen the bench top, I have a Beech top with a slap of sanding sealer and I don’t find it too slippy, and also I don’t even have a metal saw tooth edge on my planing stop. Suppose it depends what you’re used to.
Ian
 
Cabinetman":3f4azqzc said:
.....One last thing I think you need to do Mike is to take a shaving off the top of the vice jaw, or are you going to treat yourself to a new Beech one?.....

It's half a mill shy, Ian, so I can't take any off. I guess I should make a new one.
 
Hmm, where to put the holdfasts? Nearly everyone puts them in holes in the front face of the r/h leg. In the way and not particularly easy to put away when you have better things to do imo.
This is a bad sketch of my take, just a sloping bit of wood to drape them over, I’ll be interested to see if there are any good ideas out there.
Ian
D9A63774-702A-4CF0-90E7-DA01C417DF16.png
 
It's an issue I've not even begun to think about......but sticking out anywhere seems like a great way to get a bruised leg.
 
"Where to put the holdfasts?" is an easy question!!

Over 30 years ago, my wife and I stripped down an old sofa, planning to reupholster it. After a while we thought about the cost and effort required and weighed them against the likelihood that we'd only end up with a sofa that wasn't comfortable to sit on. So the stripped down frame was slotted into the bay window shaped space behind and above the workshop bench.

Since then it's been really useful as a place to dump all sorts of useful bits and pieces that have never merited a tidier home. Here's a close-up of the holdfast corner

IMG_9300.JPG

and a more general view, just to share the full beauty

IMG_9301.JPG

It works for me! But I guess it might lower the tone of your new, very smart arrangements, and excavating the space required might just be a step too far... :eusa-whistle: :lol:
 
Mike G":1emforyy said:
It's an issue I've not even begun to think about......but sticking out anywhere seems like a great way to get a bruised leg.
Another two holes in the shelf - sorted
 
Cabinetman":s5vxieo9 said:
Well as you say Andy "it works for me" I just need to find an old sofa. At least you’re not mindlessly following the herd!

...and I rather suspect that the the herd aren't following me! :D
 
PAC1":2vjq90py said:
Mike G":2vjq90py said:
It's an issue I've not even begun to think about......but sticking out anywhere seems like a great way to get a bruised leg.
Another two holes in the shelf - sorted

It isn't as easy as that for boring reasons (frame pieces below, and clearance for the window shutter thing above)........but I've found a nice place. Hopefully I'll get it done today and post some photos later, but today is a work day.
 
I only had an hour or two in the workshop this evening. The first thing I did was an experiment to find the correct hole size for the holdfasts I've got (thanks Doug), and this will determine the size of bench dogs and planing stop board pegs. I used an off cut of the benchtop so as to replicate both the timber and the thickness. The first hole I tried, 3/4", worked perfectly:

C74b7JH.png

That commits me to a bit of resistance training, as the only 3/4" drills/ bits/ augers I have are for a brace, and it's relatively hard work drilling through this thickness of beech.

More important to the way I've always worked, though, are planing stops. The ones from my old bench have always worked perfectly well, so I just needed to drill holes for them. The 16mm holes I can only do with a spade bit:

BNtPphb.png

cHGci8w.png

These planing stops have always hung off the end of my bench, so that's where I put them, along with a carefully positioned dowel (OK, snooker cue off-cut) on which to hang the holdfasts:

jvwLxsJ.png

A part of the old bench which I came to rely on was a planing stop parallel to the face of the bench. I used it all the time, but it's development was a complete fluke. I placed a loose board in the tool well because I was tired of the tool well and needed some more space to work. To support this board, I screwed a batten to the underside of it. Weeks or months later I discovered that flipping the board over gave me a really useful stop. I've no idea now how I worked without it previously. Here is the board in its normal position, followed by it flipped over in it's planing-stop position:

akxv9Ru.png

XHQ0r2Q.png

The old board obviously won't transfer over to the new bench, so I need a variation. I found a suitable board to make the replacement of, and the old one is behind:

HKeBB2g.png

I glued in a couple of strips to fill in the housings, and that was it for the day:

CV33GpD.png

The reason I stopped at that point wasn't just that dinner was ready. I puzzled and pondered over the location of the holes for the hold-fasts. As I haven't worked with this type before, I could quite easily drill holes in entirely the wrong position in my nice new bench top, and regret it for years. I have take a decision not to have a line of holes along near the front edge of the bench, at least initially. But I need some further back. These holes will not only work for holdfasts, but they'll locate my parallel planing stop. So, if anyone has any advice on the location of holdfast holes, I'd love to hear it.
 
I think the simplest approach to holdfast holes is to wait until you need to fix something, at the size of work you normally do, and make each hole as you need it.

I've ended up with three at the left hand end (near the vice, bench stop and rear planing stop) plus a couple more near the front on the right.

You do have a doe's foot or two, I think. They give you a great deal of flexibility without the need for many holes.
 
I like the holdfast hanger, practical. Holes, yes I agree re a line along the bench, mainly used with a tail vice - not my thing.
I have only drilled about 4 holes in my top over a few years, they were drilled as and when needed, which as it’s hard work to do might suit your situation. So the planing stop you’re making, does that function the same as a planing stick?
 
If you have bech morticer, a drill stand or anything that's better bolted down, put your holdfast holes to suit. I can bolt my drill stand (a Bosch S7) down and swing it out over the vice which can be handy on occasion.
 
Cabinetman":1e7he68u said:
........So the planing stop you’re making, does that function the same as a planing stick?

I don't know what a planing stick is, I'm afraid.

We may be running into the limits of my knowledge of the vocabulary. I've always called the thing on the end of my bench a planing stop. It's parallel to the end of the bench, right angles to the front of the bench. The one running parallel to the front edge of the bench is what I am going to make tomorrow, but I don't know what that's called. It allows scrub planing, cross planing, and really helps with carving.
 
Phil Pascoe":wsi8owti said:
If you have bech morticer, a drill stand or anything that's better bolted down, put your holdfast holes to suit. I can bolt my drill stand (a Bosch S7) down and swing it out over the vice which can be handy on occasion.

I've nothing like that, Phil.
 
Mike G":2aw2rg71 said:
Cabinetman":2aw2rg71 said:
........So the planing stop you’re making, does that function the same as a planing stick?

I don't know what a planing stick is, I'm afraid.

We may be running into the limits of my knowledge of the vocabulary. I've always called the thing on the end of my bench a planing stop. It's parallel to the end of the bench, right angles to the front of the bench. The one running parallel to the front edge of the bench is what I am going to make tomorrow, but I don't know what that's called. It allows scrub planing, cross planing, and really helps with carving.

Yup, that’s what they call a planing stick, and a very handy thing to have, it is normally the same length as the bench about an inch thick and it fits between the front and back halves of a split top, being able to be raised when needed, the rest of the time it is flush and forms part of the top.
Some people put a line of holes in the stick and use it as a tool rack, totally in the way as far as I’m concerned.
Ian
 
Right, so yes, I'll be making my equivalent of that tomorrow (presuming the phone doesn't ring). It will have pegs/ dowels in it, to locate it in the same way as my planing stop does, but this time the same size as the holdfast holes, so I need to know where those holes are going before I build the planing stick equivalent. I'm narrowing in on the answer but it places the front edge of my bench out of the range of my holdfasts. I wonder if I will regret that........or will I just use a batten to pin down work at the front edge, I wonder?
 
Not quite sure exactly how you fix your long stop, if the pegs were in the front edge you could then turn the board around so that what was the front becomes the back thus bringing it so much closer to the front edge of the bench, this might be close enough to be able to groove or rebate a piece of work against it?
Unfortunately only time and you can show where else you might want to hold something down, but there’s probably a particular bit of the bench where you do most chiselling, and you will remember which dog holes you used most with your wooden holdfasts.
Also as Andy said most things are within reach of a Doesfoot.
Ian
 
Back
Top