• Hi all and welcome to TheWoodHaven2 brought into the 21st Century, kicking and screaming! We all have Alasdair to thank for the vast bulk of the heavy lifting to get us here, no more so than me because he's taken away a huge burden of responsibility from my shoulders and brought us to this new shiny home, with all your previous content (hopefully) still intact! Please peruse and feed back. There is still plenty to do, like changing the colour scheme, adding the banner graphic, tweaking the odd setting here and there so I have added a new thread in the 'Technical Issues, Bugs and Feature Requests' forum for you to add any issues you find, any missing settings or just anything you'd like to see added/removed from the feature set that Xenforo offers. We will get to everything over the coming weeks so please be patient, but add anything at all to the thread I mention above and we promise to get to them over the next few days/weeks/months. In the meantime, please enjoy!

Another tool chest

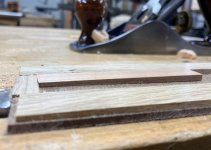
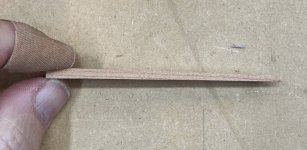
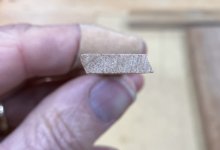
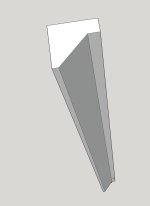
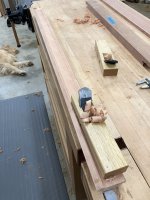
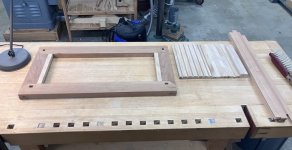
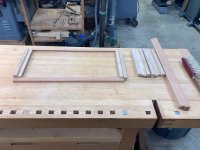
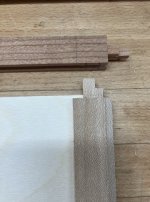
Making the shachi sen. After bandsawing some stock oversized I first tapered the sen end to end using a small planing jig.

0AE43A75-52A5-47B1-966F-DF1B915A2A1D_1_201_a.jpegB499A063-BB94-4A58-931D-A587949A035C_1_201_a.jpeg


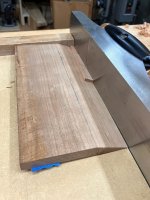
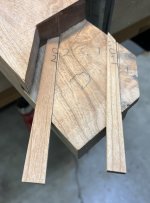
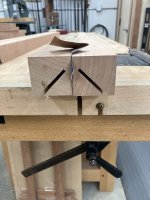
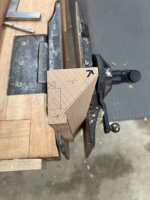
Then tapered the sen side-to-side using a sloped insert on a shooting board. The slope got me the angle of the parallelogram corners. For the taper I just eyeballed it and checked frequently against the mortices I had already cut.

EC8065AB-1F38-4840-99DB-24987F411047.jpegC1DE1F8D-ED75-47B3-8312-3E05C7889321_1_201_a.jpeg

The mortices weren't all exactly the same so I had to trim each sen to match both halves of each mortice.

962A8452-E135-4F91-9238-CCB1E59B20EF_1_201_a.jpeg

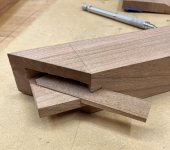
Same story for the other joint but with different sized sen and slightly different parallelogram angles. This one was still a bit fat at the time of the pic.

A81636B5-8811-489E-A433-E2F51E8C65D7_1_201_a.jpeg

One done. Just lightly in place so I can still remove it to complete the next steps. D3F99D62-1E2C-4D91-A4F8-4B730B02B4B9_1_201_a.jpeg
 
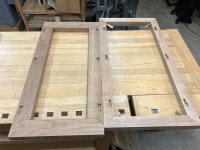
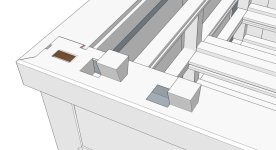
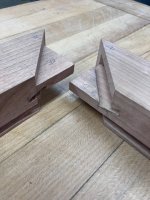
I finally layed out and cut the joinery that attaches the cabinet top to its cornice. The layout was vexing since I seemed to have trouble keeping left and right and top and bottom straight, accounting for how it would be assembled, and making sure that the mortices in the matching pieces lined up properly. Many false starts and a couple of do-overs. But I think this will work.

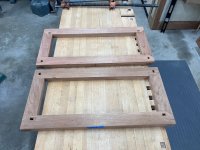
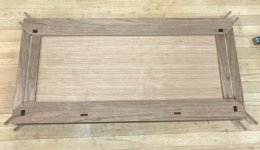
How it will look assembled, from above. You can see the groove for a future panel.

18B26EE4-FF1A-461D-BAB6-35CF5D53E14D_1_201_a.jpeg

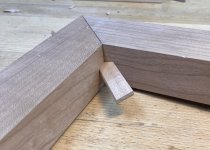
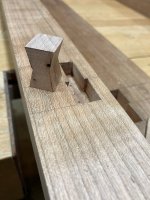
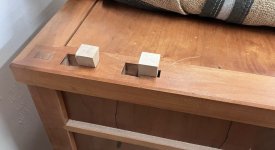
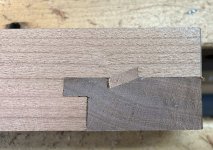
Here are the mortices for the double dovetailed keys.

47AF81BD-C84E-4B41-BE5B-E76FA1A023D3_1_201_a.jpeg

1647FB08-3207-41D0-9B98-9A15B6765FF8_1_201_a.jpeg
 
I suppose you could taper the mortices as well, that would be of a different level of bl…. difficult altogether!
All power to you Gary, I’m just glad it’s not me doing these fiendish joints.
Ian
 
I could taper them but it really isn't necessary. Instead, the mortices are square and the dovetailed keys are meant to be a press fit, slightly eased at their "front" ends before being tapped home.

Cutting them isn't that hard. Getting the layout lines in the right place is the hard part since all six mortises on one frame have to line up with the six on the other and different sized frame.
 
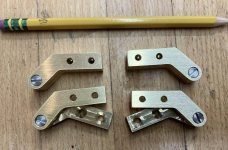
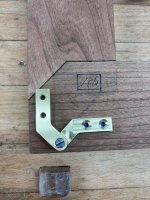
A small but important update: my retired machinist friend delivered these to me today:

2C4B437F-8642-460F-8994-D51D1020FB85_1_105_c.jpeg

He agreed to make them for me last November but I was in no hurry for them. Then in March I told him I was leaving Oregon and he and I both got serious about making them. I told him I'd be happy to pay for the time and materials but he graciously refused my offer. Said they were a going away present. Thanks, Stan!
 
Back to work on this after nine months, a cross country move, and setting up my new shop. I was relieved to find the parts for it safely packed and none missing.

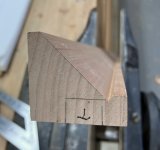
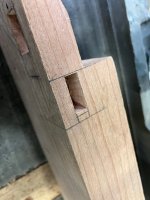
Now then, where was I? Oh yes, the top and bottom frames nearly fit and ready to work on the corner posts. Here is the profile of the left front post.

B07A5F74-7828-4AAB-A154-E9FE54B3B8B1_1_105_c.jpeg

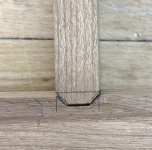
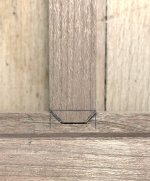
To cut that bevel I temporarily glued the two front posts together with paper in the glue line. Then ran the assembly over the table saw with the blade tilted to 45 degrees.

EA076B2D-536D-451E-83FE-80503910DB1F_1_105_c.jpeg

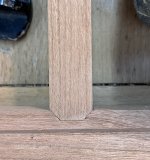
Then separated the posts and made the short perpendicular cut. I left the bevel cut a bit too wide of the line and inadvertently made it too deep. I'm not happy about that but I can make it work. Then cleaned up with a skewed rabbet plane.

3284B567-B95D-48D4-9CEE-36102ED820A3_1_105_c.jpeg

56044DB7-4A76-47CD-88FF-AA55317C95F1_1_105_c.jpeg3AA32A4C-A69E-4145-8B93-57EED996F24B_1_201_a.jpeg

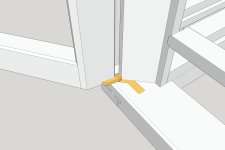
Here is how that post will look along with the hinge and door:

A35144D8-6D11-433C-888D-05EBF42006E2.jpeg

And here is a mock up that shows how the hinge allows the open door to wrap around the post and lie flat against the side of the cabinet.


0941204C-09F8-4355-9606-BD35E77F48B8.JPG
 
I'll bet it's really nice to be back to woodworking after such a long gap.
 
I for one Gary know exactly how you feel, I’ve been without a proper workshop for about 3 years now and no workshop at all at the moment, it’s going to be 6 months to get to the stage you’re at now (after our move). Well done indeed.
Getting back onto that project is great but also a remembering curve of where you got to what goes where and what to do next.
 
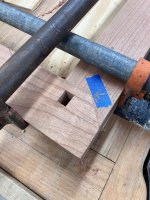
And eight mortices chopped for the post tenons top and bottom. The mortices are 12 x 18 mm. I drilled a hole first to remove some waste then chisels for the rest, entering half way from both sides. I clamped the frame together while chopping them out to make sure they stayed aligned. 0987307A-FC38-45B5-9E48-FB294D217C38.JPGDB3AAFFA-DD6C-4B02-83D6-7729A876B872.JPG
 
Parts for the drawer supports/web frames. The sides are quarter sawn sycamore and the fronts and back are cherry. They are grooved for dust panels, except for the two sides that are set into the base frame. The joinery will start tomorrow.

E7EF6EDE-55FC-4CBB-8A7E-AF581848C06E_4_5005_c.jpeg

945D31BD-68B7-4A16-A0B8-6D724DDA58A7.JPG

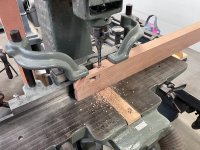
Well, there was a bit of joinery today as I fired up the morticer. There will be quite a few 1/4" wide mortices.

E51F82DB-7D09-46EC-8F49-B7ABB15FEA63.JPGCD34B573-3A65-41F3-9AB6-4ED3DF69D0D3.JPG
 
Last edited:
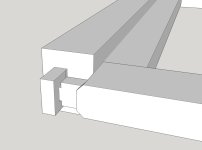
The most fiddly of the joinery I'm using for this cabinet is the connection between the front blade of the web frame, the front post, and side drawer guide. The drawer blade ends in a mitred open faced tenon. That blade also has a stepped tenon that will be draw bored into the tenon for the side drawer guide as they end inside the post. The idea, of course, is to form a rigid assembly without glue. The double mitred abutment will allow a small chamfer (not shown) to flow nicely around the corner of the drawer opening.

Here is what that will look like when assembled:
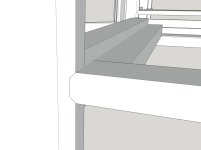
4254450C-BA1D-4AB0-BC79-4599711172BB_1_201_a.jpeg


And without the post in view:

FBDA6048-B479-4F03-957A-8B120388CD9A_1_201_a.jpeg

I used a similar joint for the web frames in the lower cabinet but without stepping the tenon. That approach left just a fragile 6 mm x 6 mm x 15 mm tenon to act as a draw bore peg and a couple of them broke off at their base during assembly. Although still small, this should be at least slightly more robust.
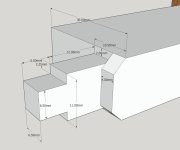
D3C56369-CED3-4507-B344-CFA45F9DD779_1_201_a.jpeg

Here is the first joint off the saw and left wide a bit wide of the lines so I can trim to fit.
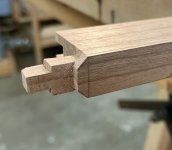
18BF2C7E-C5CE-45FA-BB8F-EDAF08E6C048_1_201_a.jpeg

For trimming to dimension I'm using a couple of paring guides, a kotenomi chisel, and calipers. Here's one tenon cheek.
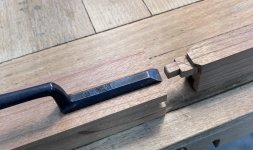
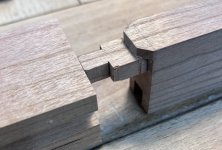
7879B93B-55BF-404D-8DF2-E68033B4714B_1_201_a.jpegCEBF4D96-5BD4-4013-B5D2-256AC417BDDD_1_201_a.jpeg

On my first joint I realized that I got the mortice in the post offset about a mm from where I wanted it so the post and web blade weren't flush.
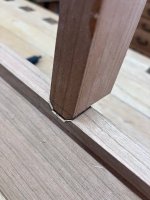
C5CE4183-6C7A-42BC-8FE1-B7E5753B7A94.JPG

So I had to add some veneer to the far tenon cheek and trim the near face back, shifting tenon 1 mm. B0BAD386-AFF0-4DAD-AAE2-11EB3E4B77C5_1_201_a.jpeg
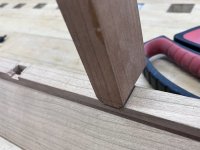
You can see I've still left the mitres fat. Those need to be carefully trimmed later. The hardest part of doing the joinery this way is that the web frame must fit precisely between posts that are already fixed in position. No room for error since there will be a gap if the blade is left too short for its mortice. It can be a just a hair too long, though since there can be some compression against the posts.

I freely admit that skipping the interlocking tenons and just gluing shorter tenons in place would be entirely adequate. But where is the fun in that?
 
One open faced, double mitred tenon fit. Here is what it looked like sneaking up on it. For the next one I'll use knife lines instead of pencil for the set out/lay out.


2BD5D45B-EAA2-4AAE-BA1E-D47E04CBEFC1_1_201_a.jpeg2A382B27-23C9-47B7-B01E-44B05B63BFAA_1_201_a.jpeg4DD94A3C-E82B-4549-8A6F-85F49211954C_1_201_a.jpeg

And slight bit of clamping pressure closes up those remaining microgaps. What might look like a gap is just a shadow line that will disappear when I flush the joints. For scale, the tenon is 15 mm wide.

EC217C5F-2479-4A1E-95EF-C06DFD48AC99_1_201_a.jpeg
 
These pieces fit between and are captured by the two front posts, like the bar in a capital letter H. The posts will be fixed by their tenons to rigid top and bottom plates.
 
Moving along and mostly fit with the posts in position. The final adjustments will come after I assemble the web frames, which is the next step. I'm happy with it so far and this view is less scary than the ghastly close-ups. The drawer openings are 75, 70, and 65 mm high.

3CFD0D00-3DB1-4977-B881-332B21D19A12_1_201_a.jpeg
 
Maybe just drop in a perfectly fitting piece of ply? Maybe so it can be lifted out to be able to screw upwards into the tool divisions that may be needed? There you are, it’s more a design feature than a hiccup now!
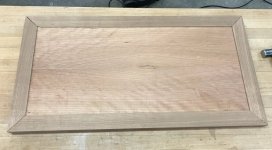
That was my first thought, too. But since the dust panel frames are still only dry fit I can easily replace the ply that is there with a solid wood floating panel that is flush with the frame surface.
 
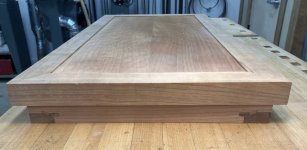
Next task is to excavate four dovetailed mortices in the bottom side of the upper cabinet base to meet with the same mortices already in place on the the top of the lower cabinet. After dropping in the dovetailed keys, these will allow me to slide and lock the upper cabinet into its final position but still allow the top cabinet to be removed if necessary. Here is the scheme:


937F2B9A-C9A1-45E8-84D2-63B896A85909_1_105_c.jpeg75E21C27-FF25-4CD9-AEF3-69FB86BBB209_1_201_a.jpeg
 
I love this type of joinery. So effective and clever a solution.
 
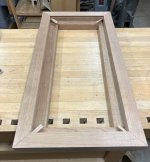
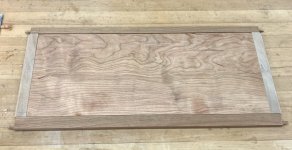
I made and test fitted solid wood panels to the top plate and cornice assemblies. The cornice didn't really need a panel but I put one in anyway so I can store things on top of the cabinet if I want to.

B711B22D-E89C-471B-AD7B-43E95AEDC903_1_201_a.jpeg06296437-145D-4CEA-882B-C7F7D1035CA5_1_201_a.jpeg

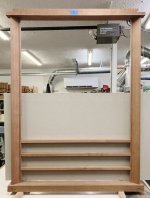
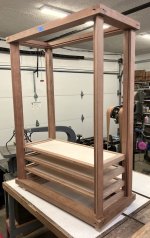
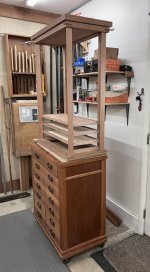
And another test fit to show where this all is headed:

AD0559E6-237B-4847-A2E0-7C41646DB715_1_201_a.jpeg
 
Last edited:
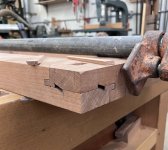
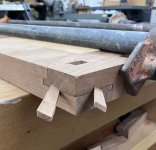
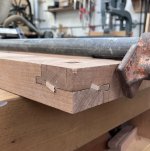
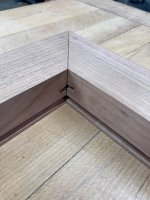
Point of no (easy) return. Tapping in the shachi sen on the base assembly. Alas, I messed up one corner with a shachi sen that was a bit too thick, which caused the lap to separate about half a mm. I tried to back the sens out but they were too tight. I'd have to drill them out now. Probably not going to do that. I'll just move on. These aren't as crisp as I'd like but will look better after finish planing and a some oil.91FADD93-AE4D-412F-A5B5-19B5911DAB52_1_201_a.jpegFF195CC9-B99E-4A2A-BE97-4A5E9E6D6666_1_201_a.jpegD4DADC52-2C60-41B2-835E-42B30084C719_1_201_a.jpegB4C91FBE-7C7E-4ABE-B354-FE4E211B3B79_1_201_a.jpegBE52F506-B2EA-4900-BA81-D56D3355ECBE_1_201_a.jpeg
 
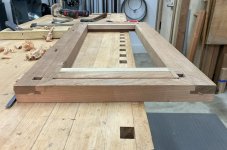
A little more of the same. The top plate has the same joinery as the base, just upside down and with a solid panel. On top of that is the cornice with locked mitred corners and a solid panel.

0C029720-F77E-457E-B8D6-F9794E0A6ED8_1_105_c.jpeg

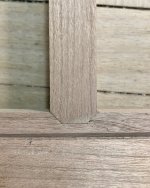
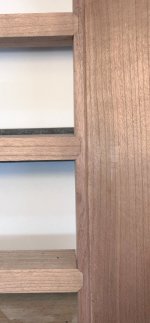
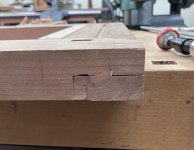
The best of the corners. Not perfect, but as good as I could do. Looks fine from normal viewing distance as you can see above.
905ADF4D-A940-49EA-9AB3-D1E0F0DD99DD_1_201_a.jpeg


EAEA9225-FA5A-43F7-ACB4-C0100D2E3DED_4_5005_c.jpeg78F624CD-C040-4FD0-9163-940C05E6ADDA_4_5005_c.jpeg
 
High resolution cameras and big screens are cruel and unnatural! Those "gaps" will disappear in real life.
 
High resolution cameras and big screens are cruel and unnatural! Those "gaps" will disappear in real life.
Absolutely. There have been several times in my last few projects when I've only realised an imperfection was there when I looked at the photo.
 
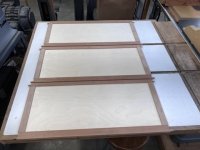
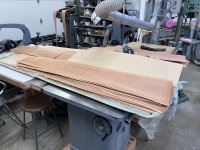
On to veneering the side and back panels. These will have a core of 6 mm birch ply. The cherry veneer is from a bundle given to me by my friend Reuben, the guy with the Bundwerk barn. This was just part of a much larger bundle that he was given by one of his home renovation clients. The gift keeps moving. The leaves are around 300 mm wide and 0.8 mm thick.

C05E0313-CB5B-4E25-9211-1D41F6BCDB93_1_201_a.jpeg


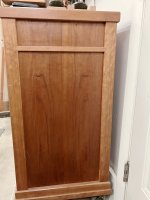
It is the same veneer that I used on the lower cabinet panels.

DD57B8B0-3DB8-476D-B293-3CAAD0DD0712_1_201_a.jpeg

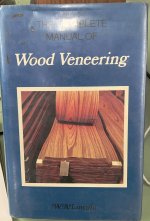
I hammer veneered those panels and I plan to do the same for the upper cabinet if I can remember how I did it back then. I'm generally following the method in this book by AW Lincoln.

665521A9-5FDE-4123-AFA2-DD70C9E3B654_1_105_c.jpeg

The hide glue recipe I'm starting with is 1 weight of glue granules:1 weight of water, plus 5% dry weight of urea. The urea is to lower the gel temperature so it will be nearly liquid at room temp, allowing a longer working time since the panels are fairly large, about 980 x 300.

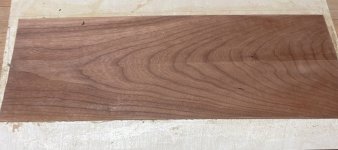
Here is a much smaller practice panel from today to see whether I could get a clean join and get the halves down flat with no bubbles. Not quite good enough but I can see the way forward. CF18817C-69FF-4908-98D1-F38D3E4783F4_1_201_a.jpeg
 
Back
Top