• Hi all and welcome to TheWoodHaven2 brought into the 21st Century, kicking and screaming! We all have Alasdair to thank for the vast bulk of the heavy lifting to get us here, no more so than me because he's taken away a huge burden of responsibility from my shoulders and brought us to this new shiny home, with all your previous content (hopefully) still intact! Please peruse and feed back. There is still plenty to do, like changing the colour scheme, adding the banner graphic, tweaking the odd setting here and there so I have added a new thread in the 'Technical Issues, Bugs and Feature Requests' forum for you to add any issues you find, any missing settings or just anything you'd like to see added/removed from the feature set that Xenforo offers. We will get to everything over the coming weeks so please be patient, but add anything at all to the thread I mention above and we promise to get to them over the next few days/weeks/months. In the meantime, please enjoy!

Chair Steps Project

rxh

Sapling
Joined
Nov 29, 2020
Messages
270
Reaction score
370
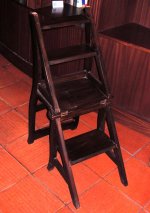
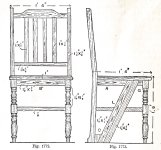
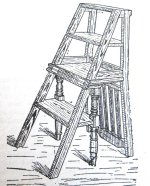
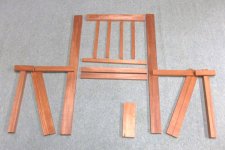
Some years ago (in 2012, I think), AndyT posted a most interesting WIP in Another Place about making a chair that converts instantly to a set of steps, useful in a library or study for accessing the upper shelves of a bookcase. A few years later, whilst on holiday in Lisbon, I saw a rather similar chair in the lobby of my hotel – these are photos of that chair. I promised myself that I would make such a chair one day. I have spent most of this year in preparing to move house, doing so and working on my new house and workshop. Having got my new workshop in some sort of order I felt like tackling a new project for the pleasure of the challenge and I recalled the chair steps. I looked up Andy’s post in the Other Place and found that all its photos were missing and it had become effectively useless. I mentioned this to Andy and he most kindly provided me with uncorrupted copies of the original posts plus many photos. Armed with this information, I have started to build the chair steps. I’ll post details here if that will be of interest.IMG_2543A.JPGIMG_2548A.JPG
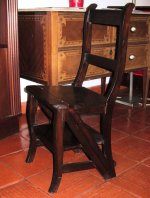
 
This one has the huge advantage of looking like a proper chair when in chair mode. I've seen some pretty clunky versions of this idea, so I'm glad you've chosen a good one to make.
 
Thanks for your comments. I am using mahogany reclaimed from old furniture and from pieces given to me some years ago. I began by sawing and planing a lot of the parts to the required widths an thicknesses, leaving them a bit over long.IMG_8077.JPG
 
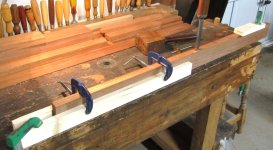
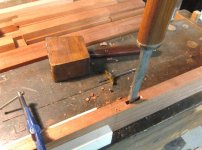
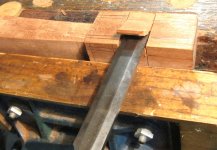
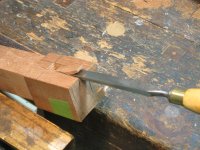
Following AndyT's example, I made the central mortices in the back legs before cutting them out of the rectangular blanks.IMG_8078.JPG

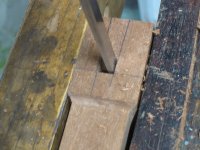
The "pig sticker" chisel in use.
IMG_8079.JPG

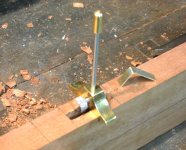
Checking the depth.IMG_8081.JPG

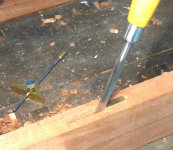
Finishing with a firmer chisel.
IMG_8082.JPG

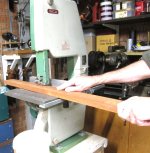
Cutting the legs out with the bandsaw.IMG_8083.JPG
 
Really pleased to see this one under way and following with great interest. I found my one was quite challenging to get right, but very enjoyable.
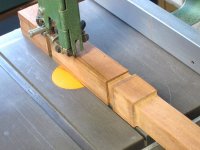
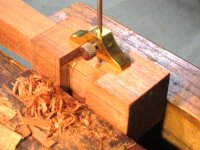
PS - That's a neat little home-made depth gauge you have there, plus an ingenious way to avoid rounding over the back of a mortise!
 
I need to get some pig stickers, someday, they are expensive.
Good progress.
Thanks. I found all my pig stickers as rusty objects with broken or missing handles. Making the handles is not difficult.
 
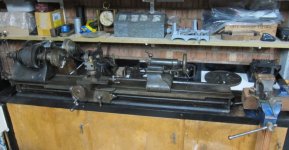
They are described in this article in the Lathes UK website:

Fascinating. I've never heard of that type before. I guessed it was probably going to look something like that from the name, but interesting nonetheless. What do you use to power yours? An electric motor of some sort presumably?

I'd love to have a go on a treadle lathe (and if I had space I'd love to have one tucked in a convenient corner of the workshop, but space is a bit of a premium in my garage).
 
  • Like
Reactions: rxh
Fascinating. I've never heard of that type before. I guessed it was probably going to look something like that from the name, but interesting nonetheless. What do you use to power yours? An electric motor of some sort presumably?

I'd love to have a go on a treadle lathe (and if I had space I'd love to have one tucked in a convenient corner of the workshop, but space is a bit of a premium in my garage).
Yes, an electric motor. AndyT also has a Barnes but with treadle drive. Although ancient they can do useful things, including ball turning and cutting very coarse thread.
 
Yes, an electric motor. AndyT also has a Barnes but with treadle drive. Although ancient they can do useful things, including ball turning and cutting very coarse thread.
Yes, I've seen pictures of AndyT's one. It looks lovely.
 
  • Like
Reactions: rxh
Yes, I'm really pleased that I have a Barnes lathe - thanks to a timely tip-off from @toolsntat eleven years ago - it's a source of much enjoyment and still in good working order after a mere century or so. The "velocipede" sort had a cast-iron seat, as found on old tractors, with a pair of bicycle style pedals, which you worked backwards. Mine is a more conventional single bar treadle, worked with one leg while standing up; probably a bigger seller in conventionally minded old England.

One of the things that convinced me I wanted one was this excellent video by Roy Underhill - I think his real pleasure in playing with one comes across very clearly.
https://video.pbsnc.org/video/woodwrights-shop-screw-cuttin-lathe/


I have looked at those chairs in the past with an envious eye, perhaps I may persuade myself that I really need one, so following with interest.
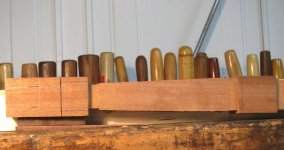
Plus one for your novel mortise end saver.
Ian
 
  • Like
Reactions: rxh
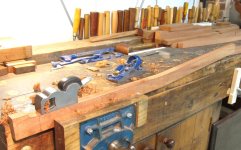
The back legs of the chair have a sort of "boomerang" shape, so each one had an easy and a less easy sawn surface to be planed.

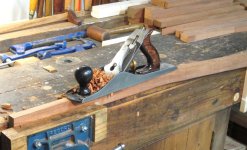
Here a Mohawk Shelburne jack plane is being used on the "easy" side:
IMG_8090.JPG

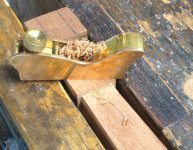
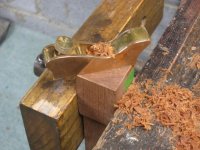
This Slater bullnose plane was just the thing for getting into the angle on the "less easy" side:
IMG_8092.JPG
 
I have never worked with Mahogany is it easy to plane? Nice wood by the way.
It is fairly easy to plane. There can be some bands of opposing grain but nothing like as bad as say sapele.
 
Here a Mohawk Shelburne jack plane is being used
That was a new one to me, that I had to search for. Not so common over on this side of the pond, I guess.
 
Also noticed a small drill press in the band saw pic. Noticed the motor, was it once a hand cranked unit?
Sorry for snooping!
 
That was a new one to me, that I had to search for. Not so common over on this side of the pond, I guess.
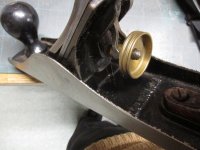
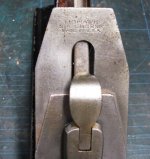
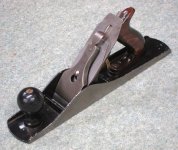
Well, I had never heard of the brand when I saw the plane for sale in a second hand tool shop for £15. Overcome by curiosity, I took a risk and bought it. It turned out to have a flat sole and it only needed a slight honing before I was making good shavings. The frog is adjustable but there is no screw for fine adjustment of the frog position. I think it is well made and I was pleased with my purchase.IMG_8158.JPGIMG_8159.JPGIMG_8160.JPG
 
Also noticed a small drill press in the band saw pic. Noticed the motor, was it once a hand cranked unit?
Sorry for snooping!
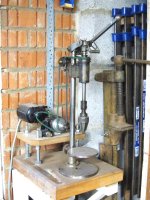
It came to me without a motor. I obtained a sewing machine motor, made a pulley for it and contrived a mounting arrangement. It has model engineer (ME) threads and has presumably been made by a skilled amateur.IMG_8157.JPG
 
Good progress and interesting, I could find a use for a step chair.

I also was intrigued by the plane and also your depth gauge, design of which I may well shamelessly copy if you have no objection.
 
  • Like
Reactions: rxh
Good progress and interesting, I could find a use for a step chair.

I also was intrigued by the plane and also your depth gauge, design of which I may well shamelessly copy if you have no objection.
Thanks. I find the depth gauge very useful and you are very welcome to copy it.
 
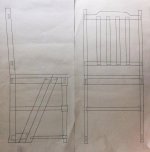
The front legs are turned in the original and I set out to turn one. I was not pleased with the result and I thought there was a poor chance of getting a second matching one before running out of wood, so I decided to follow Andy's example and make square section ones instead. I should mention that I made full size drawings of the chair, again following Andy's lead. Usually, I am happy to work from reduced scale drawings but in this case I have found the full size very useful, particularly for the non-right angled details.
IMG_8156.JPG
 
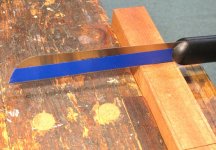
I started work on the front legs by making a series of shallow cuts, with tape on the saw as a depth guide:
IMG_8111.JPG

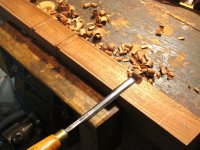
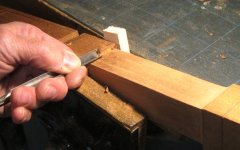
Then I chiselled out the waste between pairs of cuts:
IMG_8112.JPG

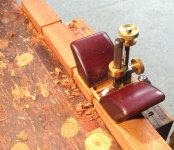
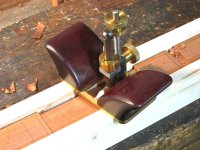
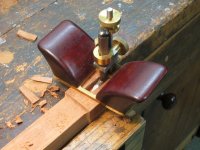
And finished the "trenches" using a router plane:
IMG_8113.JPG

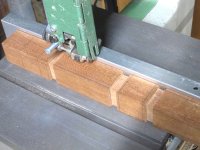
Then I removed the waste between trenches using the bandsaw:
IMG_8114.JPG

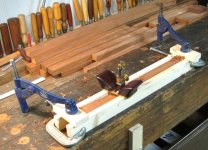
And cleaned up using the router plane running on wooden guides clamped to the leg:
IMG_8115.JPG
IMG_8116.JPG
 
Some woodwork! Excellent.

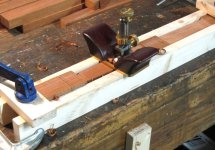
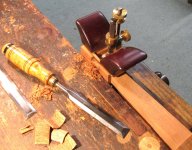
Is that piece of brass in the chopping-a-mortice photo a protection for the back edge as you lever the waste out? If so, does it work? Do you have multiple, for different width mortices?
 
  • Like
Reactions: rxh
Some woodwork! Excellent.

Is that piece of brass in the chopping-a-mortice photo a protection for the back edge as you lever the waste out? If so, does it work? Do you have multiple, for different width mortices?
Thanks. Yes, the brass is to protect the edge during levering. I have made 1/4" and 3/8" wide ones so far. They seem to be quite effective against moderate leverage, although they won't save the edge if it is too brutal. They are very quick and easy to make.
 
Thanks. Yes, the brass is to protect the edge during levering. I have made 1/4" and 3/8" wide ones so far. They seem to be quite effective against moderate leverage, although they won't save the edge if it is too brutal. They are very quick and easy to make.
Nice idea.
I suppose a piece of steel (scraper?) G cramped to the leg up to the line showing the end of the mortice would do just as well maybe. But also I always leave the last vertical slice till last so don’t really suffer from a rounding.
Ian
 
  • Like
Reactions: rxh
I removed the waste from the tapered parts of the from legs by bandsaw without using the fence:IMG_8120.JPG

I propped up one end to get it to the correct angle for cleaning up with the router plane:
IMG_8124.JPG
IMG_8121.JPG
 
I planed the tops of the front legs flat with a small low angle plane:IMG_8133.JPG

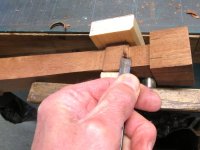
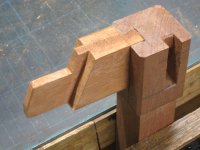
The design calls for a dovetailed joint between the short side top rail and the front leg - presumably this is to avoid the weakness of two tenons intersecting inside the top of the leg. I made the joint as a tapered dovetailed housing using the method described by Charles Haywood in his book "Woodwork Joints". After marking with a pencil I chopped a small recess at the end of the housing with a chisel:IMG_8134.JPG

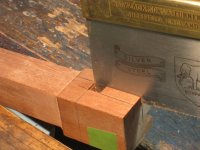
Then I made a vertical saw cut along one side of the housing:IMG_8135.JPG

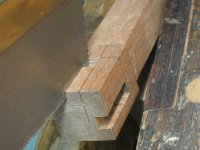
Then a sloping saw cut on the other side of the housing:
IMG_8138.JPG

I removed most of the waste with a chisel:IMG_8139.JPG

Then I finished to depth with the router plane:
IMG_8140.JPG

I cut a slightly oversize tapered dovetail on the end of the rail and gradually pared it down until I got a good fit:IMG_8164.JPG
 
Back
Top