• Hi all and welcome to TheWoodHaven2 brought into the 21st Century, kicking and screaming! We all have Alasdair to thank for the vast bulk of the heavy lifting to get us here, no more so than me because he's taken away a huge burden of responsibility from my shoulders and brought us to this new shiny home, with all your previous content (hopefully) still intact! Please peruse and feed back. There is still plenty to do, like changing the colour scheme, adding the banner graphic, tweaking the odd setting here and there so I have added a new thread in the 'Technical Issues, Bugs and Feature Requests' forum for you to add any issues you find, any missing settings or just anything you'd like to see added/removed from the feature set that Xenforo offers. We will get to everything over the coming weeks so please be patient, but add anything at all to the thread I mention above and we promise to get to them over the next few days/weeks/months. In the meantime, please enjoy!

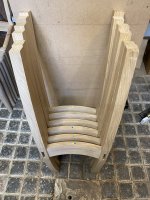
Chairs - Done!

Slow progress this week.

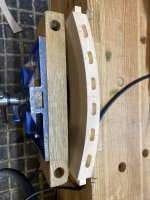
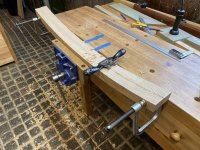
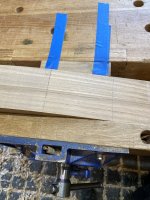
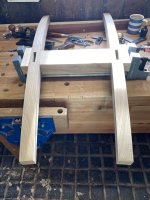
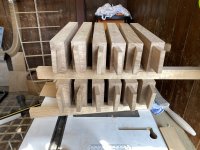
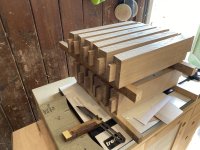
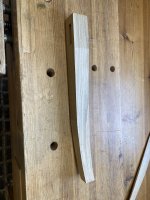
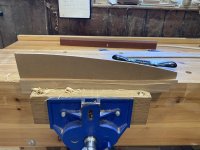
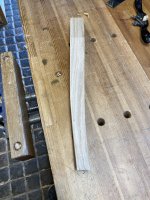
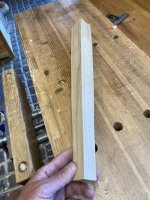
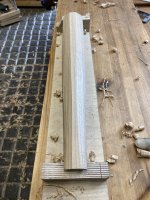
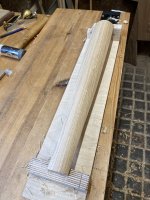
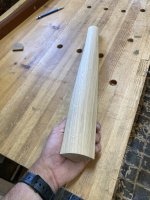
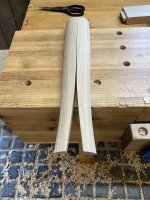
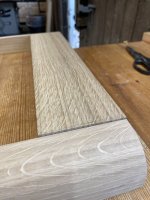
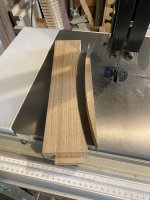
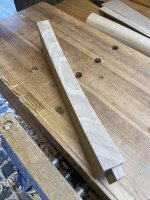
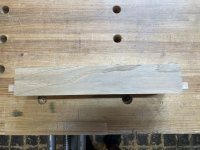
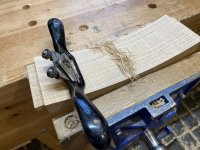
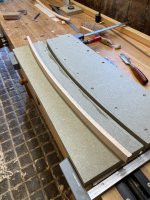
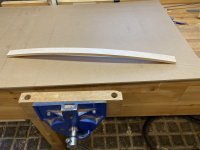
I made a "mould" for laminating the back bars and had a go at making a couple. The first one was 25mm wide and 8mm thick. It looked a bit weedy and felt a bit too bendy, so I increased it to 30mm x 10mm. Much better.
IMG_3676.jpeg

IMG_3680.jpeg

The bars have five, 2mm thick layers. I'm actually trying to get them a touch over 2mm so I can then fettle them for a tight fit in the 10mm mortises.

Annoyingly, I wasted a couple of hours on this because my drum sander decided to stop working. The drum span, but the conveyor belt wouldn't move. I took it apart. I couldn't see anything wrong but it started to work again. Probably a loose/bad connection. I hope it's not going to be one of those troublesome ongoing problems.

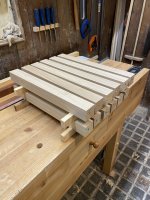
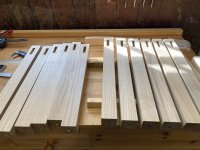
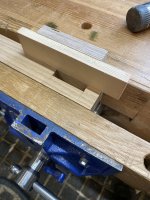
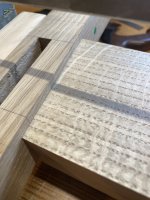
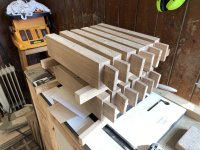
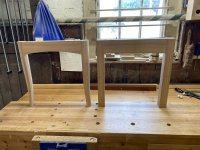
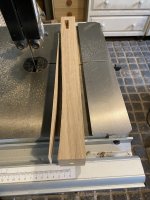
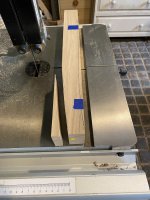
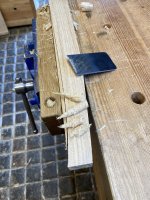
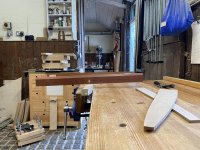
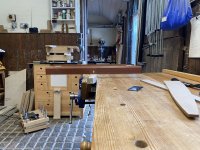
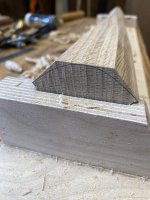
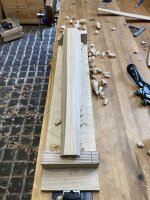
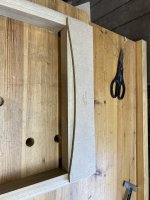
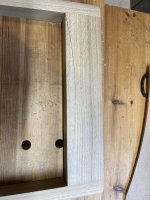
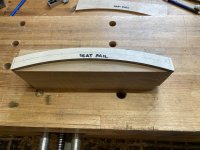
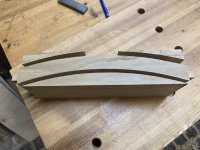
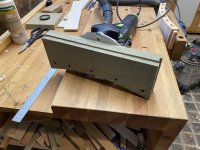
I've also made a jig for cutting the mortises in the seat rail.
IMG_3678.jpeg

IMG_3677.jpeg

IMG_3679.jpeg

I'll square the ends of the mortises by hand.

I'm normally keen to do things by hand where possible by this is going to save a lot of time. It's also not all that easy to lay out the mortises tangent to a curved surface.

I need to make a similar jig for the crest rail, but that will be harder to make as the faces of the crest rail aren't square to the bottom and the mortises also need to be angled. I've got some thinking to do!
 
A lot going on. Did you make that laminated bar using just two clamps? If so you did very well or when I was laminating bars for rocking chairs the 10 clamps were overkill.
The jig for the mortises looks like a very efficient solution. It will save a lot of time.
 
A lot going on. Did you make that laminated bar using just two clamps? If so you did very well or when I was laminating bars for rocking chairs the 10 clamps were overkill.
The jig for the mortises looks like a very efficient solution. It will save a lot of time.
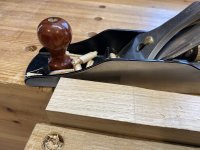
No, there were lots of clamps. That photo was after I used the mould as a way of holding the bar while I planed the edges. 2 clamps at the ends held it tight enough to be able to plane it.
 
Slow progress this week.

I made a "mould" for laminating the back bars and had a go at making a couple. The first one was 25mm wide and 8mm thick. It looked a bit weedy and felt a bit too bendy, so I increased it to 30mm x 10mm. Much better.

View attachment 32317

View attachment 32318

The bars have five, 2mm thick layers. I'm actually trying to get them a touch over 2mm so I can then fettle them for a tight fit in the 10mm mortises.

Annoyingly, I wasted a couple of hours on this because my drum sander decided to stop working. The drum span, but the conveyor belt wouldn't move. I took it apart. I couldn't see anything wrong but it started to work again. Probably a loose/bad connection. I hope it's not going to be one of those troublesome ongoing problems.

I've also made a jig for cutting the mortises in the seat rail.
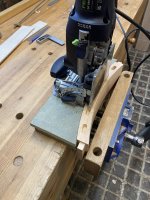
View attachment 32319

View attachment 32320

View attachment 32321

I'll square the ends of the mortises by hand.

I'm normally keen to do things by hand where possible by this is going to save a lot of time. It's also not all that easy to lay out the mortises tangent to a curved surface.

I need to make a similar jig for the crest rail, but that will be harder to make as the faces of the crest rail aren't square to the bottom and the mortises also need to be angled. I've got some thinking to do!
That is a neat jig Nick, nice accurate mortises.
 
Gosh, two months since I posted anything on this.

I haven't made a huge amount of progress due to some holidays and also a stupid accident while template routing the legs. I'm not going to go into detail on what happened but suffice to say I took a chunk out of my left index finger which needed a little skin graft to fix. Other than a numb patch on the side of my finger, there are no longer term consequences. Be careful out there!
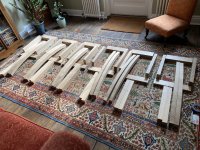
What I have done on the chairs, is to make a start on the actual components. The first step was to lay everything out to try to match up colour and grain as far as possible.

IMG_3692.jpeg

I then hand planed the front legs down to their final dimensions (checking for twist and squareness etc.).

IMG_3693.jpeg

I decided to drill out most of the waste for the mortises and then pare the rest using a jig much like the one discussed on another recent thread. The main reason for doing it this way was the ease of getting a consistent depth. I have mortises at ninety degrees to each other and didn't want one coming through to the other.

IMG_3697.jpeg

IMG_3696.jpeg

I made and fitted the tenons in the front rails but haven't got photos of that. I've put the front leg/rail assemblies to one side for now.

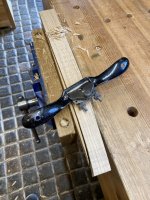
It was at this point that I turned my attention to the rear legs and got bitten by my router. As punishment for my stupidity, I instead spokeshaved the final shape in the legs, and planed the flat section where the side rails come in.

IMG_3717.jpeg

IMG_3718.jpeg

I then went on holiday for a couple of weeks, including a few days at 'home' in Guernsey where I caught a PB bass!

IMG_0648.jpeg
 
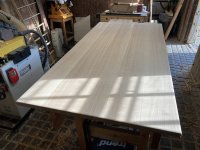
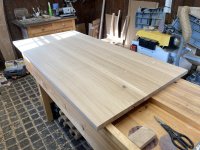
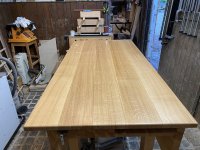
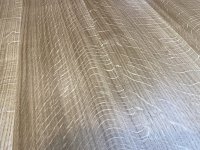
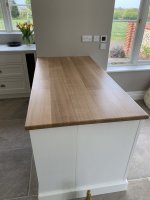
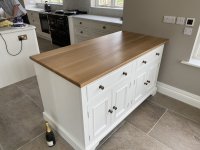
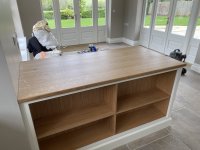
I then paused on the chairs to make an oak top for a unit in my parents in-laws' kitchen in the new house they're building. They had a cupboard they wanted to use and their kitchen maker made a book case to go on the back of it. They asked me to make a top which I've done with some nice quarter-sawn boards (same oak as I'm making the chairs from).

This is it after I'd scribed it to the wall and planed the round overs (I decided it would be fun to do them by hand, just eye-balling the shape), but before oiling:

IMG_3785.jpeg

IMG_3786.jpeg

And after oiling:

IMG_3787.jpeg

IMG_3788.jpeg

And installed:

IMG_3790.jpeg

IMG_3791.jpeg

IMG_3792.jpeg

They seem happy with it which is good!
 
Nice to see some progress, Nick. I was wondering about this, and the other chair thread (@PAC1), whilst I was away, so it's good to see an update for both awaiting me on my return. You were lucky with all that quarter-sawn oak for the island unit.
 
Gosh, two months since I posted anything on this.

I haven't made a huge amount of progress due to some holidays and also a stupid accident while template routing the legs. I'm not going to go into detail on what happened but suffice to say I took a chunk out of my left index finger which needed a little skin graft to fix. Other than a numb patch on the side of my finger, there are no longer term consequences. Be careful out there!

What I have done on the chairs, is to make a start on the actual components. The first step was to lay everything out to try to match up colour and grain as far as possible.

View attachment 33327

I then hand planed the front legs down to their final dimensions (checking for twist and squareness etc.).

View attachment 33328

I decided to drill out most of the waste for the mortises and then pare the rest using a jig much like the one discussed on another recent thread. The main reason for doing it this way was the ease of getting a consistent depth. I have mortises at ninety degrees to each other and didn't want one coming through to the other.

View attachment 33329

View attachment 33330

I made and fitted the tenons in the front rails but haven't got photos of that. I've put the front leg/rail assemblies to one side for now.

It was at this point that I turned my attention to the rear legs and got bitten by my router. As punishment for my stupidity, I instead spokeshaved the final shape in the legs, and planed the flat section where the side rails come in.

View attachment 33331

View attachment 33332

I then went on holiday for a couple of weeks, including a few days at 'home' in Guernsey where I caught a PB bass!

View attachment 33333
Nick, how do you prepare and cook the bass, weight looks around 6 kg.?
 
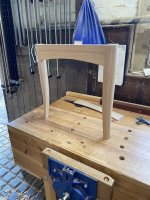
I've been making a bit more (glacial) progress on the chairs by doing the joinery on the rear seat rail. The tenon shoulders are angled to account for the splay of the legs. I realised that I should have angled the mortises in the legs, but didn't do that so had to angle the tenon instead. I don't think that matters because it's a very wide tenon and the very small area of grain runout won't have a big impact on strength.

IMG_3872.jpeg

IMG_3877.jpeg

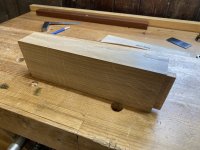
The rail is very thick because I'm going to shape it into a curve. It's going to be 'interesting' to see how much movement that creates in the rail. It probably would have been better to laminate that component, but that would have been a faff and the curve isn't too tight so hopefully it will be OK.
 
Looking good.
Angled tenons versus angled mortices are a difficult choice and angled mortices create their own problems especially when angled in both directions. There is no perfect answer just degrees of compromise.
 
Scandalous. How on earth can you expect to do decent woodwork fuelled by coffee?! Did you run out of tea bags? :ROFLMAO:
 
Last edited:
I've made a bit more, but very slow, progress on the chairs.

The side rails are probably the most complex parts because of the angles involved. In particular, the tenon which goes in (and through) the rear leg is angled in three-dimensions to take account of (a) the rake of the seat, (b) the taper of the seat, and (c) the tilt of the rear legs (I wanted to keep the wedged tenon parallel to the leg so the tenon has to be angled). The tenon for the front legs is angled in two dimensions.

I guess it would have been possible to make a jig to do these on a bandsaw or table saw, but I'm not in a hurry and decided to do them by hand. They got faster as I went along. The slowest bit was paring the thickness of the rear tenons down to fit the mortises. As they're through tenons, they need to fit really well (I also spent a lot of time making sure the mortise was even width.

They're all done now. The shoulders fit pretty well, but I haven't agonised over tiny gaps at this stage as I'm fairly sure they'll need some tweaking when I come to do the final fit with all of the components in position.

IMG_3973.jpeg

IMG_3972.jpeg

IMG_3974.jpeg

I think the next stage will be to do most of the shaping on the front legs and front rail and get those glued up, but that will have to wait for a while until I'm back from a trip to Guernsey.
 
Thinking out loud........ it's the same angles for all of them, but "handed", right? There would be a great chance of cocking that up, by going the correct way for two, but the wrong way for a third. I bet you developed quite a marking system to make sure you got it right.
 
Thinking out loud........ it's the same angles for all of them, but "handed", right? There would be a great chance of cocking that up, by going the correct way for two, but the wrong way for a third. I bet you developed quite a marking system to make sure you got it right.
Yep. With most chairs you can choose which to make difficult either the tenons or the mortises. I chose the mortises. Nick chose the tenons. At the risk of starting a “sharpening” argument I am not sure if one is easier than the other. I was driven more by where I wanted to place the weak point in my chairs.
 
Thinking out loud........ it's the same angles for all of them, but "handed", right? There would be a great chance of cocking that up, by going the correct way for two, but the wrong way for a third. I bet you developed quite a marking system to make sure you got it right.
Yes, they're left and right handed! Or at least I hope they are...:ROFLMAO:
 
Yep. With most chairs you can choose which to make difficult either the tenons or the mortises. I chose the mortises. Nick chose the tenons. At the risk of starting a “sharpening” argument I am not sure if one is easier than the other. I was driven more by where I wanted to place the weak point in my chairs.
I agree, I don't think there's a particularly right or wrong way, just different trade offs.
 
I'm back from Guernsey where the fishing was decent. 5 bass in total. 3 were just under the 42cm limit so went back. The one in the photo above fed 5 of us and I gave the fillets from the other one, which was a bit smaller, to my aunt who was very pleased!

I've managed to do a bit of work on the chairs since I got back.

The current task is doing the shaping on the front legs and front rail. I need to get from the clunky one on the right to the svelte one on the left:

IMG_4004.jpeg

I used a template to draw the lines on the legs and bandsawed most of the waste off. Between cuts, I taped the waste back on so I had the lines to work to.

IMG_4005.jpeg

IMG_4006.jpeg

That gave me this.

IMG_4007.jpeg

I used the template to draw the lines back on so that I could work down to those.

The top part of the leg is 'vertical' so I worked that down to the line with a hand plane.

IMG_4008.jpeg

Then it was a case of working down to the pencil lines on the rest of the leg with a spokeshave and scraper.

IMG_4009.jpeg

IMG_4012.jpeg

I could check the curve against the template and also use winding sticks to make sure the curved faces are parallel with the square top of the leg.

IMG_4010.jpeg

wonky..

IMG_4011.jpeg

good enough

IMG_4013.jpeg

That left me with a shaped leg with square cross-sections.

IMG_4014.jpeg

IMG_4015.jpeg

That's the "easy" bit, but I now needed to round over the outside face of the leg. I think the best (only sensible?) way of doing this is to create smaller facets and gradually shape those to a smooth curve. There's probably a way of drawing lines to work to, but the curves and the fact that the round over isn't (deliberately!) an arc of a circle make that tricky. I found a method which was repeatable and which didn't rely on (too much!) guess work.

Step one is to make a large facet on the outer corner of the leg. Much of the waste could be removed with a chisel, but I found that a hand plane, block plane and spokeshave got the job done pretty quickly. This facet can be checked by creating a tangent with the curve marked on the top of the leg and by using the template.

IMG_4017.jpeg

IMG_4018.jpeg

The adjacent facets can also be measured at various points to check they are even. That left this:

IMG_4019.jpeg

From there, I felt comfortable just creating two new facets on either side and then it was just a case of taking off the edges between facets with lighter cuts. I got it very close with the spokeshave and then finished it off with sandpaper.

IMG_4021.jpeg

IMG_4022.jpeg

IMG_4023.jpeg

Then I did it all again on the other leg

IMG_4024.jpeg
 
The front rail has a large curve on the underside and also a subtle curve on the front face. The front face curve essentially involves bringing the outer edges down to the legs; i.e. removing this step in a gradual curve towards the centre of the rail.

IMG_4025.jpeg

I started with the curve on the underside, marking it out with a template and then band sawing the waste before cleaning that up with a spokeshave and scraper (checking the curved edge is square).

IMG_4026.jpeg

IMG_4027.jpeg

IMG_4028.jpeg

IMG_4029.jpeg

The bulk of the shaping on the front face is done by cross-grain planing until it's close to flush with the leg. I then attached the leg and very carefully brought the rail flush with the leg. Using a blade across a joint with perpendicular grain is risky because it's easy to get tear out. I got them as close as I dared and then finished it with sandpaper.

This one is done, just four more to do.

IMG_4032.jpeg
 
Excellent Nick. And your workshop looks astonishingly clean and tidy.
 
Last edited:
I finished shaping the front legs and front rails. They all look roughly the same and, importantly, I didn't shape away into the mortises which is a concern I had in the back of my mind!

IMG_4046.jpeg

The next job I decided to tackle was shaping the rear rails.

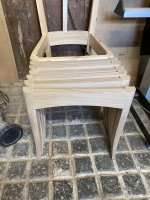
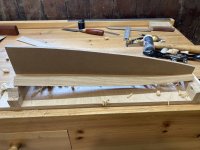
These started out as thick (c.50mm) blocks which had angled shoulders to reflect the tilt of the back legs. The thickness was there to enable me to cut the curve I wanted.

IMG_4036.jpeg

The curve was marked on with a template a made and then cut close to shape with the bandsaw.

IMG_4037.jpeg

IMG_4038.jpeg

IMG_4039.jpeg

I suppose I could have only cut the outside curve (which is the surface that will be seen) and just rebated the inside curve for the seat. That might have made this component a bit stronger, but I think it will be plenty strong enough and it would look and feel a bit clunky when the chair is picked up or looked at from underneath. My plan is for the seat to have some support at the back from the braces and cutting both faces will keep the weight down a bit.

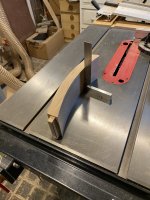
It was then a case of spokeshaving to clean up the saw marks and to get down to the line. I used my table saw bed as a reference to make sure I was keeping the faces square/vertical.

IMG_4040.jpeg

IMG_4042.jpeg

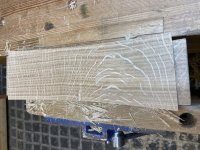
I love the effect that curving a surface has on the medullary rays, creating arches where the grain changes direction in the curve.

IMG_4041.jpeg

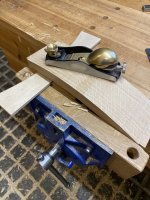
Shaping the convex side was the same process although I used a mixture of spokeshave and block plane. I found the longer sole of the plane helped achieve a fairer curve.

IMG_4044.jpeg

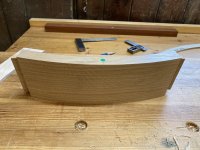
One finished rail:

IMG_4045.jpeg

These didn't take very long to do and I've now completed the set.

IMG_4047.jpeg

I think the next task I'm going to tackle is tapering the legs. They are tapered from the top of the rear rail upwards and from the bottom of the rear rail downwards. The taper is all on the inside edge of the leg which accentuates the splay of the seat back and also leaves a flat surface on the outside edge of the leg from top to bottom.
 
There is such a lot of work in a set of chairs!
Tell me about it🤔
A common or garden thing that tests your skill and packs an incredible amount of work into each one. I am fed up with sanding. I think I have another week of it!
Nick - looking good.
 
Back
Top