• Hi all and welcome to TheWoodHaven2 brought into the 21st Century, kicking and screaming! We all have Alasdair to thank for the vast bulk of the heavy lifting to get us here, no more so than me because he's taken away a huge burden of responsibility from my shoulders and brought us to this new shiny home, with all your previous content (hopefully) still intact! Please peruse and feed back. There is still plenty to do, like changing the colour scheme, adding the banner graphic, tweaking the odd setting here and there so I have added a new thread in the 'Technical Issues, Bugs and Feature Requests' forum for you to add any issues you find, any missing settings or just anything you'd like to see added/removed from the feature set that Xenforo offers. We will get to everything over the coming weeks so please be patient, but add anything at all to the thread I mention above and we promise to get to them over the next few days/weeks/months. In the meantime, please enjoy!

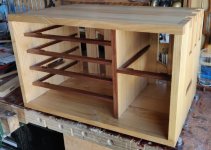
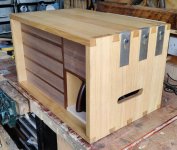
Holiday Toolchest

Dr.Al":13pgcj9c said:
......Another potentially easier option is just to shorten the plywood a bit and stick a bit of walnut over the end. We shall see.

If you choose this route, then maybe have a think about leaving the walnut strip deliberately raised above the ply so that you don't have the hassle of trying to plane it flush. A little rebate on the back of the walnut strip to meet the ply would leave everything quite neat.
 
Drawer stop for the bottom one could just be a small piece of wood glued to the vertical bars at the back, keep planing till the fronts are the right distance in. You could also put a rare earth magnet in there to hold the drawer shut. Looking like you almost know what you’re doing, that’s what my son and I used to say.
Ian
 
Mike G":292xy8rq said:
Dr.Al":292xy8rq said:
......Another potentially easier option is just to shorten the plywood a bit and stick a bit of walnut over the end. We shall see.

If you choose this route, then maybe have a think about leaving the walnut strip deliberately raised above the ply so that you don't have the hassle of trying to plane it flush. A little rebate on the back of the walnut strip to meet the ply would leave everything quite neat.

Thanks Mike, that's a good idea

Cabinetman":292xy8rq said:
Looking like you almost know what you’re doing, that’s what my son and I used to say.

That's definitely not true :lol:
 
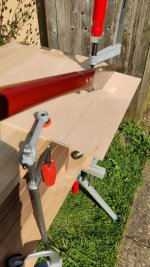
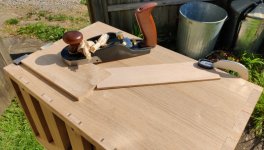
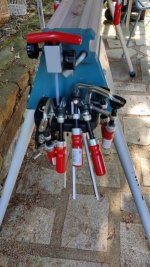
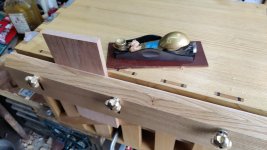
Rather than getting straight on with a (probably temporary) front for the chest, I thought I'd start the day with a quick trial run. I dug into the shed and pulled out my Makita mitre saw stand (which a kind member of another forum offered for free a few years ago) - I don't have a mitre saw any more, but I've kept the stand as it is very robust and comes in handy occasionally.

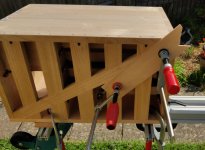
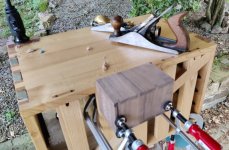
I clamped the box down to the stand and cut a strip off a bit of plywood:

01_sawing_doe.jpg

I then clamped the plywood to the back slats and sawed a notch:

02_sawed_doe.jpg

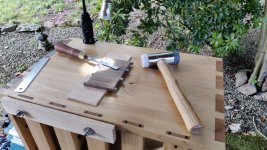
Finally, I used the planing stops and the notched "doe's foot" (I think that's what they're called) to plane the surface of a random offcut of sweet chestnut.

03_planing.jpg

By Jove, it works! :D
 
I can imagine that you will draw quite a crowd when you sit down in earnest in a campsite somewhere and start to use that box.
 
Andyp":kamxfq2h said:
I can imagine that you will draw quite a crowd when you sit down in earnest in a campsite somewhere and start to use that box.

Absolutely, you could take orders, now, how many hours has it taken? Yep, that’s the problem with making things, they become unaffordable.
 
Andyp":2qzjhab6 said:
I can imagine that you will draw quite a crowd when you sit down in earnest in a campsite somewhere and start to use that box.

Campsite?! Sorry to disappoint, we're not slumming it on this trip :lol: We've booked a self-catering cottage in the middle of nowhere, so I doubt there will be much of a crowd...

Cabinetman":2qzjhab6 said:
Absolutely, you could take orders, now, how many hours has it taken? Yep, that’s the problem with making things, they become unaffordable.

I've lost count of the hours, but I can say with some certainty that I won't be taking many orders: something tells me that the travel toolchest-cum-hand-tool-woodworking platform is a bit niche :lol:

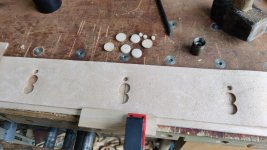
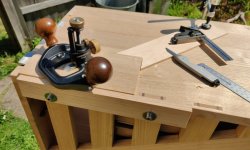
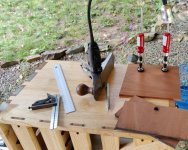
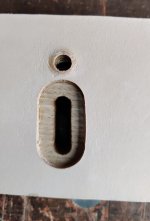
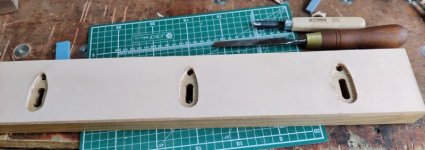
In a bid to put off thinking about the front :) I grabbed an offcut of ash and drilled four holes before turning them into slots with fretsaw and chisel. I then screwed it to the back of the chest and tried out another work holding method. This also worked well:

04_router.jpg

This was one I'd been a bit concerned about: having access to the whole of the top surface of the workpiece, but it worked fine, so I needn't have worried.

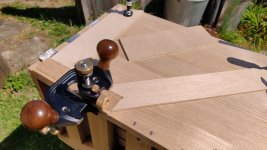
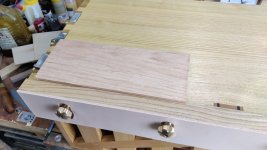
The final test before I completely run out of excuses to get on with something useful: ploughing a groove with the fence attached to the router plane. I had to make a longer doe's foot for this one, but the shorter one was useful to support the front edge of the to-be-grooved off-cut:

05_groovy.jpg
 
That’s good Al, I had wondered if those lift up stops would be strong enough, I can’t remember now how you attached them, but well enough obviously.
Like the planing stick fastened to the side as well. Do you remember about a year ago I recommended Mike Siemsen's work holding to you? Well you’ve done him proud.
Ian
 
Cabinetman":2isgzgmm said:
That’s good Al, I had wondered if those lift up stops would be strong enough, I can’t remember now how you attached them, but well enough obviously.
Like the planing stick fastened to the side as well. Do you remember about a year ago I recommended Mike Siemsen's work holding to you? Well you’ve done him proud.
Ian

Thanks Ian.

The planing stops are attached with M6 screws into a 10 mm square stainless steel bracket on the inside of the chest. The bracket is screwed to the top with wood screws. I wanted the force of planing to be transferred into the top rather than the sides (so that I don't gradually pull the dovetails apart!). Time will tell how the wood screws into the top cope.
 
:o :o :o :o :o :o :o :o :o :o :o

WARNING: This post contains lots of scraggy wood and bodgery, along with a bit of power tool usage

:o :o :o :o :o :o :o :o :o :o :o

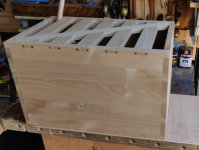
Part of the reason I've been putting off thinking about the front of the chest is that the final front of the chest is going to be quite complicated to make. I want it to double as a shooting board (preferably along the lines of my large one, which is one of my favourite tools).

However, making that in a way that looks pretty when the chest is closed is going to be quite complicated. It'll need to be about the right thickness (so it is robust but sits slightly sub-flush with the front) and will need to have all the various rebates or whatever that are required to make it work as a shooting board. It'll also need to be made in such a way it won't warp too much with humidity variation.

All in all, I need a bit more time to ponder on it and I decided that the best thing to do for now is a temporary bodge to keep the drawers shut without worrying about looks or shooting-board-ability (for this trip, I'll just take my big shooting board).

With that decided, I started on said bodge!

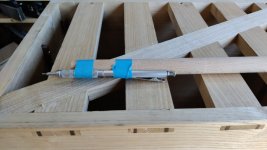
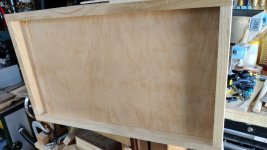
I had a conveniently sized but rather shabby bit of 12 mm plywood, so I laid it on the bench and plonked the chest, front-size down, on top of it. I then used a pencil taped to the end of a dowel:

02_dowel.jpg

to mark round the edge of the chest:

01_dowel_assisted_markup.jpg

I then sawed it to the line and tweaked with a plane until it was an easy fit:

03_plane_to_fit.jpg

While it was there, I used the pencil-on-a-dowel to mark along the underside of the right-hand drawer divider; more on that later...

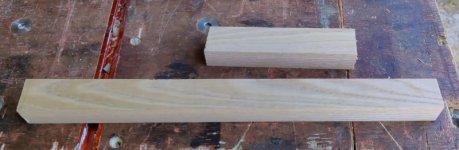
I had some offcuts of sweet chestnut that were about 25 mm thick, so I planed them smooth and cut some 30 mm slices off:

04_offcuts.jpg

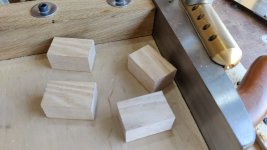
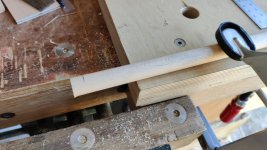
I then chopped off a few 45 mm lengths and shot them square:

05_shot_to_length.jpg

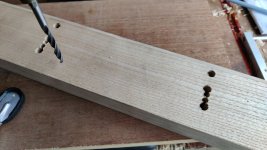
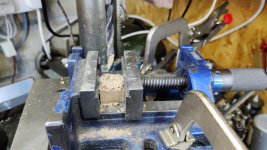
As this isn't part of the "real" chest and as I wanted to get this job done quickly, I used the electric pillar drill to make some holes: 7 mm through, then 8.8 mm (if memory serves correctly) 25 mm deep, followed by a 16 mm Fortsner bit down to 12 mm deep. I then flipped it over and counterbored it 12 mm to about 8 mm deep.

06_power_drill.jpg

A bit of 16 mm dowel was shot square on the end and then a 10 mm slice cut off. I repeated that four times:

07_dowel_to_10mm.jpg

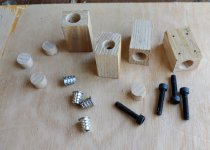
That gave me this little pile of bits:

08_bits.jpg

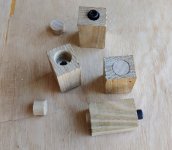
Assembled thus:

09_bits_assembled_ish.jpg

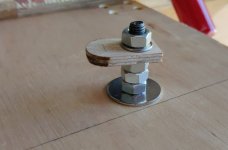
That's probably good enough to hold the front in place, but as a belt-and-braces sort of thing, I added an M8 countersunk screw (which has the same hex socket size as the M6 cap screws used in the threaded inserts), some nuts and washers and a bit of plywood:

10_belt_and_braces.jpg

It turns reasonably easily with a 5 mm hex key and the plywood latch thing pops up behind the drawer divider on the right-hand side.

With that, the scruffy and temporary front thingamebob is fitted:

11_fitted.jpg

As a test, I undid the plywood latch thing and pushed on the drawers from the back; it didn't move at all. I then undid the beech dowel corner pressy things (if you'll forgive the technical terminology) and closed the plywood latch thing: again the front was held reasonably firmly in place.

That should do to keep the drawers shut for this trip away. As long as I remember to leave the 5 mm Allen key outside of the chest, I should be able to open it too :lol:

With that done, I can put off worrying about how to make the chest-front-cum-shooting-board until after the holiday :)
 
All together now...

2kaIFEL.png 2kaIFEL.png It's a kind of magic, a kind of magic... One dream, one soul ... 2kaIFEL.png 2kaIFEL.png

01_magic.jpg

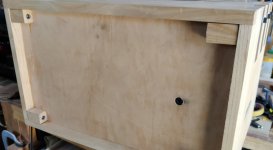
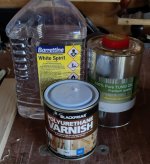
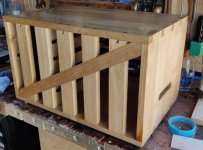
The first coat of the Mike's Magic Mix has been applied. Having done one coat I can say with some certainty that the inside of this chest isn't going to have very many coats at all :D Getting the stuff on was hard enough (with a foam pad on a long stick), wiping it off was even worse. The gap between the upper drawer dividers is too narrow to get my hand in between, as is the gap between the slats on the back. Hopefully one (or if I can face it) two coats will be plenty.

I'll give the outside faces four coats probably.

02_back.jpg

03_front.jpg

The drawers (and the scraggy temporary front for that matter :D ) aren't going to get any finish applied until they're much closer to finished (with the fronts planed down and the knobs on). That'll be after the holiday, but I thought it would probably help protect the chest itself if it had a bit of finish applied.
 

Attachments

  • 01_magic.jpg
    01_magic.jpg
    219.9 KB · Views: 17,059
  • 02_back.jpg
    02_back.jpg
    175.8 KB · Views: 17,059
  • 03_front.jpg
    03_front.jpg
    176.6 KB · Views: 17,059
If you cast your mind back to page 7 of this thread, you might remember that my marking gauge is too big to fit in the drawers. I think the best solution to this is going to be a new body made out of circa 50 mm diameter brass with flats on two sides so that the height is only about 30 mm and hence it'll fit in a drawer.

There's currently some rather large planks of sweet chestnut blocking access to my brass drawer at the moment, so as an interim I decided to use a bit of 30 mm brass that was on the bench.

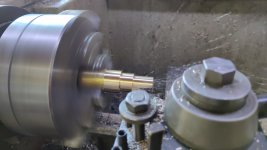
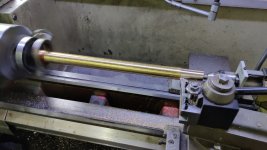
It's unpleasantly hot in the metalworking end of the garage at the moment but needs must. A bit of turning:

01_lathe.jpg

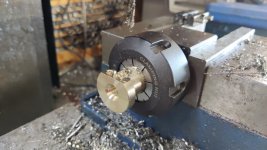
Then a simple bit of milling (for an anti-roll flat) and a tapped hole in completely the wrong place (I blame the heat):

02_whoops.jpg

Then turn it through 90° and another tapped hole, this time in the right place:

03_better.jpg

That'll do for now. It doesn't have much of a registration surface, but it'll only be used for small scale stuff (boxes). I'll make another one out of some bigger brass once I can get to it :)

04_do_for_now.jpg
 
The problem with oiling wood is that it shows up all the problems ;)

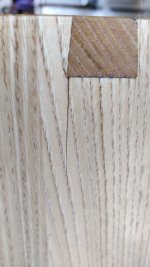
I'd looked over the chest (what I thought was) very carefully, but hadn't seen this crack until the oil went on. I guess my dovetails were a bit tighter than I thought :(

01_crack.jpg

It's not visible from the (also oiled) inside surface, so at least the crack doesn't go all the way through. I'm sure it won't affect the strength of the chest much but it's a bit disappointing. I'm not sure whether there's anything good that can be done; the only thought I've had so far is sand the oil off and then use some sawdust/superglue to fill it in. I'm not sure whether that will make it look worse though.

Anyway, that's going to have to be something to think about post-holiday.

In the meantime, I've now given the inside awkward bits one coat of MMM, the relatively accessible with stretched fingers surfaces two coats and all the easy to get to bits three coats. That's all I've got time for I think.

This evening I started chucking things in the drawers to fill it up:

02_loaded_chest.jpg

03_loaded_chest.jpg

I'm very, very happy to say that I can lift it without too much difficulty! I wouldn't want to hike up a mountain carrying it, but to and from the car should be okay.

I need to work on something to stop things rattling around in the car during the drive and ferry crossing, but for this trip that might be very temporary and consist of bubble wrap and masking tape. I'd welcome other suggestions though.

Partly for my record (so I know what to put where for the return journey) and partly in case anyone else is interested, this is what ended up in the chest thus far.

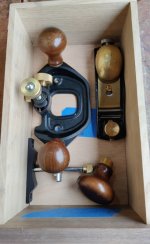
Right-hand side drawer: router plane and block plane and a lot of space really.

04_upper_right.jpg

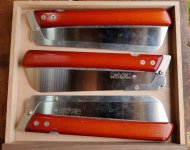
Left hand side, first drawer: saws.

05_l1.jpg

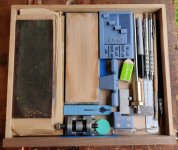
Second drawer: sharpening stuff, pencils, rules, glue brushes and some other miscellany.

06_l2.jpg

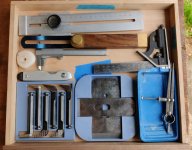
Third drawer: more marking stuff, router cutters (in a 3D printed tray to protect the edges), the other blades for the two LA planes (again in a 3D printed tray), silicone glue tray and the all-important tea‑light.

07_l3.jpg

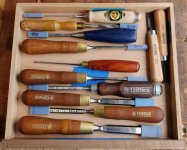
Fourth drawer: lots of chisels. Still need a 3D printed end cap for the 3.2 mm chisel and something or other to protect the tips of the carving chisels assuming I do take them (still undecided). This drawer is the one that is most in need of something to stop things moving around.

I might not take all of these, but one can never have too many :D I'll definitely take the 16 mm for paring type jobs and I'll definitely take a couple of the smaller sizes for pins. I'll also take at least one of the skewed chisels, but everything else is still TBD.

08_l4.jpg

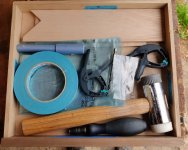
Fifth drawer: doe's foot, hammer, masking tape, spring clamps, scrapers and screwdriver bit holder handle.

09_l5.jpg

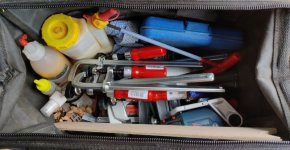
Finally, there's a (separate) bag with some miscellaneous "hardy" stuff like clamps, glue bottles and Allen keys.

10_extras.jpg
 
Is this the time to wish you horrible weather on holiday? I can see you won't want to spend much time outside enjoying the sunshine at the beach or walking in the countryside - you'll be indoors, getting stuck into the next ingenious project! :D
 
AndyT":1vpgw1w1 said:
Is this the time to wish you horrible weather on holiday? I can see you won't want to spend much time outside enjoying the sunshine at the beach or walking in the countryside - you'll be indoors, getting stuck into the next ingenious project! :D

:text-lol:

Andyp":1vpgw1w1 said:
All looks very neat and tidy. will you be able to stop those tools rattling about in transit?

That's the bit I'm still working on, hence this:

Dr.Al":1vpgw1w1 said:
I need to work on something to stop things rattling around in the car during the drive and ferry crossing, but for this trip that might be very temporary and consist of bubble wrap and masking tape. I'd welcome other suggestions though.

Woodbloke":1vpgw1w1 said:
I'd suggest cosseting those tools in some bubbly wrap to stop them barging into one another - Rob

That's the current plan failing any better ideas.
 
Sorry. Guilty as charged. :oops:

I must fully read posts before replying

Can you do something similar to the 3d printed organisers you’ve used elsewhere.
Non slip router mat on the drawer bottoms might help for the larger flat bottomed items.
Compressed foam ( sleeping mat) cut to shape.
 
Andyp":o10xyto3 said:
Can you do something similar to the 3d printed organisers you’ve used elsewhere.

In principle, yes, but probably not with the time available. I've only got a couple of evenings (and friends coming round for dinner on one of them) so not enough CAD time, let alone the printing time.

Andyp":o10xyto3 said:
Non slip router mat on the drawer bottoms might help for the larger flat bottomed items.

That's a good thought: I think I've got some of that.

Andyp":o10xyto3 said:
Compressed foam ( sleeping mat) cut to shape.

Also a good thought, I'll see if I can find anything like that from somewhere....
 
I suspect the reason you didn’t spot that crack Al, was that it wasn’t there, it’s probably the magic mixture soaked into the end grain of that pin that has caused it, I wouldn’t try and fill it, I think it will go down on its own when the M/M evaporates a bit. Also the reason there isn’t a crack on the inside of the cabinet is that the M/M hadn’t gone that far through the end grain to swell the pin that far down.
You must be chuffed to bits with that cabinet Al,
Didn’t notice if anybody mentioned it, but you can buy rolls of non-slip matting in caravan places usually, 3 to 4 mm thick, and if you were to put that in the bottom of the drawers it would stop everything clattering over bumps but you will still need something to separate the tools I think.
Ian
 
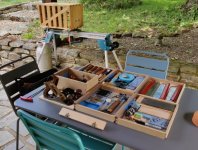
Well, I'm back from my travels and I'm happy to report that the chest worked :)

drawers_out_and_set_up.jpg

The mitre stand provides some very handy storage for clamps too :)

clamp_storage.jpg

It was a pretty idyllic spot: the cottage had a lovely covered patio area so I could (mostly) stay out of the sun (I'm very much a shade hugger). We didn't use the lounge of the cottage at all: we spent all the time on the patio. Only one day with any rain in two weeks and it was rather nice sitting outside under the cover and watching the rain come down around us.

Anyway, that's a bit of a digression. The chest has gained a few knocks (which was inevitable), but nothing too bad really. The main one is some indentations from the clamp that came with my lamp:

lamp_clamped.jpg

... but I'm fairly sure they'll get better with the application of an iron and a damp towel.

To tide me over for the rest of the trip, I mostly just used an offcut underneath the clamp to stop it from marking the surface further (seen in the background of this rather blurry photo):

box_clamped_lamp_with_wood.jpg

When I was feeling more lazy, I also just stuck the #4 on the side and used the magnetic base:

magnetic_lamp.jpg


Anyway, generally the box worked really well. Planing worked well (and much better when I slid the chest to the right-hand end of the stand rather than the left), although not quite as well as when I'd tried it in the garden. I think this was just because of the slope in my home garden, which made it less likely for the mitre stand to lift off the ground. This was only really a problem under heavy planing and with a bit of practice I found a technique where I could hook one foot up against a leg of the mitre stand and the problem went away.

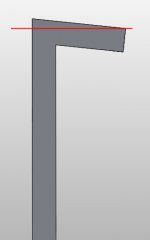
The other issue with planing was preparing material for a box base, which was only 3 mm thick. The planing stops in cross-section look like this:

stop_section_1.jpg

That angle is there so that the stop tends to push the work down onto the chest. However, it means that if the stop is high enough to plane thin material, the plane blade is likely to come across some stainless steel at the back of the stop and that's not going to end well.

It should be easy to solve, by removing this bit (or some of it at least):

stop_section_2.jpg

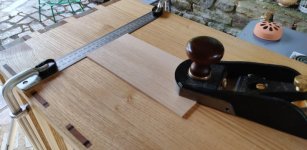
I obviously wasn't equipped to deal with that while I was in France, so an alternative was found, which worked fine:

ruler_planing_stop.jpg

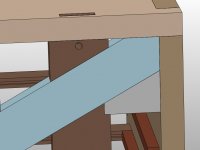
The other main tweak I want to make is to the top right of the anti-rack piece. There were a few times I wanted to clamp something in that corner, but the angled side of the anti-rack piece made it difficult. To tide me over, I made a little triangle of walnut and held it up against the bottom of the anti-rack thing when clamping, but it's awkward having to hold an extra piece in place while getting a clamp on, so I'm going to do something more permanent. I'll probably key it into the upright: that way it'll also serve the purpose of covering up the bit of chipped off wood that happens to be right there. Probably something like the grey bit in this model, but I might think a bit more about the shape so that it looks a bit better than that:

clamp_helper.jpg
 
Oh, the other thing that needs work is shooting (although I was expecting that to be the case). I took my big shooting board with me as I haven't made the one that will become the front of the chest yet. I also took my LA jack plane + shooting handle but vowed to myself I would only use it if I got desperate.

I used the block plane for all the shooting (and never quite got desperate enough to get the LA jack plane out), but it wasn't great. I doesn't work as well as the bigger plane, but I think with shooting board design tweaks I can probably make it work. There were a few problems:

Firstly, it's far less comfortable to hold than the LA jack plane, but that's not surprising and I doubt it's resolvable. It's not too much of an issue, so I'll just live with it.

Secondly, for some reason it didn't sit that well in the 3D-printed insert I'd made and was able to rock back and forth a bit (left-and-right as you look at the shooting board), so I had to be very careful not to tilt the plane and end up with a non-square edge.

I did some experimentation without the 3D-printed insert and the rocking issue went away but then there wasn't anything stopping the plane moving to the right during the cut and ending up with a non-square (in the other axis) edge.

On heavy-ish cuts, I found the workpiece would sometimes move to the left during the cut, suggesting I wasn't holding the workpiece firmly enough in place. I suspect that the reason I haven't seen that before is the momentum of the LA jack plane means that it just forces its way through before the workpiece has a chance to budge. This is probably not an issue; I just need to be careful to hold the piece rigidly.

Finally, the tall fence on my big shooting board is much higher than the little block plane, so if I wasn't careful I could see myself bashing the hand pushing the plane against the fence. That shouldn't be an issue on the new one as it'll have a much lower fence.
 
Excellent!
I do hope you found a few moments to also enjoy the beaches, woods, creperies, cider etc! :)
 
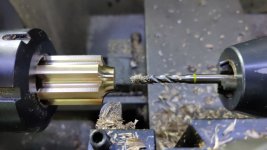
Today is the first day that I've managed to spend any time in the workshop since I got back from France three weeks ago. The rain was coming down horizontally (if you'll forgive the oxymoron) so I needed to keep the workshop door shut. As that limits what I can do at the woodwork end of the workshop I thought I'd do a bit of metal mangling for a change.

A while ago I was fortunate enough to get (for free :) ) quite a few bars of 32-ish mm brass. Today I decided to sacrifice one of them to the greater good.

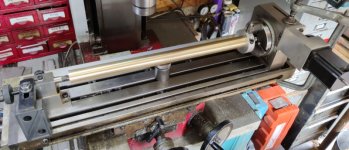
32 mm is too big for my collet chuck, so I started by turning the entire bar down to 30 mm. So that I could get at as much of the bar as possible, I decided to do this between centres (so I could turn most of it down to size, then flip it end to end and be sure the last bit is concentric with the first):

01_drive_dog.jpg

Action shot:

02_turning_to_30mm.jpg

Without a travelling steady fitted and with the rather inconsistent wear on my old lathe, this was never going to be a very accurate process, but it doesn't really matter here as long as the whole bar is no more than 30 mm diameter.

With that done, I moved over to the milling machine, again working between centres (with a drive dog specifically designed for 30 mm stock that I made a few years ago):

03_setup_on_mill.jpg

It took a while to get it dialled in (checking with a dial indicator running along the top of the bar and then the side of the bar), but I got there in the end.

That set-up was seriously stretching the limits of the milling machine. I could only get one screw in the tailstock (as the other end stuck out beyond the end of the t-slots), so that got a table clamp to hold it down more firmly. I could also only clamp one side of the rotary table for a similar reason, so I used an F-clamp to hold the rotary table down. That necessitated taking off the spindle handles as otherwise they would have hit the F-clamp as the table traversed:

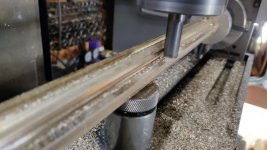
04_stretching_mill_limits.jpg

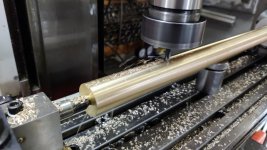
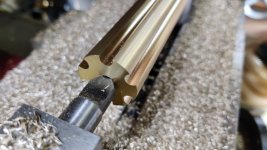
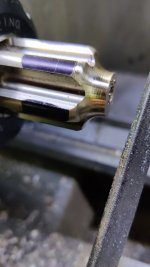
With the mill all set-up and the X-axis power feed doing its job, I gradually plunged a 6 mm ball-end slot-drill into the brass until it got to 4.5 mm depth:

05_milling_slots.jpg

That got repeated in six places around the circumference:

06_sharp_corners.jpg

The next job was to take off the sharp corners. Ideally this would be with a corner-rounding end mill, but I don't have anything that would fit and do the job and I couldn't be bothered to make a custom fly cutter, so I just used the side of a 12 mm end mill to chamfer the edges:

07_chamfering.jpg

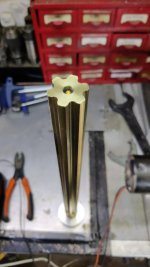
The final profile, of which I now have about 400 mm (way, way more than I need :D )

08_final_profile.jpg

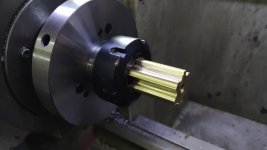
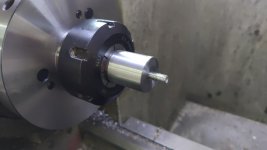
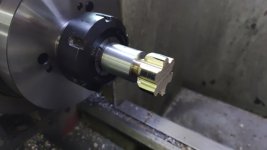
The bar then went in the collet chuck (I do like having a big spindle bore):

09_in_collet_chuck.jpg

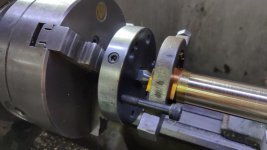
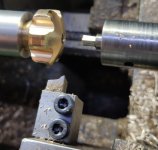
I ground a form tool with a 6 mm radius on the end and used that to face off the end and then shape a bit of the length. Then I spot drilled, drilled and tapped an M6 hole in the end:

10_form_tool_and_tap.jpg

A round-over was then added by eye with a file:

11_chamfer.jpg

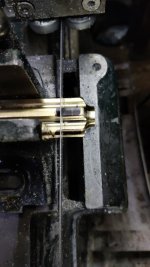
The bar was then removed from the lathe and sawn off on the bandsaw. I could have done this with a parting tool, but there's no great benefit to doing so and this way wastes less material and is quicker:

12_saw_off.jpg

The next job was to make a simple mandrel by facing off a bit of mild steel, drilling and tapping M6 and then inserting a length of M6 threaded bar:

13_mandrel.jpg

The cut-off piece could then be screwed onto the mandrel:

14_on_mandrel.jpg

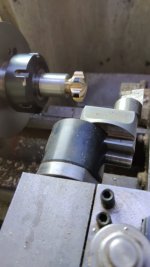
My home-made ball-turning attachment turned a circa 30 mm radius on the face:

15_rounding.jpg

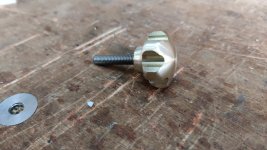
I then used a file again to blend the edges together a little and finally fitted a length of stainless steel threaded rod into the knob (this will get held in place with Loctite 603 at some point):

16_with_screw.jpg

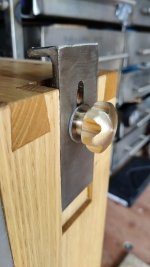
Et voila:

17_in_place.jpg

It was a lot more effort than simply knurling the outside, but I thought it would add a bit of character and I was curious to see whether I could pull it off.

I've still got five more to make (three for the planing stops and three for the back stop), but there's enough shaped brass there to make about 18 in total so I'm not in danger of running out! The lathe part of the job is much, much quicker than the mill work so making the other 5 should be a fairly quick job, especially as I'll prepare one end of all of the remaining ones in one go, then fit / adjust the mandrel, then round over the other end of all of them in one go, which will be much quicker than setting up the mandrel for each one as I go.
 
Well, someone's made the most of a rainy day!

I'm sure your special brass knob stock will be much more useful than the plain old rod you started with.

(And that's a sentence I never expected to type in a public forum... ;) )

Most impressive.
 
AndyT":328vxq4k said:
I'm sure your special brass knob stock will be much more useful than the plain old rod you started with.

(And that's a sentence I never expected to type in a public forum... ;) )

:text-lol:

I spent a couple of hours this morning making a load more of the knobs (and modifying the one I'd already made slightly). The only differences in the way I made them (apart from doing one end of all the pieces in one go, then turning the mandrel, then doing the other end, as I said in the last post), was that I made a new form tool to save the file work and I also stuck a 5 mm hex hole in the outer end in case I ever need to apply a bit more torque than I can by hand.

01_form_and_broach.jpg

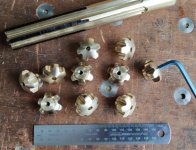
02_ten_of_them.jpg

I made ten of them (although I only need six) so I've got some spares. I've got enough milled bar left for about 6 or 7 more if necessary.

I still need to fit the threaded rod into them, but I don't have enough stainless steel M6 threaded rod at the moment, so that'll have to wait.
 
Now that is clever. Do you make the hexagonal hole just by winding the tailstock down, shaving all six corners at once?
Is it a commercial tool or something else you have made?
 
AndyT":1lueup7o said:
Now that is clever. Do you make the hexagonal hole just by winding the tailstock down, shaving all six corners at once?
Yes
AndyT":1lueup7o said:
Is it a commercial tool or something else you have made?

Both!

It's a tool I made from a kit: https://www.hemingwaykits.com/HK2570

One of the best tools I've made: I use it all the time.
 
SamQ aka Ah! Q!":2kqk3cvt said:

Al, when you are using that, I take it you need to drill a 'minimum diameter' hole first? Then the broach 'squares' things up?

Edit: SORRY, just read the Hemingway blurb: "...and will effortlessly transform a pilot hole into an accurately cut hex... "

Yep. I drilled it 5 mm and then pushed the 5 mm AF rotary broach in. It works astonishingly well.
 
Well that is rather pretty. And that Allen-key cutter arrangement is obviously black magic.
 
Apparently the maximum number of photos per post is 20; I've got 27 (plus one recalled from a previous post), so this is going to be split across two posts. Hopefully that doesn't class as abuse of forum rules :)

I haven't done very much on the toolchest for a while, mainly as a result of work being manic but partly dithering and being indecisive about what to tackle next (and feeling at a bit of a loss as to how to approach the shooting-board-cum-front thing when I was planning to base it around my block plane which I've realised has sides that aren't square to the base).

Anyway, while I ponder on other things, I thought I'd get going on something else for change.

Those of you with a good memory, might recall that I took a (rough and ready) bit of ash with me to France to use as a fence. The aim of that bit of ash was that it would hold one edge of a workpiece steady. The planing stops would hold a second edge and a doe's foot thingy would hold the last two. I would then have access to the whole of the top surface of the workpiece for router planing or carving or whatever. You can see it (not in use) in this image:

file.php


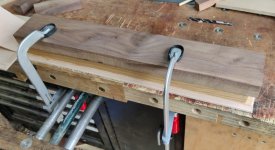
While I was away, I realised that the little piece of ash could also be used as a crude vice and it made clamping boards for cutting dovetails on the ends a lot quicker than using an f-clamp into the slots. The f-clamp approach is more versatile, but the vice mode was quicker. One limitation I found (when making the drawer box) was that the hole spacing of the screws wasn't enough to hold very wide boards so I had to go back to f-clamps.

The ash fence was only ever intended to be a temporary thing (I'm making this chest out of sweet chestnut and walnut :D ). I decided it was time to get on with making a new one, this time considering its use as a vice as well as a fence. For it to work as a vice for wider boards, it needed to be thicker.

I started in the usual way, by ripping a bit of chestnut up with my big 7 tpi Ryoba.
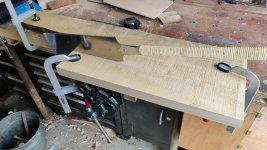
01_ripping_chestnut.jpg

I then planed one face until it was flat and twist free and then planed the two edges square to that face. No photos of that I'm afraid, but there's plenty of them further up this thread :)

The target thickness (30 mm) was only about 4 mm thinner than the starting thickness, so rather than resawing it, I got my wooden scrub plane out and attacked the board. I really like this little scrub plane as it's so light (being wooden) that it's easy to be quite aggressive with it without wearing myself out.
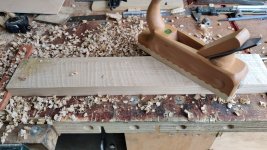
02_planed_three_sides_scrubbing_fourth.jpg

Once it was planed to dimension, I marked up some hole positions and also a distance in from to edges for a heavy chamfer.
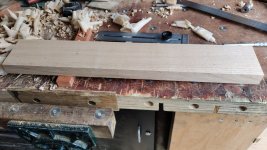
03_marked_up_for_chamfer_and_holes.jpg

To plane the chamfer, I used my dog hole tail vice to hold the board and a spare French cleat that was lying around to support the bottom surface of the board. I then attacked it with my #5.
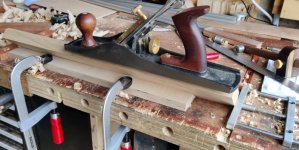
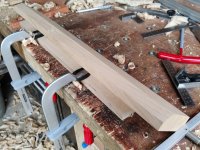
04_planing_chamfer.jpg

05_planed_chamfer.jpg

It was then time to lug the hand pillar drill out of the dining room and down the garden path to the garage. First I drilled some 8 mm holes:
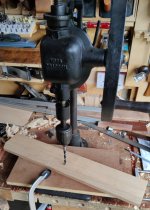
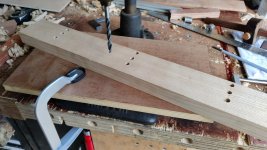
06_drilling_8mm.jpg

07_drilled_8mm.jpg

Then I drilled some 6 mm holes:

08_drilled_6mm.jpg

For each of those holes, I set the pillar drill up so that it wouldn't quite break through the bottom of the board. Once all the holes were drilled, I flipped the board over and came in from the other side.
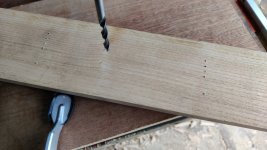
09_drilling_from_back.jpg

With hindsight, it would probably have been better to just hold / clamp it down firmly and drill through into a sacrificial board: I got quite a lot of tear-out as the drill entered from the rear:
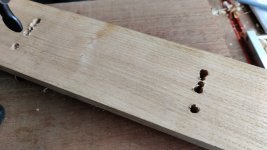
10_tear_out.jpg

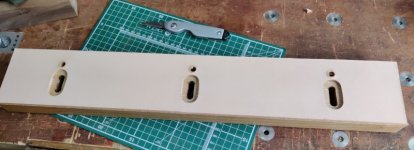
Not the end of the world though: it was easily dealt with using a #4. The smaller drill holes were turned into slots with a 16 mm chisel:
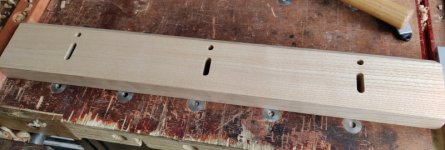
11_chiselled_and_planed.jpg

After sawing it to length, shooting the ends square and applying a light chamfer to all the edges with a #4, it was time to apply some magic to five out of the six faces:
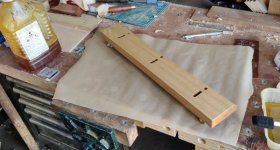
12_magic.jpg

While it had three coats of magic mix over the course of a few days, I got an offcut of 25 mm silver steel, drilled it through 8 mm, turned the end down to 22 mm and then made a chamfered bore:
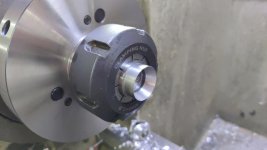
13_turned_punch.jpg

The piece then got heated up with a blowtorch until it wouldn't stick to a magnet, plunged in water to quench and then chucked in the domestic oven at 220°C (± quite a lot) for a few hours to temper.

Once all the coats of magic mix had dried, I gave the unfinished face a quick pass with a smoothing plane to get rid of the bits where the oil and found its way round the corner.

I then clamped a bit of thick undyed leather to the bench (on some plywood scraps). The bits of wood clamping the leather down had some heavy chamfers on the underside to stop glue attaching them to either the leather or the wood. The bits of wood also acted as a reference up to which to push the chestnut.
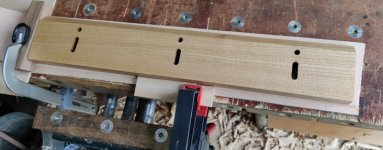
14_stops_on_leather.jpg

I then used an 8 mm transfer punch to mark the centres of the holes and each end of the slots.
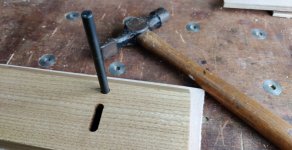
15_marking_centres.jpg

With the wood removed, I used an 8 mm drill bit to mark the outline of the holes from the centre and then a punch to remove an 8 mm circle around the holes.
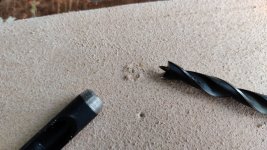
16_marking_circles.jpg

For the slots, the transfer punch could be slid onto my hardened silver steel punch and located into the mark it had made. The transfer punch could then be removed and I could attack the silver steel punch with a club hammer to remove a large circle.
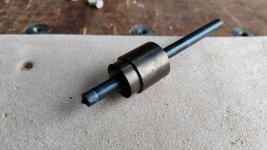
17_transfer_punch.jpg

Et voila:

18_punched.jpg

The two big circles were then turned into a big slot using a chisel.

To keep glue away from the area that would align with the slot in the leather, I used the big punch as a template to draw a pencil line onto the wood:
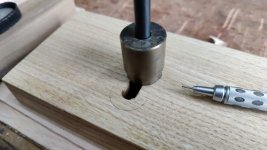
19_marking_glue_keep_out.jpg

I then applied lots of contact adhesive to both faces and left it for 5 minutes or so to cure.
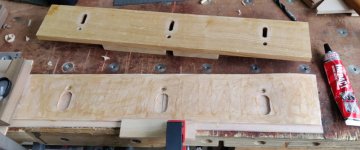
20_chiselled_and_contact_adhesive.jpg

...
 
...
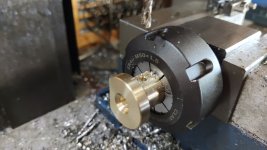
Once the contact adhesive was touch dry, I lined the wood up against the stops and pressed down. I then grabbed a random bit of wood from the pile and clamped it down hard for a few minutes to make sure:

21_squeeze.jpg

Then it was time to trim the leather to size with a knife and then flip the jaw over to inspect. First impressions were very good:

22_flip_over_and_inspect.jpg

But the hole and slot that were furthest away from the clamps were a little bit off (the photo makes it look worse than it is as a result of some wood chips in the hole, but they definitely weren't lined up perfectly):

23_missed_slightly_on_one_hole.jpg

Rather than worrying about it unduly, I just decided to double down and chisel / gouge out a bit more leather:

24_join_the_holes.jpg

With that done, the vice jaw/fence is complete. To see how well it worked, I thought I'd try a fairly brutal test: taking a relatively heavy end-grain planing cut (with a slightly blunt plane :oops: ):

25_test_end_grain_plane.jpg

The board stayed put, without rotating as I would expect it to do if it wasn't held robustly.

I also did a quick test using it as a fence:

26_test_as_fence.jpg

... and then finished with a beauty shot because, well, why not?
27_beauty_shot.jpg
 
I think we can forgive you a beauty shot, it’s really super stuff Al.
I’ve never used leather on a vice face as I’ve never thought I needed it but with the relatively small clamping force of those knurled nuts I can see why you’ve done it.
With your attention to detail Al I think you would be good at making one of those £3k grooving planes, all shiny brass and Rosewood, - when you have a minute obviously!
 
Cabinetman":3gox3i2z said:
I think we can forgive you a beauty shot, it’s really super stuff Al.

Thanks Ian.

Cabinetman":3gox3i2z said:
I’ve never used leather on a vice face as I’ve never thought I needed it but with the relatively small clamping force of those knurled nuts I can see why you’ve done it.

I don't have it on my main vice but I put some on the jaws of the vice on my portably workbench (mainly just to see what it was like). It definitely helps with grippiness, but for "normal" vice screws I don't think it's needed. As you've said, one good reason is the relatively small clamping force of the M6 thumb screws (although a single M6 screw can apply an astonishingly large amount of force), but another is the relatively slow speed of the thread.

As the thread is only 1 mm pitch, it takes a little while to spin the screws in and out (not that I'm in a rush :D ). It's a lot quicker to push the jaw up against the workpiece and then spin the screws (which in that situation aren't under tension so they spin very easily) up to the jaw. The leather means that it only takes a very light force with one hand to hold the jaw against the workpiece while spinning the screw with the other hand.

Cabinetman":3gox3i2z said:
With your attention to detail Al I think you would be good at making one of those £3k grooving planes, all shiny brass and Rosewood, - when you have a minute obviously!

Hmmm... maybe one day :)
 
What a great conclusion to a successful project. I especially like the casual, blink-and-you-miss-it manufacturing of a round punch for leather discs. But there's so much more - the consistent sawing and planing to make those lovely flat boards, the showily precise dovetails, the bespoke brass knobs.
Hearty congratulations!

:eusa-clap: :eusa-clap: :eusa-clap:
 
AndyT":m9h0m3kw said:
What a great conclusion to a successful project. I especially like the casual, blink-and-you-miss-it manufacturing of a round punch for leather discs. But there's so much more - the consistent sawing and planing to make those lovely flat boards, the showily precise dovetails, the bespoke brass knobs.
Hearty congratulations!

:eusa-clap: :eusa-clap: :eusa-clap:

Thanks Andy, although... conclusion? I've got a long, long way to go before this is finished. It doesn't have a front and the drawers have to be pushed out from behind as they don't have handles yet! Lots of other things on the list as well as those. I'm optimistically hoping it might be finished by the time we go back to Brittany in June next year :lol:
 
Back
Top