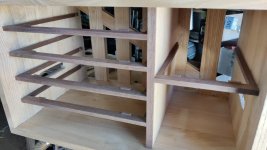
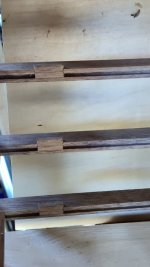
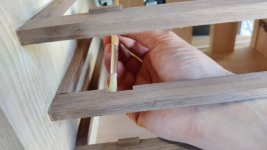
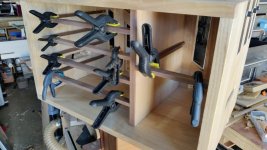
• Hi all and welcome to TheWoodHaven2 brought into the 21st Century, kicking and screaming! We all have Alasdair to thank for the vast bulk of the heavy lifting to get us here, no more so than me because he's taken away a huge burden of responsibility from my shoulders and brought us to this new shiny home, with all your previous content (hopefully) still intact! Please peruse and feed back. There is still plenty to do, like changing the colour scheme, adding the banner graphic, tweaking the odd setting here and there so I have added a new thread in the 'Technical Issues, Bugs and Feature Requests' forum for you to add any issues you find, any missing settings or just anything you'd like to see added/removed from the feature set that Xenforo offers. We will get to everything over the coming weeks so please be patient, but add anything at all to the thread I mention above and we promise to get to them over the next few days/weeks/months. In the meantime, please enjoy!

Holiday Toolchest

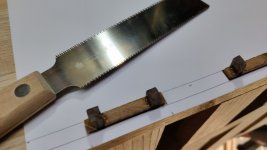
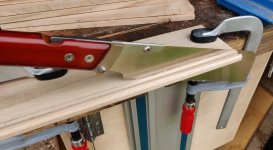
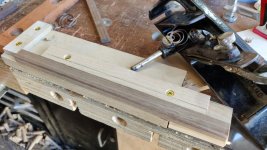
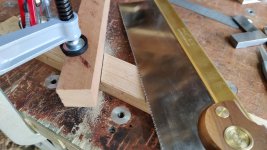
This afternoon I tackled the half-lap joints. To saw the sides of the joints in the anti-rack piece, I decided to use a western-style tenon saw, with a fence clamped in place to help me saw square and in the right place:
01_sawing_half_laps_in_antirack.jpg

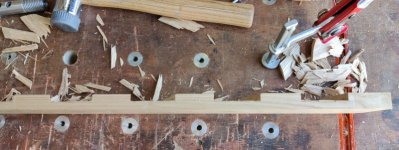
I then chiselled out the bulk of the waste, going half-way to the line over and over again and going about halfway through before flipping the piece over and doing the same from the other side.
02_chiselling_out_waste.jpg

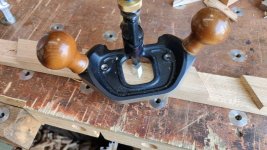
Finally, I worked down to about half-depth with a router plane.
03_router_plane.jpg

I then got the other router plane and set it slightly above the bottom of the half-lap when placed on the outside face of the board. The idea of this is that when I use the router plane on the back of the chest, the anti-rack piece will protrude very, very slightly and I can plane it flush.
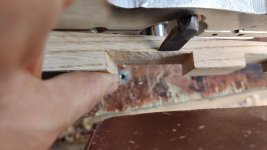
04_setting_router_level.jpg

I then marked up the depths of all the half-laps on the back of the chest using the router plane as a marking gauge and used a square and a knife to bring the side marks down to the router plane mark.

My placement (for marking) of the anti-rack piece wasn't perfect as I'd ended up with a very small bit of short grain near one end of one of the back slats:
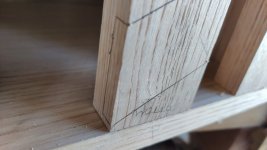
05_close_to_end.jpg

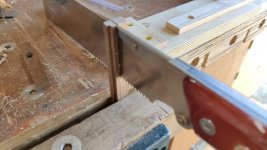
To saw the back slats, I used one of my folding dozukis, which has teeth at the very end of the blade (intended for cutting into the middle of a panel I think). Again, I set up a fence to saw against as it reduces the chance of operator error!
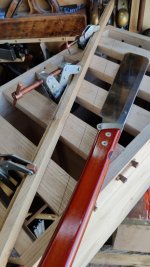
06_sawing_back_slats.jpg

To saw to the right depth I just put a bit of masking tape on the side of the saw. I had to be very careful on the outer slats, but generally it was much more straightforward than I had expected.
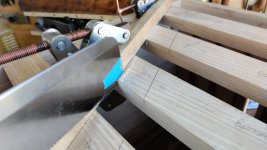
07_tape_on_saw.jpg

Rather than trying to chisel out the waste (which seemed to me to be fraught with risk), I just decided to plod my way down with the Veritas router plane...
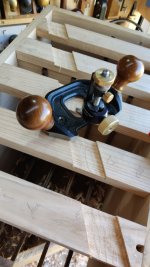
08_roughing_half_laps.jpg

... and then do the last pass with the Stanley one that I'd previously used as a marking gauge:
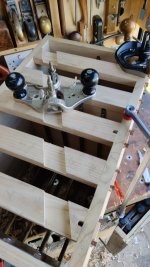
09_finishing_half_laps.jpg

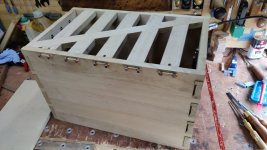
Finally, it was ready to assemble and on a quick trial (not pushing it very far), it felt like it would go in relatively easily. Unfortunately, I chipped a little bit off one corner (visible in the bottom of the following photo). Thankfully, I caught the bit, so it would be easy to glue back on again. Unfortunately, I sneezed and it flew across the workshop never to be seen again :( . I guess I'll have to make a new piece and make a cut-out to fit:
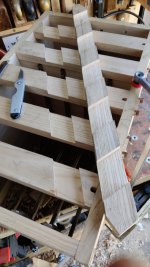
10_ready_to_go_together_and_chip.jpg

I brushed glue onto the routed faces of the half-laps (staying away from the corners to reduce the chance of squeeze-out) and then clamped the anti-rack piece into place:
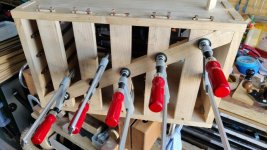
11_glued_and_clamped.jpg

Obviously I don't know how tight it'll look once it's all planed and cleaned up, but nevertheless I'm quite pleased with that for my first half-lap joint(s).

All being well, the fish glue will all have dried by tomorrow morning and I'll spend some time cutting all the sticky-out bits to length and giving everything a very careful plane. I also need to finish the cut-outs for the planing stops and apply finish; I don't think there's much else to do on the chest base itself.

Any thoughts on finish for a tool-chest/workbench? I guess applying finish before sizing drawers would be sensible, but I haven't really spent much time thinking about finish. My usual default would be Mike's Magic Mix, so I'll probably use that unless someone has a better idea!
 
Well you nailed that Al, a lot of people would have made a right dogs dinner of adding that brace.
As to finish, I think as it’s a piece that is going to get bashed and abused in use I would use water based poly varnish as it’s really tough and scratch resistant, but that’s just my opinion and I haven’t tried Mikes mix so can’t comment.
Also the top doesn’t want to be too slippery for working/planing on, I have always just used a couple of coats of sanding sealer on workbench tops. Different finish on different parts, not sure what you think to that, but in my view it’s a work piece first and foremost so it should be practical.

Just had a thought, I wonder what a leather top would be like to work on?
There will no doubt be a fair few other ideas!
 
Thanks both. I've no idea what leather would be like to work on. I'd guess it would take some of the force out of a chisel hit, but I don't really know.

Has anyone else got any thoughts on finish?

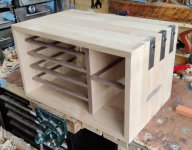
Anyway, this morning the chest base came out of the clamps and it was time to start on the last few jobs.

01_out_of_clamps.jpg

I've never really got on with my zero-set flush cut saw, but I decided to risk it and use it anyway, with a layer of thick-ish card between the saw and the surface of the chest, just in case.

02_flush_cut.jpg

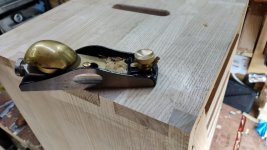
On most of the tails and pins, I just went straight in with a block plane, but one or two got the flush-cut saw treatment first.

03_block_plane.jpg

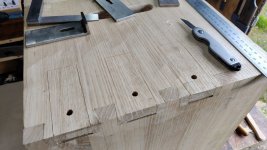
With everything planed very, very roughly, I put the chest on its side and marked out the cut-outs for the planing stops:

04_mark_out_stops.jpg

As it was so far up in the air, I didn't fancy chiselling (even for the sides), so I just worked my way down with the router plane, cutting the edges with a knife after every few router plane passes:

05_router_plane.jpg

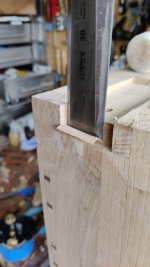
Finally, I chiselled out the pocket at the top (the chiselling was going straight down into the end of a well-supported bit of wood rather than into the middle of a panel, so I felt better about this):

06_chiselling.jpg

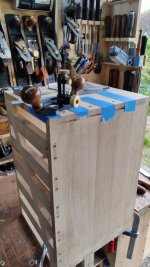
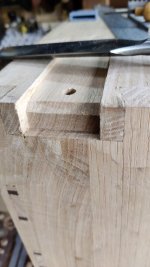
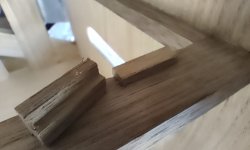
I then added a chamfer (to allow room for the weld bead) and took a carefully framed photograph showing only the best of the three pockets :D

07_chamfer.jpg

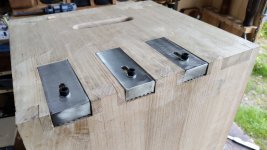
Finally it was time for a test fit:

08_test_fit.jpg

I'll replace those cap screws with some knurled brass thumb screws at some point, but I need to make them first.

The next job is to give all six faces a very careful plane. Well, the next job is probably to do some sharpening of said planes, but after that I'll tidy everything up. I've still got to fill in that little bit that chipped out when I was cutting the half-laps, but I'll do that once everything else is pretty much finished I think. No doubt when I look over the finished chest I'll spot one or two other little details that need some attention.
 
I'm still really enjoying this - you've taken on so many challenges and found solutions to them before the rest of us have found our keyboards!

On the finish, I agree with Ian - if you want to retain the pale colour, water based poly is excellent and can be almost invisible when applied (but will protect from dirt, glue, etc). Oil or a Danish-oil style oil/varnish mixture would do that too, but will darken and emphasise the grain a bit (which you might prefer).
 
FWIW, and being as you asked, whenever I have made anything for the workshop I have slopped on whatever thick gloppy varnish I had to hand but then I have never made anything so nice as that.

Something that is easy to clean and replace, or perhaps nothing at all and just let it age and take on a natural, weathered well used patina all of it’s own.
 
Thanks all; keep the finish suggestions coming! (and any other suggestions, of course)

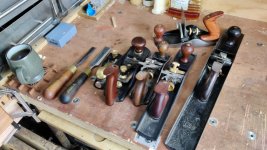
The first job this afternoon was to get a pile of tools together to sharpen. I figured I might use any or all of these so they seemed an appropriate set (except the chisels, which were just in the pile because I'd been using them all). Some of these might not need sharpening, but I figured it couldn't hurt and I wanted as easy a life as possible:

01_tools_for_sharpening.jpg

Rather than explain in text my preferred method of sharpening, I thought I'd prepare a detailed picture that shows everything very clearly I think:

censored.jpg

With everything hopefully nice and sharp, it was time to put the dulcet tones of David Ford on the stereo and start attacking the box with the planes.

For the four big faces, I clamped an offcut to the end to prevent break-out of the end grain and then used my #4. This felt like quite hard work, especially the side faces. It wouldn't normally have been, but the chest is big and I had to contort myself into quite an awkward position up on a step ladder to work on it! Also I hadn't done a very good job of ensuring the side panels had consistent grain direction so I had to plane them in two directions, which added more fun :) Thankfully the top and bottom were a bit more straightforward.
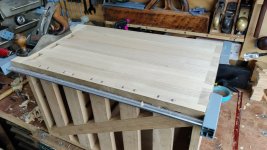
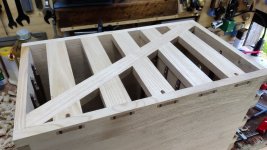
02_smoothing_plane_for_faces.jpg

For the back I used my LA smoothing plane, but not for any good reason. I'm sure the #4 would have been fine.

03_back.jpg

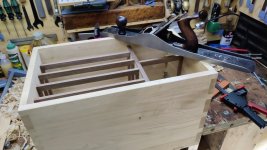
For the front, I used the #7 as it made it much easier to control the plane on the relatively thin edges: the long length allowed the back to sit on one of the other edges while planing on the skew:

04_jointer_for_front.jpg

I haven't done anything in terms of filling in any gaps or sorting out that broken out bit on the back, but I'm completely knackered (I feel ready for a weekend now :lol: ) so I'm calling that done for now. I'm sure some things will surface when I'm looking at it pre-finish application but there's time to worry about that when I'm less tired.
Just before closing the garage I thought I'd do a dreary weather photo shoot. I'll try to take some better photos if we ever have any sunshine again.
05_done_1.jpg

06_done_2.jpg

I guess the next thing to do is start thinking about the drawers, but I'm not going to think too hard about that before next weekend!
 
It's time to start working on the drawers. The first job (I think) is to get all the drawer fronts shot to size. I've started working on that (two down, four to go), but haven't taken any photos yet so you'll have to wait a bit longer for those.

In the meantime, I also want to plan the drawer construction in a bit more detail. I've decided to use 5.5 mm plywood as the bases, but I'm going to set that plywood into drawer slips in a bit to keep the construction as traditional as possible. I'm sorely tempted to make the bases out of solid wood, but with all the stock preparation that would be involved in making the base stock, there's very little chance I'd have any drawers made before I go to Brittany so plywood seems like a sensible option. I can always pull the plywood out and replace it with "real wood" later if I choose to.

Given the thin drawer sides, that means using slips. However, having looked at the construction described by Joyce, Charlesworth and AndyT of this parish, I think I'd struggle to get height of the inside bottom of the drawer any lower than 15 mm above the outside bottom of the drawer. I'm trying to squeeze quite a few things into the very narrow drawers and I don't really want to lose quite that much height. Having done some quick calculations, I reckon the maximum I can get away with is 12 mm loss and even that might be a bit tight.

All that combined means that I'm trying to come up with a drawer-slip based layout that doesn't lose much height. I've been playing around a little in CAD to see what it might and this is what I've come up with so far:

front_view.png

(Note that I haven't bothered to model the dovetails yet - that'll come later). The front joints will be half-lap dovetails (or whatever they're called), the back ones will be through dovetails. The drawer base will have a slot at the back and will be screwed into the back piece with a 4 mm torx-head stainless steel screw.

As you can see the back is lowered. I think this was traditionally done to prevent air pockets stopping the drawer from shutting. I don't need that in this tool chest (as the back is slatted), but the top left drawer needs the lowered back so it doesn't hit the stainless steel brackets for screwing stuff to the back. The top-right drawer will also need the sides lowering.

rear_view.png

The drawer slips stick up slightly from the base, which isn't anywhere neat as the way AndyT et al showed drawer slips being made, but it has the advantage of a reduced height usage. Hopefully with the chamfer it won't look too odd.

Here's a couple of views of that drawer slip (I haven't quite decided how much to cut out at the back, although it probably doesn't matter much which I pick):

slip_cut.pngslip_truncated.png

If I plan it right, then the groove in the front piece will be a through groove that comes out in one of the tail locations so that I can plough it more easily. As I said, I haven't designed the dovetails yet, but that's something I'll consider.

I would very much welcome any comments on all of the above. I'm hoping to make some progress with the drawer construction this weekend but I'm still not feeling very confident that I'm doing it right.
 
I wonder if this is where your desire to experiment with trad construction comes into conflict with the practical need to get the maximum capacity?

The best way to get the max capacity is also the simplest construction - just glue the plywood onto the bottom edges of the sides and back. (Add some small pins if you want.) On the front, you have enough thickness to allow you to cut a little rebate and so hide the edge of the plywood from sight. It's plywood, so it will be stable.

There's a theoretical argument that the outer veneer of the ply will wear through quicker than solid hardwood, but I don't think you need extreme strength and I'm sure you'll make all surfaces smooth and waxed.

If you want a historical precedent, I'm sure you could find plenty of old toolboxes with shallow trays made like that.

And with the experience gained from this project, you will be ready for fancy slip work on a full size chest of drawers :)
 
AndyT":97s6u5n3 said:
I wonder if this is where your desire to experiment with trad construction comes into conflict with the practical need to get the maximum capacity?

The best way to get the max capacity is also the simplest construction - just glue the plywood onto the bottom edges of the sides and back. (Add some small pins if you want.) On the front, you have enough thickness to allow you to cut a little rebate and so hide the edge of the plywood from sight. It's plywood, so it will be stable.

There's a theoretical argument that the outer veneer of the ply will wear through quicker than solid hardwood, but I don't think you need extreme strength and I'm sure you'll make all surfaces smooth and waxed.

If you want a historical precedent, I'm sure you could find plenty of old toolboxes with shallow trays made like that.

And with the experience gained from this project, you will be ready for fancy slip work on a full size chest of drawers :)

Thanks Andy

It's not so much the historical precedent I'm going for; it's more what would stretch my skills more. As I (think) I said, I like the idea of a slot in base as it gives me the option (after the holiday!) of pulling the plywood out & replacing it.

The glued (& maybe pinned) plywood-in-rebate option would be very easy, but I'm trying to avoid easy :D
 
Fitting the drawer fronts involved a bit of sawing and a lot of shooting:

shooting.jpg

The result:

fitted.jpg

It looks quite nice to my eye: in some ways it's a shame it'll be hidden by the shooting board / front cover :D

They're all a relatively tight fit at the moment. They will definitely all need reducing in height a bit (to allow for expansion); they may also need a bit of length trimming later, but I think I'll be able to do all of that after making the drawers and it seemed sensible to err on the side of slightly tight at this stage.

As I've said a few times already, the current plan is to have an opening rather than a drawer in the bottom-right, but I thought I might as well prepare the stock in case I change my mind in the future.

I guess the next stage is to plan out the dovetails etc and then start work on the sides, back and slips. I'd welcome any more comments on the slip layout / design before then.
 
This morning I decided to get started on the first drawer. I thought I'd start with the top-left one as it's the smallest, with some quite fiddly bits (especially the back piece). I decided I'd drop the sides as well as the back (the back needs to be dropped to avoid the stainless steel bracket things; the sides will be dropped for the same reason on the top-right drawer, so I thought I'd match it on the top-left one).

I started by pulling out a couple of pieces of the drawer side stock I prepared earlier (I only ended up using the left-hand one of these pieces for this drawer as that was enough for all three sides). I also did a 4:1 sketch to make sure everything seemed to make sense to me:

01_start_with_drawing.jpg

I then starting sawing slices off with my Kataba, then using the shooting board to sort out the ends and the edges. The back piece was shot to match the length of the front piece; the sides were made about 8 mm shorter than the depth allocated for the drawers (5 mm to account for the half-lap dovetails at the front, the other 3 mm to allow for a bit of movement).

02_split_and_shoot.jpg

I could then choose which piece goes where. I aimed to have the planing direction on the outside faces and bottom edges of the sides going from front-to-back as I thought that would be best for clean-up later.

03_choose_which_is_which.jpg

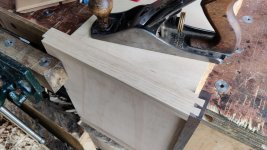
Cutting the tails was quite easy as there is only one bit (per plank) that needs chiselling away:

04_cut_tails.jpg

(I might have got a bit carried away with recording everything on the masking tape :) )

I then used the usual ruler trick to mark the sockets...

05_mark_blind_pins.jpg

... and then extended the lines down the face with a square; marking the depth such that the sides will hopefully protrude by half a millimetre or thereabouts so that I can plane them to fit after assembly:

06_marked.jpg

The Dozuki sawed at 45° to get the edges started...

07_saw_down_sides.jpg

... and then a 6 mm and 8 mm chisel removed the rest:

08_chiselled_out.jpg

I couldn't resist an immediate test fit after cutting the first sockets:

09_test_fit.jpg

Before this project, I'd cut exactly one half-lap dovetail joint before: in a test piece while I was in France on holiday last year. I used my magnetic saw guide for the practice one, so as well as being my second ever half-lap dovetail, this is my first ever half-lap dovetail cut without a guide. It's not perfect, but I'm still pleased with it.

With that done, it was just a case of rinse and repeat. I was obviously a bit over-relaxed with the through dovetails at the back as one is a little gappy, but I think it'll be okay.

Test fit of everything made so far:

10_test_fit_of_all.jpg

Close-up:

11_test_fit_close_up.jpg
 
The next thing to do was to get on with preparing the slips. My original plan was to cut them from the same piece as the sides, but I got slightly carried away and just chopped it into three pieces with enough for the back. On a positive note, I could use one of the pieces of sweet chestnut that isn't long enough to for side pieces.

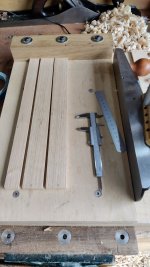
To cut the grooves in the slips, I used one of my home-made grooving/ploughing planes. This one (which also has a matching, but mirrored pair for the opposite grain direction) cuts a 5 mm wide groove, 5 mm from the edge and 5 mm deep. I really like using these little planes as they don't stick out over much of the board (and hence can be used on relatively narrow stock quite easily) and they don't require any set-up time, so I can plough a groove in less time that it would take to find a 5 mm electric router bit, let alone the time to set up a router properly.

12_grooving_1.jpg

The plane makes lovely little curly shavings:

13_grooving_done.jpg

After that was done, I chamfered the outside corner with a Chinese plane made for the purpose...

14_chamfering.jpg

... and sawed the piece off, again with the Kataba:

15_sawing_slips.jpg

This photo shows the profile of the slips a bit better I think:

16_two_slips.jpg

They're slightly oversize at the moment: my plan is to glue them into the drawer carcass and then plane the bottom edge flush with the drawer.

I also need a matching groove ploughed in the front piece, for which the little grooving plane came out again:

17_ploughed_groove_in_front.jpg

All the bits for one drawer (except the bottom) complete:

18_all_the_bits.jpg

At this point I decided that the best thing to do was to get on with the glue-up. With hindsight, it would probably have been better to decide what to do about drawer pulls (i.e. a hole or something sticking out) as it might be easier to do with the front piece separate, but it's too late for that! I'm sure I'll be able to deal with it with a drawer board or something like that, so I won't worry about it for now.

I decided to try the TB hide glue for the drawers (not for any good reason), so I put it in some hot water and did a bit of a half-hearted tidy-up before getting everything I thought I'd need ready and to hand:

19_everything_ready.jpg

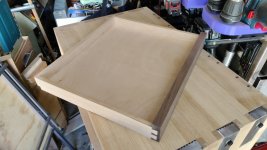
Then it was just a case of using what ended up being a tiny amount of glue (just on the long grain sides of the tails and pins) and clamping it up.

20_all_glued_up.jpg

I probably didn't really need that many clamps really, but I figured that the ones holding it down to the bench would keep the bottom fairly flat and would also stop it going trapezoid after I'd carefully measured the diagonals.

Time for lunch now; I haven't decided whether to try to fit the slips today: I could probably do so if I just remove the clamps that are holding it down to the table, so it might be a good idea to try to get the second glue operation done sooner rather than later. I'm very seriously running out of free days to finish this before I head to Brittany, so lots of leave-it-for-24-hours type gluing operations could be a bit of a problem!
 
You're clearly having a lot of fun and doing some really satisfyingly good work there.
I can hear the pleasure in using planes you made for yourself too.

One final thought on the slips, in case it's not too late. If space is really tight, you could cut your ply to the exact internal size of the sides, so it goes into a groove on the thicker front, goes under the shorter back, and just butts up to the sides. Then glue a plain rectangular strip underneath, giving extra width and bearing surface. I'm sure you could cut the ply precisely enough.

I made a wooden briefcase a bit like that, before I had a plough plane, and nearly 40 years later it's still sound.
 
AndyT":1wmocsa5 said:
You're clearly having a lot of fun and doing some really satisfyingly good work there.
I can hear the pleasure in using planes you made for yourself too.

One final thought on the slips, in case it's not too late. If space is really tight, you could cut your ply to the exact internal size of the sides, so it goes into a groove on the thicker front, goes under the shorter back, and just butts up to the sides. Then glue a plain rectangular strip underneath, giving extra width and bearing surface. I'm sure you could cut the ply precisely enough.

I made a wooden briefcase a bit like that, before I had a plough plane, and nearly 40 years later it's still sound.

Thanks Andy. Not too late and that sounds like a good idea. I'll try it on this drawer & we'll find out whether I can cut the ply precisely enough :shock: :?
 
Well, I did what AndyT suggested. I figured that if it turns out that I can't cut plywood accurately enough, I can always put a "decorative strip" along the sides to hide the evidence :lol:

Two more little strips cut to (slightly over) size and glued on with hide glue. I set the distance to the top to be consistent using my edge distance gauge thing and clamped the strips in place with some spring clamps:

21_base_runners_fitted.jpg

I decided not to worry too much about squeeze-out here. The joint should be hidden by my super-precisely-cut :lol: plywood and given that there's only 5 mm of contact, I wanted to be sure a decent amount of glue got everywhere it was needed.

22_squeeze_out_close-up.jpg

After that, I had some mowing and strimming chores to get on with, so that's it for today.

I've got 5 more drawers to make (as well as the base for this one), plus planing them to fit the chest. Then I've got to make something to hold the planes in place in the bottom right corner, followed by the shooting board that forms the front of the chest.

Due to some other commitments, I've got only five completely free days left before we go to Brittany and not much in the way of free evenings, so I don't think I'm going to be close to managing all of that, but I'll do my best. I can always tape the drawers shut and take my big shooting board for this trip if the shooting board isn't ready in time.
 
Ah, very nice, but... In my imagination, I saw you marking the exact size of the plywood by setting down the glued-up frame onto the plywood and marking around the inside of it, and then afterwards you glued the strips on ... Is that what you did?

(If not, I expect that your drawer sides will be sufficiently consistent and square for you to mark round inside the top edges instead.)

(And the hide glue will still come off easily with a chisel tomorrow, if it needs to.)
 
AndyT":1vb1wchd said:
Ah, very nice, but... In my imagination, I saw you marking the exact size of the plywood by setting down the glued-up frame onto the plywood and marking around the inside of it, and then afterwards you glued the strips on ... Is that what you did?

Nope: didn't think of that :oops:

AndyT":1vb1wchd said:
(If not, I expect that your drawer sides will be sufficiently consistent and square for you to mark round inside the top edges instead.)

You have way more faith in me than I have. I'm sure I'll figure something out. I'd been working on the assumption that I'd just keeb hitting the plywood with the shooting board until it fit. I bought a full sheet of plywood & need about a quarter of sheet, so I've got lots of spare plywood if it takes a few attempts anyway :D

AndyT":1vb1wchd said:
(And the hide glue will still come off easily with a chisel tomorrow, if it needs to.)

Good!
 
A bit late to the party on this one, but gluing on your drawer slips is exactly the way I do it. The slip is left proud by a mm or so on the underside and then carefully planed flush and square. This is the drawer in the current project:

IMG_0904.jpeg

You can just make out a Paduk drawer slip in one corner of the pic. The wide centre muntin is the drawer runner and the base(s) slide in under the back. Apologies for stealing any thunder, but your approach appears to be a gud'n - Rob
 
Woodbloke":6nwfp0el said:
Apologies for stealing any thunder, but your approach appears to be a gud'n

Steal away: I'm under no delusions of being good at all this and the more feedback I can get the better.
 
Hi Al, just did a one day trip to Brittany, had a full days guided tour of the beaches etc, we had a marvellous guide compared to a lot of the groups we passed- English for a start and small group of 7 compared to bus fulls, PM me if interested. Slips are going well.
 
As I rushed ahead with gluing the slips on rather than doing it the way the sensible Mr T later advised, I needed to find an alternative means to mark the size of the base. I could have marked it using the top of the drawer, but I thought I'd try something different first on the off-chance it worked (I've got loads of spare plywood, so if it didn't, it wouldn't matter that much).

The slips were still protruding from the drawer bottom by a little over a millimetre. I took advantage of that and taped the box to a bit of plywood with the edge of one slip lined up with the edge of the plywood:

02_marking_base.jpg

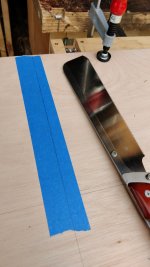
I then taped a steel rule to the plywood with the steel rule shoved underneath the side and up against the other slip:

01_marking_base.jpg

That gave me a nice line to mark that should be in the same place as the inside edge of the drawer side.

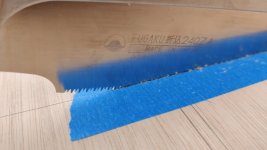
For the cut that was going to be across the grain of the top surface of the plywood, I decided to put a strip of masking tape along the cut line. I've no idea whether this made any difference, but the result was a very clean cut, so it certainly didn't hinder:

03_masking_tape_to_protect_edge.jpg

I was rather pleased that I was bang on the line all the way along the cut: perhaps I'm getting the hang of this sawing malarkey after all?

04_accurate!.jpg

With the base cut to size, I did a bit of chamfering around the underside edges as the plywood is 5.5 mm and the groove is 5 mm. I didn't take any photos of that process, but there were a few test fits and tweaks until it went into the front groove with a few light taps from the persuading stick.

With the base fitted (and a slot made for the screw with an eggbeater drill and a dozuki), I could plane the slips flush with the bottom:

05_planing_slips.jpg

and then use handy offcut of plywood as a drawer board for planing the sides.

06_planing_sides.jpg

The vice jaw in that photo isn't tightened up; I just positioned it there so that if I did something stupid the drawer wouldn't fall onto the floor.

After a few test fits and tweaks, my first ever drawer is finished :obscene-drinkingbuddies:
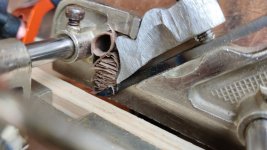
07_finished.jpg

08_test_fit.jpg

A nice snug fit (with about 1 mm clearance at the top to allow for a bit of movement; I'm guessing that'll be enough on such a shallow drawer, but if it sticks I can always trim it a bit more).

09_snug.png

At the moment, I've decided not to think about drawer hardware (pulls or holes). Given that the chest is designed such that the back is easily accessible for clamping etc, it's quite easy to just reach over and shove a finger through one of the gaps in the back and push the drawer out enough to pull it at the front. I'll probably add a pull or something at some point, but I've got too much else to do and too little time to worry about that right now!
 
That looks pretty damned good for your first ever drawer. In fact, it looks pretty damned good no matter how many drawers you've made previously.

I confess to being totally confused by the marking issues. I couldn't follow at all. I'm glad your chosen solution worked. If I have an awkward internal measuring/ marking issue like I think you had, then I think my first instinct would have been to reach for some pinch sticks. The thing is, a drawer bottom in a rebate doesn't have to fit well.
 
How will the drawers stay closed during transportation? Can you be sure if the box is in the car and you make a sudden stop the drawers will not fly open?

Looking very good by the way.
 
Mike G":24pn4z5d said:
That looks pretty damned good for your first ever drawer. In fact, it looks pretty damned good no matter how many drawers you've made previously.

Thanks Mike

Mike G":24pn4z5d said:
I confess to being totally confused by the marking issues. I couldn't follow at all. I'm glad your chosen solution worked. If I have an awkward internal measuring/ marking issue like I think you had, then I think my first instinct would have been to reach for some pinch sticks.

Pinch sticks sounds like a good idea; I hadn't thought of that.

Mike G":24pn4z5d said:
The thing is, a drawer bottom in a rebate doesn't have to fit well.

It's not in a rebate though. My original plan had been to have it in a groove, but following AndyT's suggestion, it now sits on top of the slip with the end of the plywood exposed (hence needing to be accurate). This is the cross-section of one drawer side:

cross-section.jpg

Andyp":24pn4z5d said:
How will the drawers stay closed during transportation? Can you be sure if the box is in the car and you make a sudden stop the drawers will not fly open?

"Sure" sounds like a rather strong word :lol:

The plan is to make a shooting board that fits into the space in front of the drawers. That will be anchored (somehow) to the sides of the chest so that it can't come out in transit and it in turn will hold the drawers in place. That's the idea anyway :D

I doubt I'll have that done in time for the trip to Brittany, so it might be a bit of plywood held in with masking tape for that trip 8-)

Andyp":24pn4z5d said:
Looking very good by the way.

Thanks
 
Dr.Al":2wju12ki said:
....It's not in a rebate though. .... it now sits on top of the slip with the end of the plywood exposed (hence needing to be accurate)....

So, make the drawers up, glue them and let them dry. Sit them on the ply and mark around with a pencil. Cut slightly generously, and plane back to a perfect fit.

Or... use a small quadrant over the junction of ply to sides.
 
Mike G":1pwjao3s said:
Dr.Al":1pwjao3s said:
....It's not in a rebate though. .... it now sits on top of the slip with the end of the plywood exposed (hence needing to be accurate)....

So, make the drawers up, glue them and let them dry. Sit them on the ply and mark around with a pencil. Cut slightly generously, and plane back to a perfect fit.

Yes, that would have worked, but I would have had to mark off the top of the drawer as I rushed ahead and fitted the slips. It probably would have been fine (assuming the sides are parallel to each other :D ), but it really wasn't that hard to mark it with a ruler under the slip. It took considerably longer to type up an explanation of what I did than it did to mark it up.

For the next one, I'll plonk it down on the plywood and mark round it and then fit the slips (like what AndyT told me to do :oops: )

Mike G":1pwjao3s said:
Or... use a small quadrant over the junction of ply to sides.

That's a nice thing to have up my sleeve if I mess up the plywood dimensioning!
 
I was away enjoying the sunshine at the Mach motorbike festival for the bank holiday weekend, but I've been managing to do odd bits and pieces in the evenings.

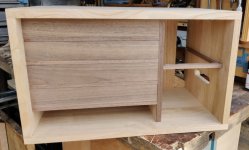
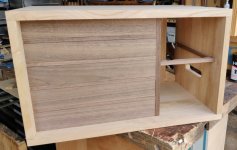
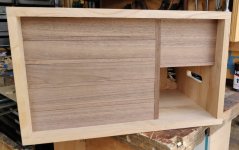
When we last left the story, the chest was looking like this:

10_one_drawer.jpg

Ctrl-C, Ctrl-V:

11_two_drawers.jpg

Ctrl-V:

12_three_drawers.jpg

Ctrl-V:

13_four_drawers.jpg

Ctrl-V:

14_five_drawers.jpg

Ctrl-V:

15_six_drawers.jpg

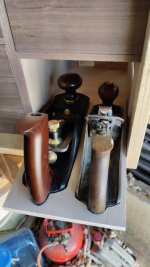
The bottom right section is going to remain drawer-less for now (as it isn't deep enough for my Veritas BU smoothing plane, so until I've decided whether I want that to be part of the kit or not, I'll take it away with me in the gap, probably on a tray of some sort). I've still got the front piece for the drawer, so I can always make the last drawer at a later date if I decide I want it.

file.php


The process for the other five drawers was fairly similar to the first one, although there were a few changes. One was that I stopped bothering with the masking tape when cutting the plywood as I found that the Kataba didn't cause any tear out at all so the masking tape was unnecessary.

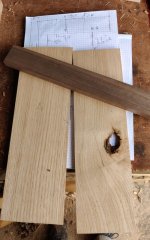
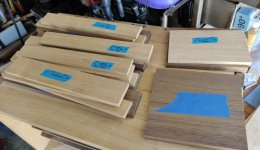
Another change was that I cut all the stock for all the drawers to width in one go:

01_cut_to_width.jpg

(apart from the top-right drawer, which needed a new piece cutting and planing to thickness as I didn't have any big enough for the drawer sides). From there, I marked up and sawed all the sides of all the dovetails in one go:

02_tails_sawn.jpg

I then did the rest of each drawer (finishing cutting the tails, marking and cutting the pins and ploughing the groove) one-by-one, with each drawer taking about an hour so being easily achievable in an evening.

After the second (I think) drawer, I made another small change. I'd laid out the half-blind dovetails such that the pin was too big for my home-made grooving plane, resulting in the groove breaking out of the dovetail and needing a repair:

03_whoops.jpg

Rather than risk that happening again, I swapped over to my relatively newly acquired Rapier plough plane (which I hadn't used before):

04_ploughing.jpg

It was a bit harder work than using the home-made one (even after setting it up) as the shavings tended to jam in the mouth, especially when the groove was still quite shallow:

jamming_shavings.jpg

As the groove got deeper, the shavings got more curly:

curly_shavings.jpg

I'm not sure if that's because I was taking quite an aggressive cut or just because the mouth is much smaller and tighter than that on my home-made plane.

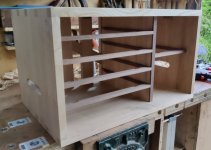
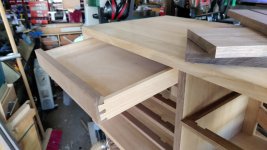
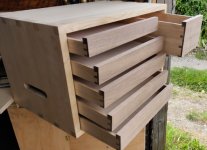
Anyway, that brings us up to date; all (for now) six drawers are in place. They still need knobs of some sort as well as drawer stops and they probably need a bit of smoothing to get rid of any handling marks before finish is applied. I'll probably use this weekend to do something in the way of a front, even if it's just a temporary one to tide me over for the upcoming trip to France.

Longer term I need to think about how to hold the tools in place so they don't rattle around in the drawers, but for this trip I think it'll be something like bubble wrap or scrunched up paper!

17_drawers_sticking_out.jpg
 
I'm really impressed and pleased at the way this project has developed.

Have a great holiday!
 
Excellent Al. You should be very proud of yourself over this project. There's some serious woodwork in there. It's going to be way too heavy to lift alone when loaded...but this was always more about the woodwork than the practicalities.
 
I landed on the last photo first showing all the drawers fitted and an involuntary Ooh came out!
I really am most impressed Al.
I don’t feel that you deserve this but I’m sure you would want to know of any way to improve, when the drawers are pulled out as in the photo they drop a little which is a real shame, when preparing the sides of the drawers they need to be individually fitted and marked so there is barely a gap between the side and the kicker. Part of the reason why drawers are numbered on the back on old furniture.
Blame all of us, we should have mentioned it!
Ian
 
AndyT":2nzsz5gm said:
I'm really impressed and pleased at the way this project has developed.

Have a great holiday!

Thanks Andy

Mike G":2nzsz5gm said:
Excellent Al. You should be very proud of yourself over this project. There's some serious woodwork in there. It's going to be way too heavy to lift alone when loaded...but this was always more about the woodwork than the practicalities.

Thanks Mike

I *think* I'll be able to lift it, but we shall see...

It's definitely been the most challenging woodworking project I've ever undertaken.

Cabinetman":2nzsz5gm said:
I landed on the last photo first showing all the drawers fitted and an involuntary Ooh came out!
I really am most impressed Al.
I don’t feel that you deserve this but I’m sure you would want to know of any way to improve, when the drawers are pulled out as in the photo they drop a little which is a real shame, when preparing the sides of the drawers they need to be individually fitted and marked so there is barely a gap between the side and the kicker. Part of the reason why drawers are numbered on the back on old furniture.
Blame all of us, we should have mentioned it!
Ian

Thanks Ian. I'm not sure my case was square enough for that to work! They were individually fitted (they're all slightly different sizes, although it's not obvious in the photo), but mainly just a case of planing the sides until they went in easily.

Also, I needed to make the sides of the top drawers lower than the front (to allow space for the brackets that the planing stops attach to) and thought it looked better to have them all like that. I guess it would be neater with the back lowered but the sides at the same level as the front, but maybe that's one for next time.

In practice I suspect that all the drawers will be removed completely before using the chest for any woodwork anyway, so they won't sit down at an angle as shown in the photo.
 
I had another hour free this evening so I decided to go and make and fit the drawer stops. I've no idea what these would normally look like, so I just made it up.

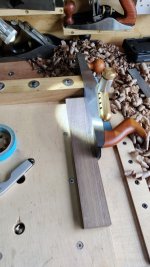
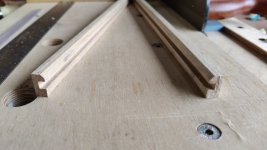
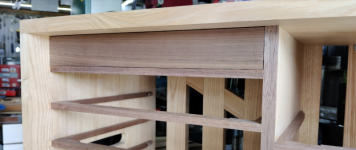
I started by getting a spare bit of drawer divider and chopping a bit out to make it roughly the same shape as the cut-outs that I'd made in the dividers. I then made an impromptu "sticking board" (I think that's what they're called anyway) and made a small rebate in one corner of a scrap bit of walnut with the #78:

01_rebate.jpg

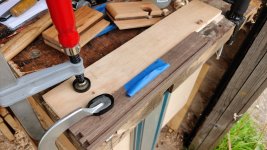
I then used the folding Kataba (which is becoming one of my favourite tools) to chop it a bit thinner, before planing the sawn edge smooth:

02_trim_to_width.jpg

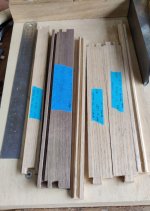
I could then chop the strip into circa 20 mm slices and shoot each one individually to the right length to fit its slot:

03_shoot_to_fit.jpg

All dry fitted:

04_all_fitted.jpg

What it looks like from behind:

05_rear_view.jpg

To glue them in place, I decided to use the fish glue again, rather than the TB hide glue that I'd used on the drawers. Having tried both, I think I prefer the fish glue: it takes a long time to dry (and hence gives time to get stuff into place) like the hide glue, but also seems to spread quite a bit more easily than the hide glue.

Having said that, getting it onto the glue surfaces on the drawer dividers was a little awkward:

06_awkward.jpg

I'm not sure they really need clamps as they're all a very snug fit, but I figured it couldn't hurt:

07_clamps.jpg

I still need to figure out what to do in the way of a drawer stop for the bottom drawer, but I'm putting that decision off for now!

Once the glue is properly dry I guess I'll need to (gulp) try to plane the fronts of the drawers to be flush with the fronts of the dividers and the middle support. I might do that after the holiday as I feel like I might need to be very, very calm and relaxed before I start that job :lol:

I haven't decided what the next job is. I'll probably get started on some sort of front (either the final shooting or an interim thingamajig to tide me over until I have more time). I think it'd probably be a good idea to get some finish on the chest itself before travelling. I'm still very open to suggestions, but at the moment it'll probably be MMM just because it's easy and I've got the ingredients.
 
I'm starting to feel the pressure with only two full days left before I skip the country. I think I'll mostly be doing whatever it takes to get it in a state that will suit going away and then I can worry about doing stuff properly when I get back - I'll possibly also learn a bit from what it's like to use and decide to tweak things (or bung it on the bonfire :lol: )

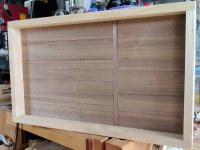
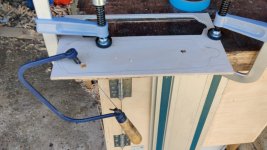
Anyway, this afternoon's quick job was to cut a couple of sheets of plywood to be a nice sliding fit in the bottom right corner. One of them then got drawn on and I attacked it with a coping saw (and then quite a bit of work with a file: I'm not very accurate with a coping saw :( ).

01_coping.jpg

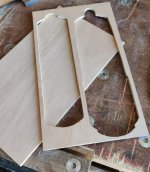
After cleaning it up:

02_template.jpg

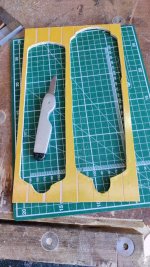
I didn't fancy the idea of trying to stick the two pieces together without any squeeze-out but with good glue coverage, so I cheated and used double-sided tape...

03_tape.jpg

... which also has the advantage of not needing much in the way of curing time, so I could try it out:

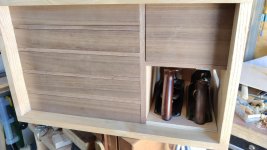
04_fitted.jpg

It's nice and easy to push in and pull out as there are two rather large and carefully shaped handles provided :D

05_sticking_out.jpg

It looks quite shabby with the exposed plywood ends, but that's something I'm going to think about when I get back from my travels. One option that's quite appealing is to make it again out of sweet chestnut, although I might use a different means of stopping the planes rattling around (e.g. a simple block on each corner). Another potentially easier option is just to shorten the plywood a bit and stick a bit of walnut over the end. We shall see.
 
Back
Top