• Hi all and welcome to TheWoodHaven2 brought into the 21st Century, kicking and screaming! We all have Alasdair to thank for the vast bulk of the heavy lifting to get us here, no more so than me because he's taken away a huge burden of responsibility from my shoulders and brought us to this new shiny home, with all your previous content (hopefully) still intact! Please peruse and feed back. There is still plenty to do, like changing the colour scheme, adding the banner graphic, tweaking the odd setting here and there so I have added a new thread in the 'Technical Issues, Bugs and Feature Requests' forum for you to add any issues you find, any missing settings or just anything you'd like to see added/removed from the feature set that Xenforo offers. We will get to everything over the coming weeks so please be patient, but add anything at all to the thread I mention above and we promise to get to them over the next few days/weeks/months. In the meantime, please enjoy!

Holiday Toolchest

Al, Cidre is in the same class as beer as far as bringing back to UK. Therefore the allowance is 42 litres, each. I’d be surprised if you have room in your car for that much with all the tools and timber you take on holiday.
 
Al, Cidre is in the same class as beer as far as bringing back to UK. Therefore the allowance is 42 litres, each. I’d be surprised if you have room in your car for that much with all the tools and timber you take on holiday.
Not according to that link you posted unfortunately: 9 litres each (or less if we wanted to bring back any spirits):

alcoholic drinks up to 22% alcohol (not including beer or still wine) - 9 litres

Alcoholic drinks up to 22% alcohol include:
  • sparkling wine
  • fortified wine (for example port, sherry)
  • cider

You can split this last allowance. For example, you could bring 2 litres of spirits and 4.5 litres of fortified wine (both half of your allowance).
 
Oops, sorry for the false advice. I have always considered cidre the same as beer and have certainly carried more than 9l at a time.
 
I’m not entirely sure that they’ll look that closely.

Reminds me of when we first moved to Sweden. Defender packed to the gills. Including small dachshund making a noise. Young custom guard did a pretty cursory look. And then asked ‘Any sharp, or edged items’. My response: ‘Oh, good lord no’.

And then we both looked down at a large axe in full view.

‘Well, that’s ok then’. What a lovely chap. I must have looked at my most beguiling.
 
While I’ve had nothing better to do I emailed Brittany Ferries and I quote from their reply

“Good Afternoon,
Thank you for your email.
I would recommend sticking to what the GOV website is advising. I will email the relevant department to let them know that the information on our website is incorrect.
Thank you for bring this to our attention.
Kind Regards”
 
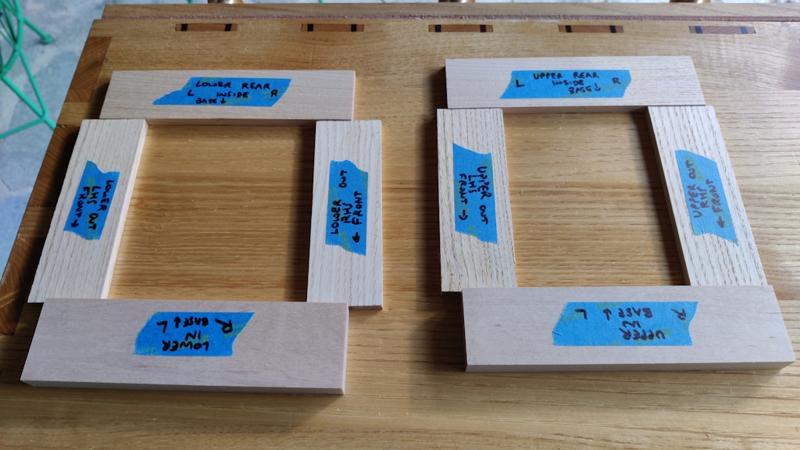
We've been out and about a bit more over the last few days, so the photos I'll be posting here (and in the next post) are from stuff I've been doing in odd bits of time over the last three days. In the last "episode", I'd got all the drawer pieces thicknessed, so the first job was to label them to minimise the chance of any silly mistakes later:

2024-09-20-01-pieces-marked-out_800.jpg


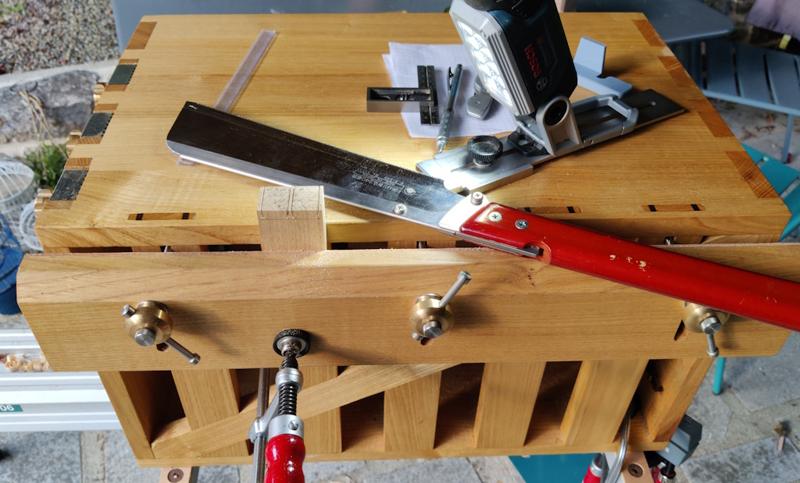
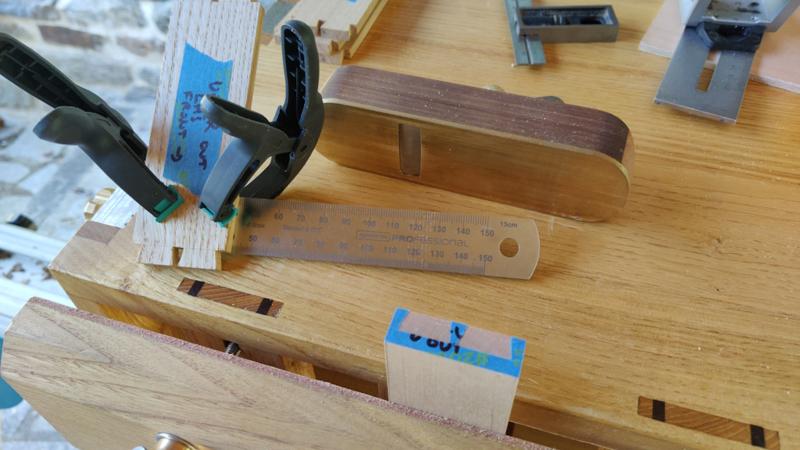
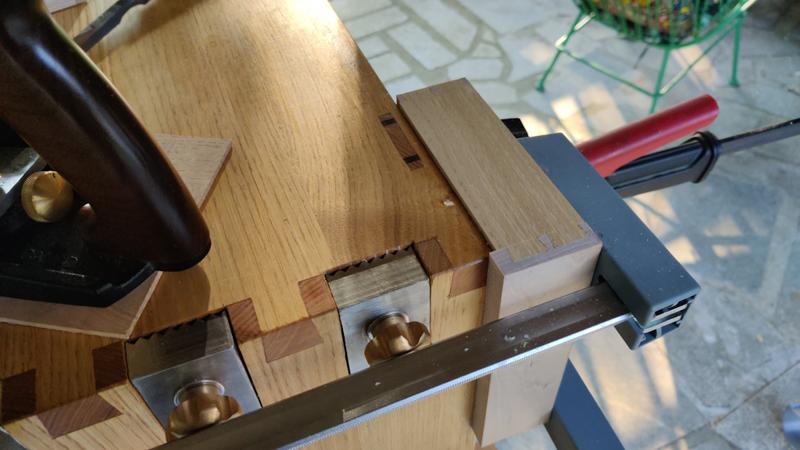
I sawed all four tail boards at the same time as I couldn't see a reason not to do so. The vice was right at the very limit of its capacity (so the screws were probably only in the "nuts" by a turn or so), so I only tightened them enough to hold the boards loosely in place and then I used a clamp to hold them securely:

2024-09-20-02-cutting-tails-together_800.jpg


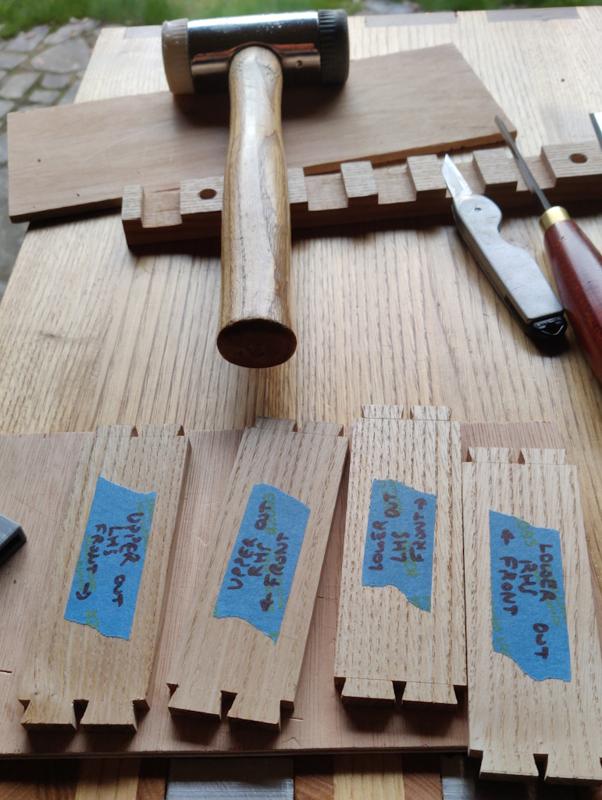
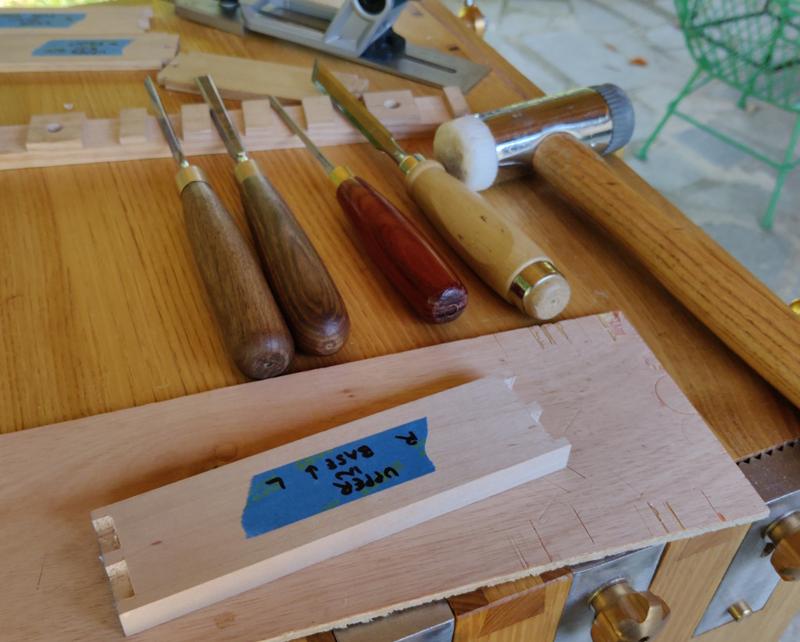
The tails were then chopped in the usual way, using a 3 mm (actually 1/8" in this case: most of my chisels are metric sizes but I have a couple in dark-ages units!) chisel.

2024-09-20-03-chopping-tails_800.jpg


The pins for the drawer backs were marked in the usual way and then sawn while they were still in the vice:

2024-09-20-04-marking-back-pins_800.jpg


The pins for the drawer fronts got marked in the usual way...

2024-09-20-05-marking-blind-sockets_800.jpg


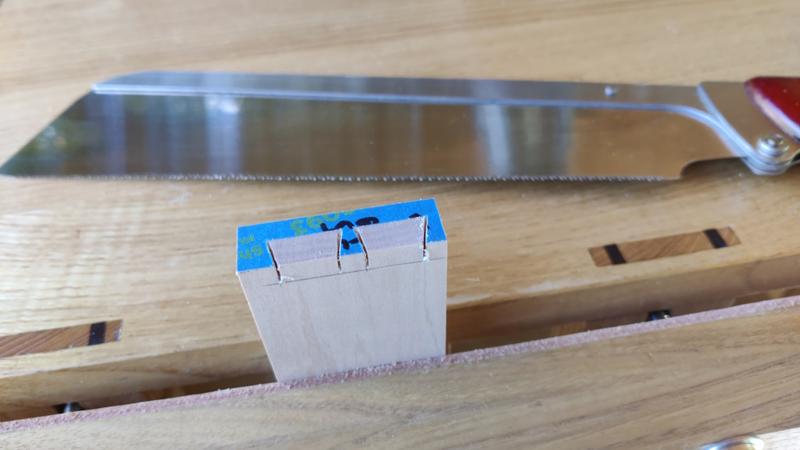
... but turned round to saw at 45° as deep as I felt confident going ...

2024-09-20-06-sawing-blind-sockets_800.jpg


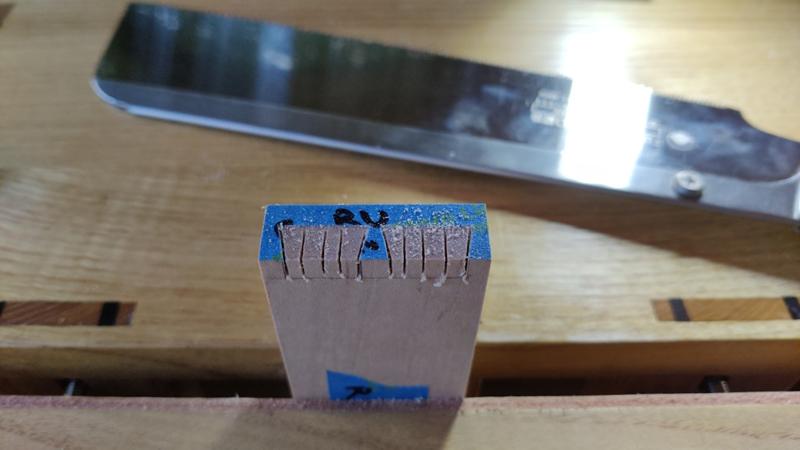
... and then I added a few extra saw cuts to help with chopping the waste out.

2024-09-20-07-extra-saw-cuts_800.jpg


To chisel out the waste, I put a cushion on the end of the mitre saw stand so I could sit straddling the stand and work through the boards, using a 6 mm and a 10 mm chisel for the rear pieces...

2024-09-20-08-straddling-saw-stand-to-chop_800.jpg


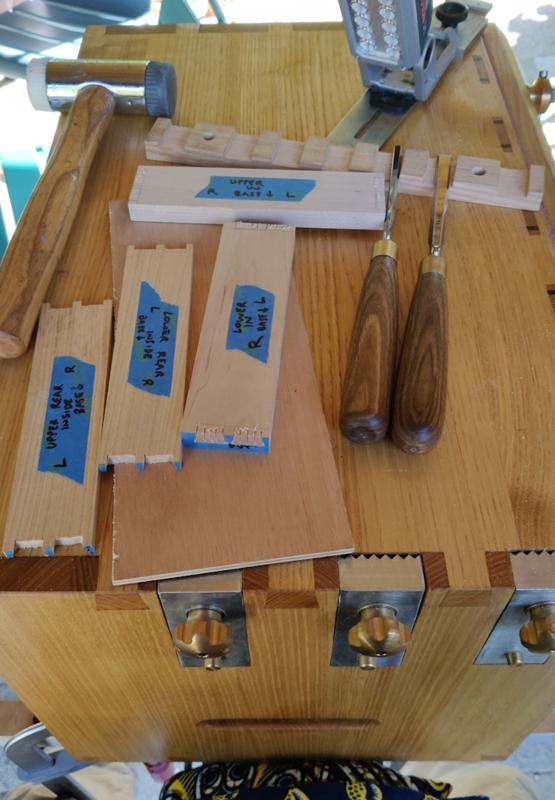
... and adding the 3-ish mm one and a skewed chisel for the blind sockets:

2024-09-20-09-different-set-of-chisels-for-blind_800.jpg


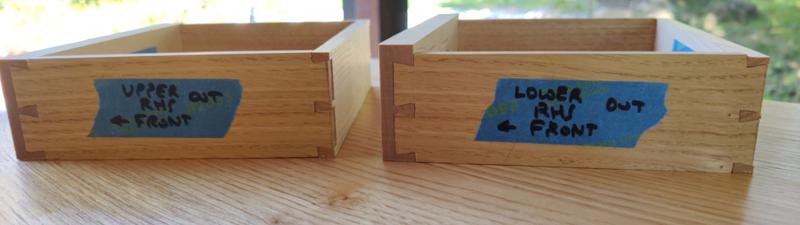
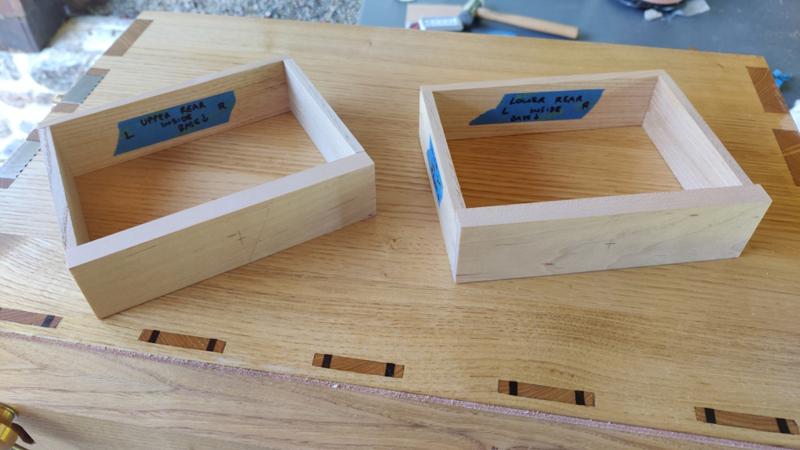
I could then do a dry fit:

2024-09-20-10-dry-fit_800.jpg


2024-09-20-11-dry-fit-second-view_800.jpg


After getting back from a trip to see the "Museum of the Junkyard Poet" (Univers du Poète Ferrailleur), which I'd wholeheartedly recommend to anyone visiting the area, I wanted to get the drawer boxes glued together so the glue could dry overnight. It was getting quite late, so I just got on with it without taking photos.

I'd been reading "The Complete Woodworker" by Bernard E. Jones (my copy published in 1920) and had decided that for these little drawers, I'd just set the base into the sides with a simple groove. To make sure there was definitely room for expansion despite the thin pieces that make up the sides and the backs, I ploughed 2 mm deep grooves in the sides and the backs and a much deeper (5 or 6 mm) groove in the fronts. I then (after making the bases 4 mm bigger than the inside dimension of the boxes) glued them into the back pieces. They shouldn't need any allowance for expansion side-to-side (as that's along the grain) and any expansion front to back should just cause them to push deeper into the deep groove in the front piece.

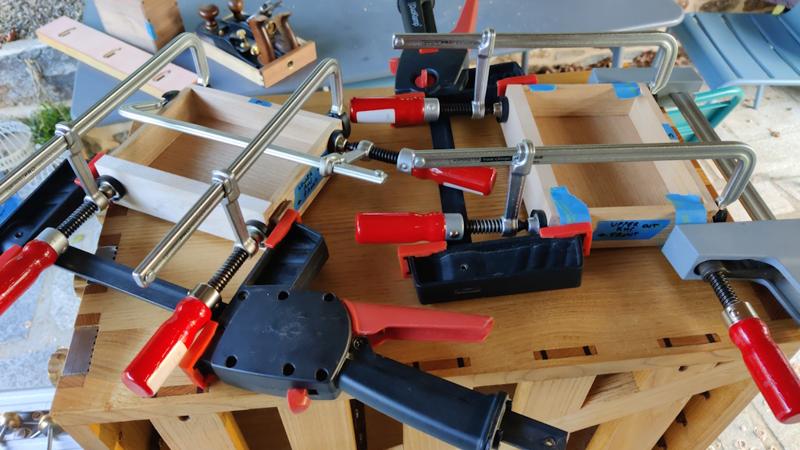
Anyway, when they were all glued together and covered in clamps, they looked like this:

2024-09-20-12-in-clamps_800.jpg


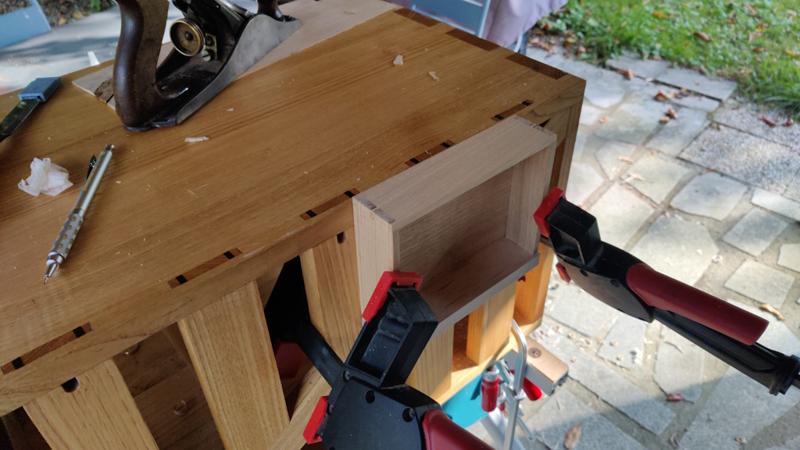
Planing the sides down to meet the front and back (which were initially made to be the right size; the sides were made to sit slightly proud of the front and back) involved a bit of thought about how to clamp the drawers (especially on the bottom drawer, which has a protruding lip on the front):

2024-09-20-13-planing-sides_800.jpg


The backs (and the sides of the top drawer) were much simpler:

2024-09-20-14-planing-back_800.jpg


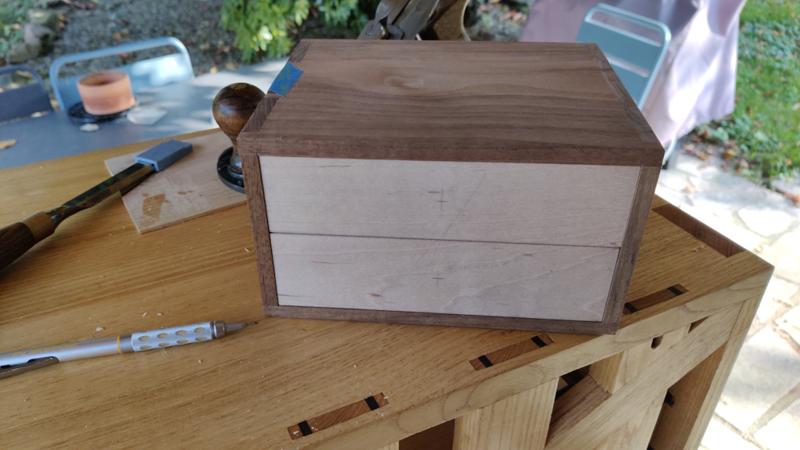
Test fit:

2024-09-20-15-test-fit_800.jpg
 
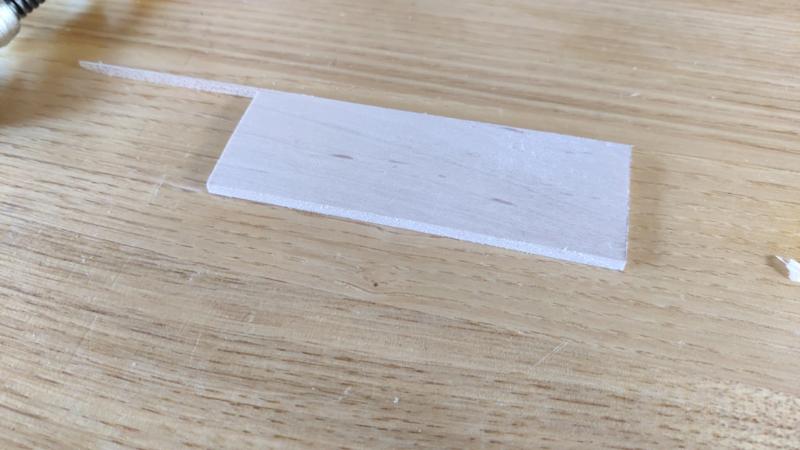
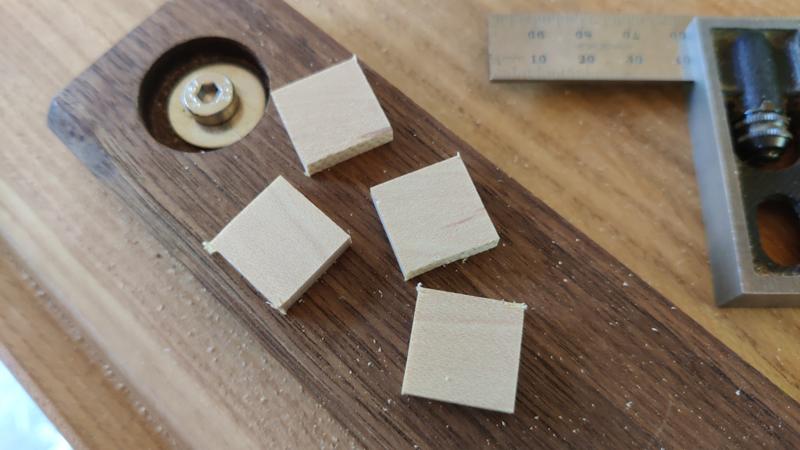
Remember this offcut of maple?

2024-09-20-16-offcut-of-maple_800.jpg


It got chopped into four small pieces (plus a lot of left-over, obviously):

2024-09-20-17-square-bits_800.jpg


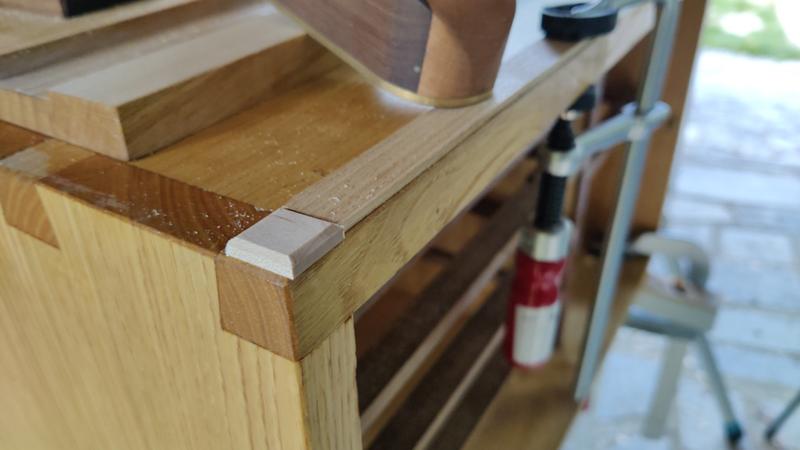
With a bit of wood clamped to the front of the chest acting as a planing stop, I chamfered all the corners by eye:

2024-09-20-18-planing-by-eye_800.jpg


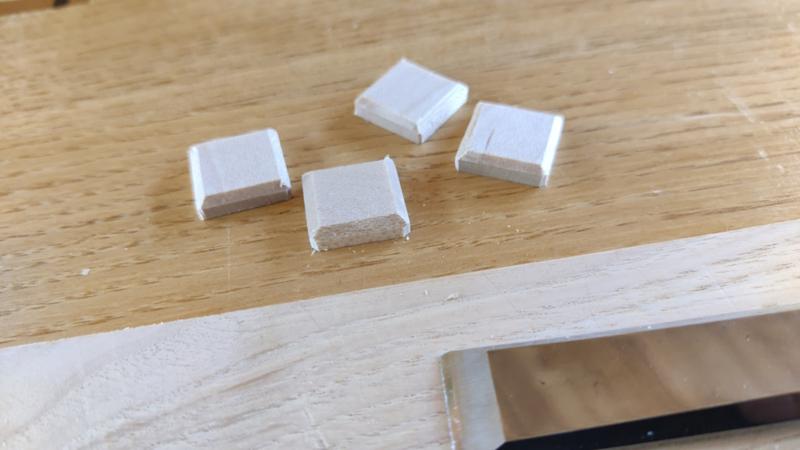
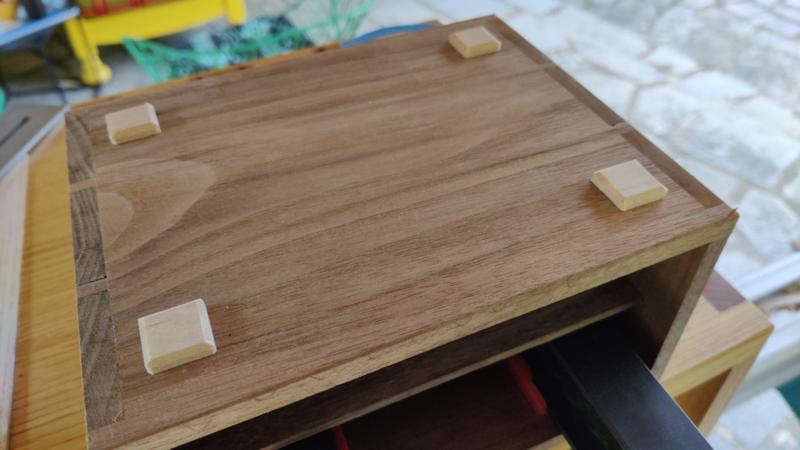
That gave me four feet to put on the bottom of the box ...

2024-09-20-19-four-feet_800.jpg


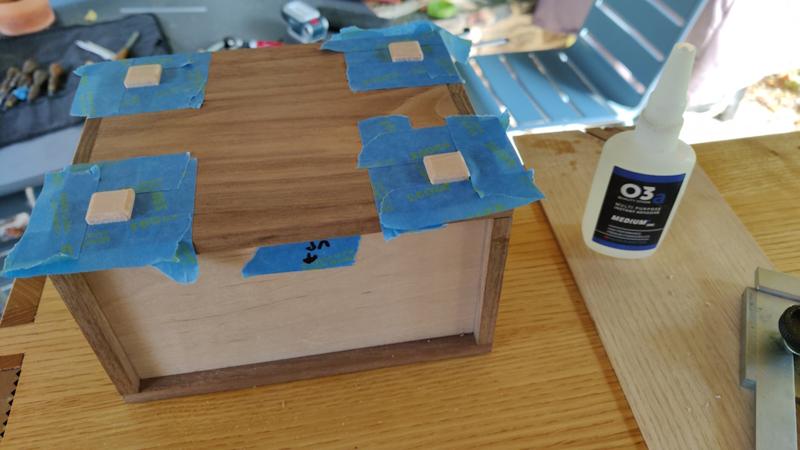
... which I did using masking tape to help with alignment and superglue for a quick cure:

2024-09-20-20-superglue_800.jpg


Voila:

2024-09-20-21-four-feet-fitted_800.jpg


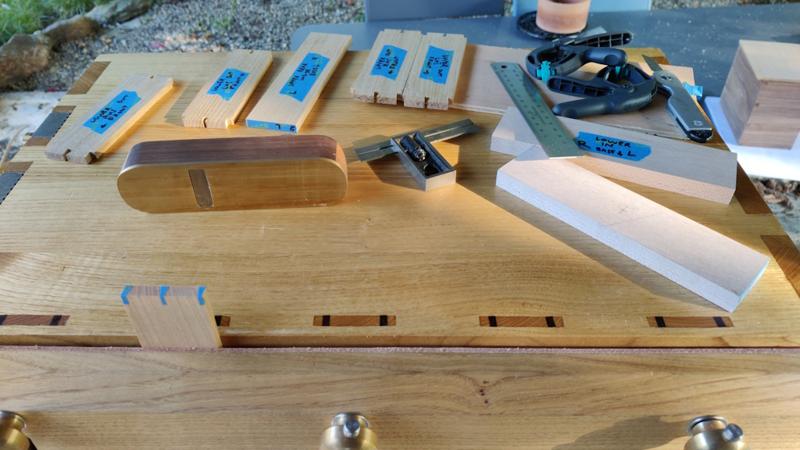
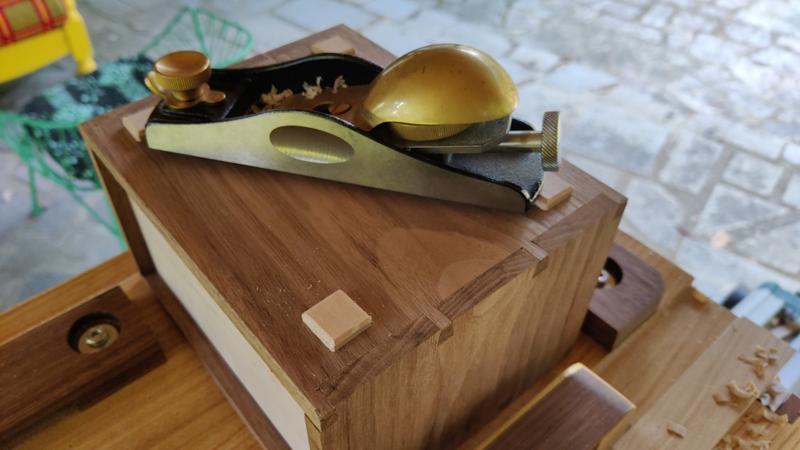
The box rocked slightly on its feet, so I used the shooting board as a flat reference (i.e. checked whether the box was flat by placing it on the shooting board and seeing if it rocked) and planed the two high corners down with a block plane until it sat level:

2024-09-20-22-planing-for-level_800.jpg


That was the body of the box complete (give or take some final skim cuts and chamfers for which I didn't bother taking any photos). The next thing to get on with was the drawer fronts.

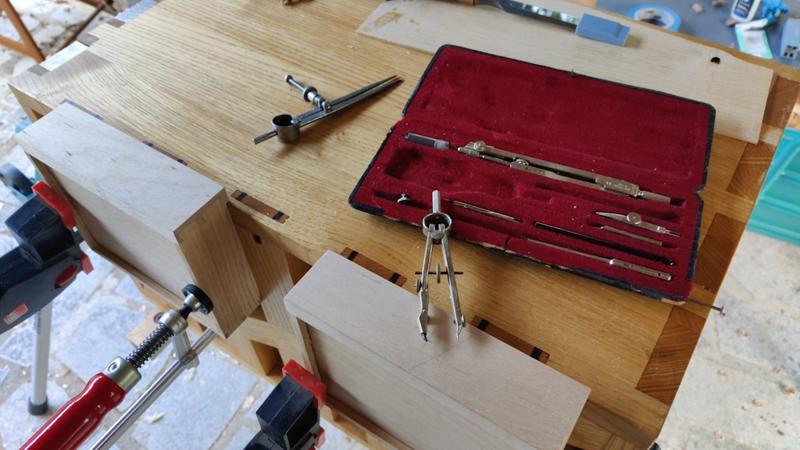
I'd brought my old drawing set with me...

2024-09-20-23-drawing-set_800.jpg


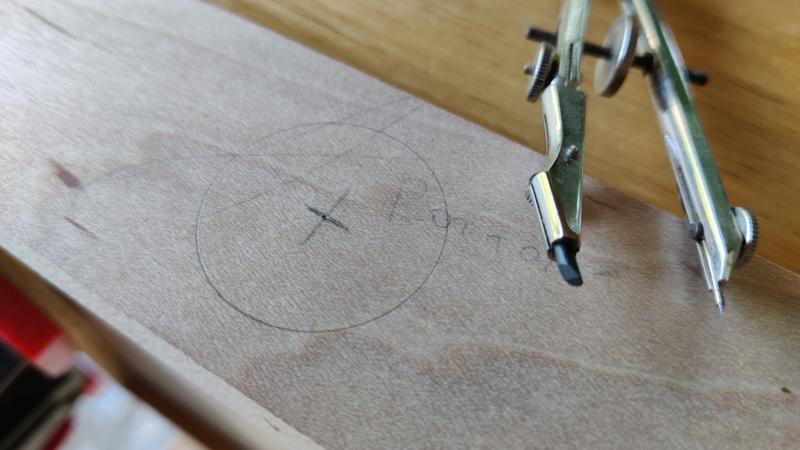
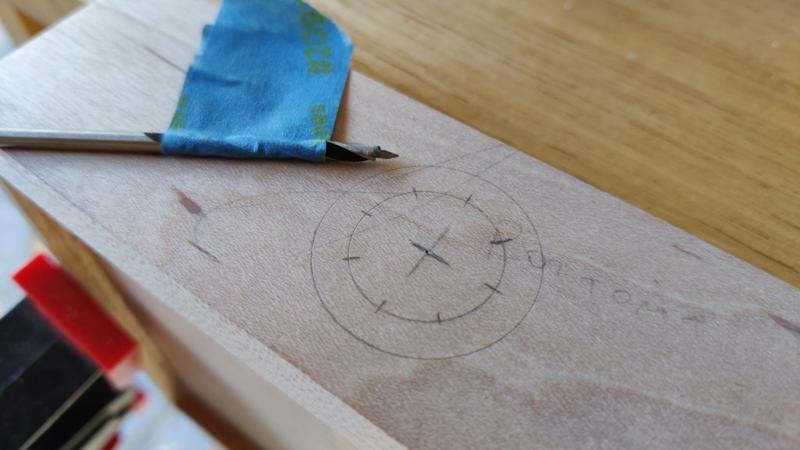
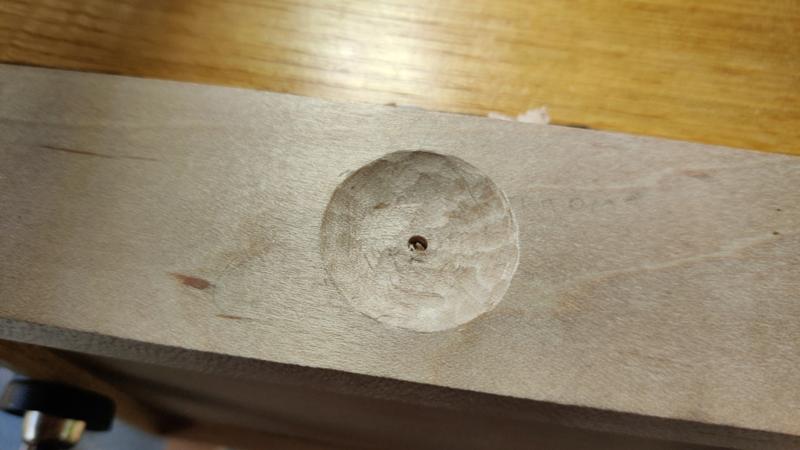
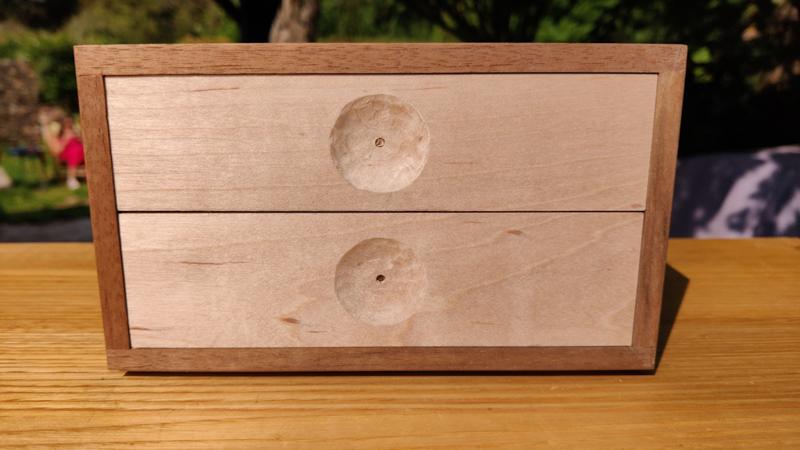
... which I used to draw a 30 mm diameter circle on the front of each drawer:

2024-09-20-24-circle_800.jpg


I then drew another slightly smaller circle and divided it into eight:

2024-09-20-25-divided-smaller-circle_800.jpg


Those divisions weren't really necessary, but I had thought they might help me get started carving in a logical way.

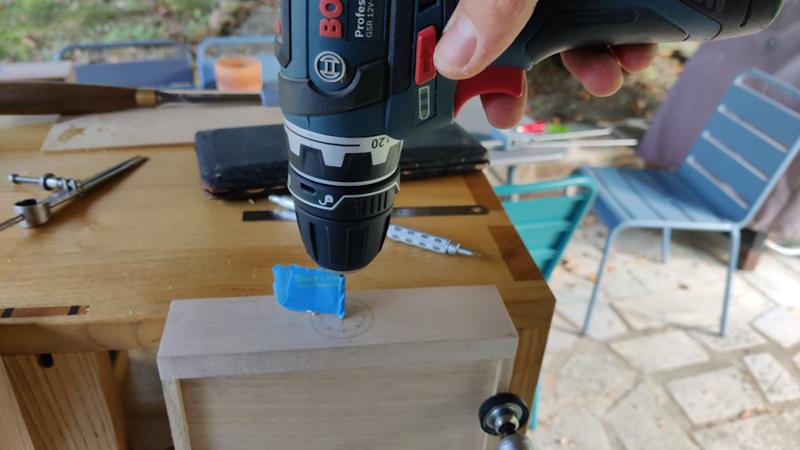
To drill the centre hole, I put some tape on a 3 mm drill bit and then, with Carolyn sighting down one axis and me sighting the other, drilled down until the tape hit the drawer front:

2024-09-20-26-drilling-centre_800.jpg


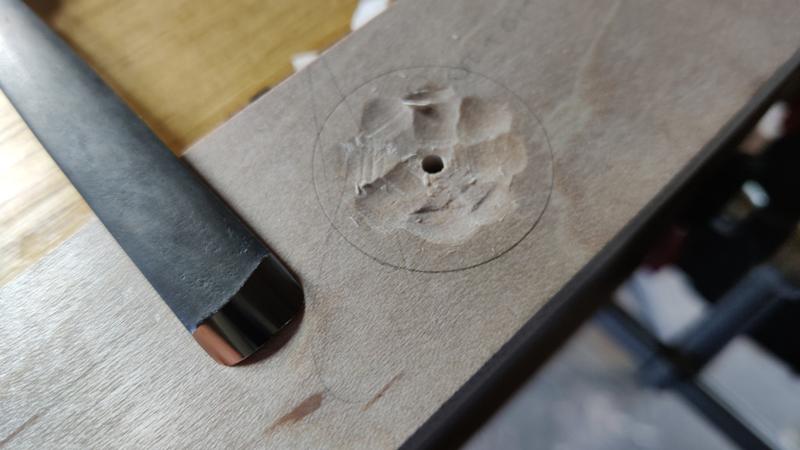
Those blind holes will be made bigger later, but the small hole gives me something to aim for. I then started to carve, initially following the division marks on the inner circle...

2024-09-20-27-starting-to-carve_800.jpg


... then following those lines out a bit further ....

2024-09-20-28-bit-more_800.jpg


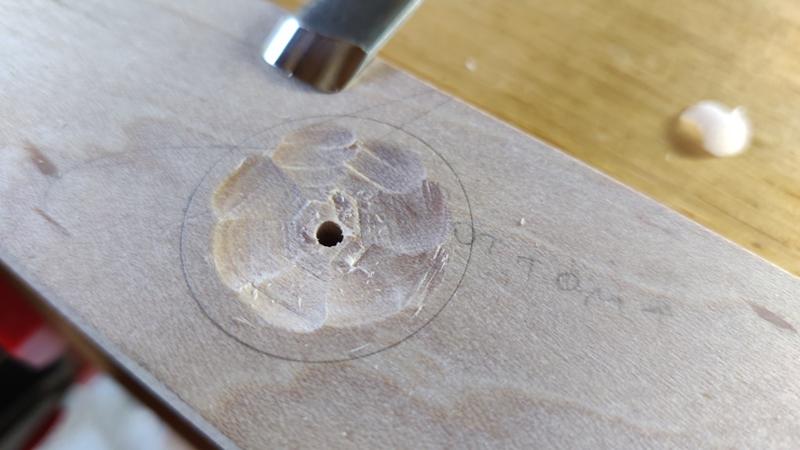
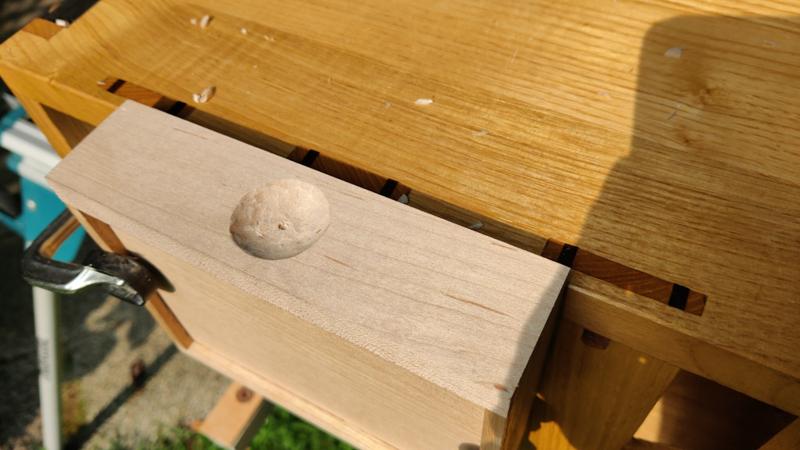
... and then doing it a bit more randomly to get a "rustic" indent:

2024-09-20-29-first-one-done_800.jpg


For the first one, I'd had a light set up on the bench but it was a bit awkward as I kept having to move it out the way as I worked around the circle. For the second one I decided to break the habit of a lifetime and move into the sun. With better lighting (and having practised on the first one), the second one proceeded very quickly:

2024-09-20-30-second-one-done_800.jpg


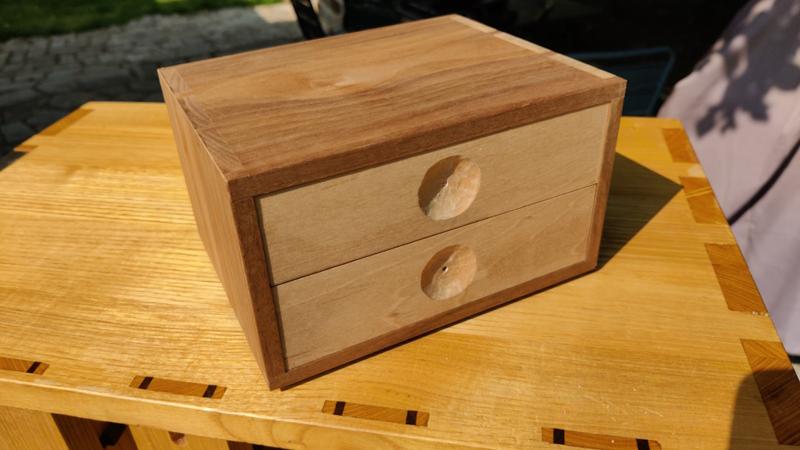
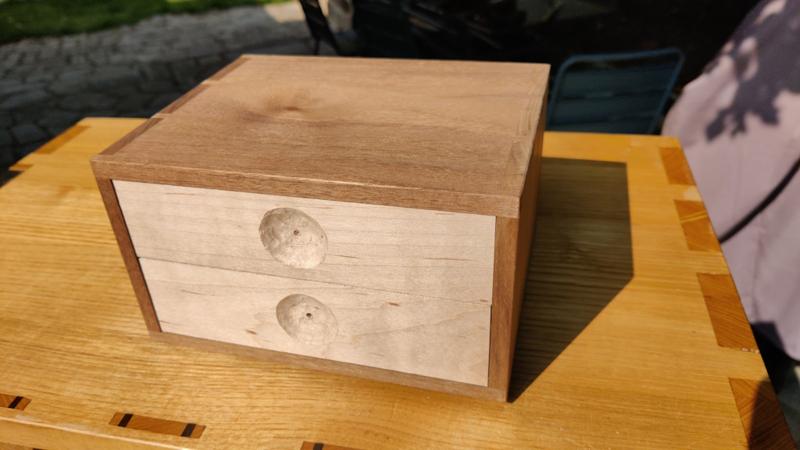
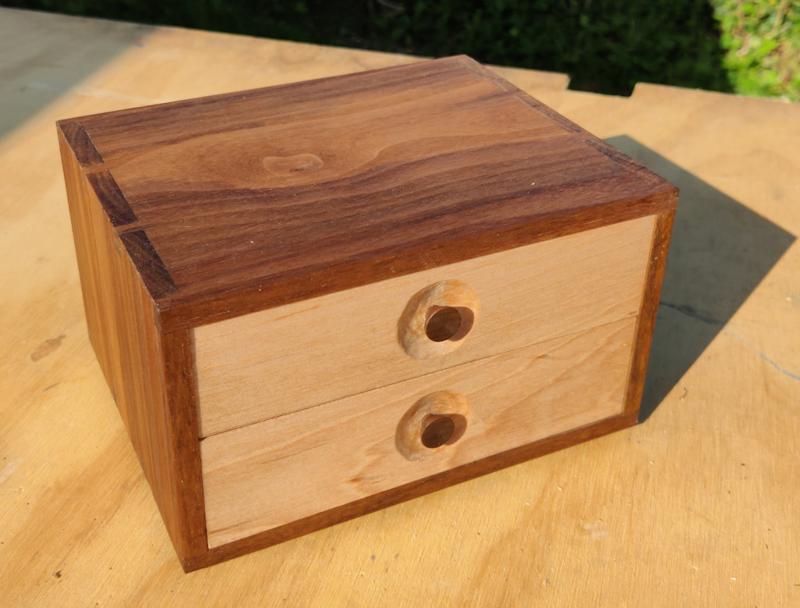
That's the box done for now. The drilled holes in the middle of the drawer fronts will be made bigger and then there will be some turned walnut knobs glued into the holes, but turning knobs needs a lathe, so that'll have to wait until I'm back home.

A few photos showing what it looks like pre-knobs and pre-finish:

2024-09-20-31-done-for-now-1_800.jpg

2024-09-20-32-done-for-now-2_800.jpg

2024-09-20-33-done-for-now-3_800.jpg

2024-09-20-34-done-for-now-4_800.jpg


We've only got a couple of full days remaining here in Brittany (and I'm not sure how much of that will be at the cottage vs out-and-about), so I won't start anything as complicated as this drawer box now. On my list of boxes to make are a couple more tea caddies (one for Keemun tea for home and one to take into work) so I might get started on one of those. Or I might just sit in the shade and drink cider, who knows?!
 
Nice job on that little box unit Dr.Al and the drawer fit doesn't look too shabby either. I've recently watched the series of Rob Cosman videos (the first four) on making and fitting drawers; if you have a spare hour or three I can thoroughly recommend them. The carved recesses on the fronts have been nicely done, however to get the gouge scollops really, really crisp you need a gouge with an absolutely lethal edge; 'sharp' is good but it's nowhere near good enough. I have a load of gouge work to do on the new cabinet shortly so of necessity I've got the keep the gouge(s) used as sharp as scalpels (if that's possible). I use the leather wheels on the Tormek to hone the outside and inside bevels to get the required degree of lethality. However it's dead easy to make up a curved profile mdf 'wheel' to fit on the pillar drill to do the inside bevels if you ain't got a Tormek. Dress the wheel with your favourite honing compound (Autosol is pretty good) and you'll see and feel the difference - Rob
 
Nice job on that little box unit Dr.Al and the drawer fit doesn't look too shabby either. I've recently watched the series of Rob Cosman videos (the first four) on making and fitting drawers; if you have a spare hour or three I can thoroughly recommend them. The carved recesses on the fronts have been nicely done, however to get the gouge scollops really, really crisp you need a gouge with an absolutely lethal edge; 'sharp' is good but it's nowhere near good enough. I have a load of gouge work to do on the new cabinet shortly so of necessity I've got the keep the gouge(s) used as sharp as scalpels (if that's possible). I use the leather wheels on the Tormek to hone the outside and inside bevels to get the required degree of lethality. However it's dead easy to make up a curved profile mdf 'wheel' to fit on the pillar drill to do the inside bevels if you ain't got a Tormek. Dress the wheel with your favourite honing compound (Autosol is pretty good) and you'll see and feel the difference - Rob
Thanks Rob. That gouge was honed on the Tormek leather wheel (inside & out) as you describe. It produced a lovely clean cut (although slightly less so going across the grain). The wobbly nature of the cut is partly that I was aiming for a slightly rustic look, but mainly that my hands shake a bit and I was too nervous too keep fettling it to make it smoother! It's also the first time I've done it (apart from a play when I was experimenting with drawer pull ideas for the chest), so my technique needs a lot of work.

I've watched David Charlesworth's excellent video on drawer making; I'll definitely have a look at Rob Cosman's. He does annoy me at times, but I do see that he has a lot of skill.
 
Thanks Rob. That gouge was honed on the Tormek leather wheel (inside & out) as you describe. It produced a lovely clean cut (although slightly less so going across the grain). The wobbly nature of the cut is partly that I was aiming for a slightly rustic look, but mainly that my hands shake a bit and I was too nervous too keep fettling it to make it smoother! It's also the first time I've done it (apart from a play when I was experimenting with drawer pull ideas for the chest), so my technique needs a lot of work.

I've watched David Charlesworth's excellent video on drawer making; I'll definitely have a look at Rob Cosman's. He does annoy me at times, but I do see that he has a lot of skill.
Good to hear that you've got a Tormek; I wouldn't be without mine. Shaky fingers explains the rustic look :ROFLMAO: The late and very great Alan Peters did some fandabby work with a gouge on one or two of his low tables, where a bowl was gouge finished into the top. Exquisite work - Rob
 
Very nice Al, I’ve always used a marking gauge with a knife point in it set to the exact thickness of the drawer sides to mark the shoulders of the Dovetails, there is virtually no planing of sides needed then. Obviously I prepare the fronts so that they are an almost tolerance fit in the box/cabinet.
I was wondering why you had an overhang on the bottom of one drawer and realised that you weren’t having a dividing rail between the drawers which is the way I think I would have done it, but looking at the way the two drawers are together surrounded by the box you have it right.
How’s your other half bearing up?
Ian
 
Good to hear that you've got a Tormek; I wouldn't be without mine.

I was slightly on the fence with it regarding "normal" woodworking tools and I rarely use it with them. It's just too slow for regrinding/reshaping (compared to my 1450 rpm bench grinder with 80 grit wheel): I don't have the patience for regrinding even a relatively thin blade and with a thick Veritas one it's a nightmare. With the 1450 rpm one even the 5 mm thick blades only take a few minutes and (being slower than a full speed grinder) doesn't get the blade too hot. For sharpening plane blades and chisels a bench stone is far quicker than bothering with the Tormek.

However, with carving and woodturning tools, the Tormek is an absolute god-send.
 
Very nice Al, I’ve always used a marking gauge with a knife point in it set to the exact thickness of the drawer sides to mark the shoulders of the Dovetails, there is virtually no planing of sides needed then.

I've never quite had the bottle for that on any dovetail. I sometimes use a marking gauge, but I tend to set it very slightly off (usually using a piece of paper as an offset) as it's easier to plane a bit off than to add a bit on.

Obviously I prepare the fronts so that they are an almost tolerance fit in the box/cabinet.

Yes, that's what I did too.

I was wondering why you had an overhang on the bottom of one drawer and realised that you weren’t having a dividing rail between the drawers which is the way I think I would have done it, but looking at the way the two drawers are together surrounded by the box you have it right.

Thanks Ian. I'd pondered different ways of supporting the upper drawer, but that was the only viable one I could think of. With a simple rail in the sides, it would either need to be short grain (which would be a nightmare) or would need to allow for wood movement (which felt difficult given that there isn't enough thickness for a screw in a slot at the back). Having a full width shelf seemed the easiest option. I'd also considered bringing it all the way to the front (possibly with a narrow maple strip on to keep the grain continuation going), but the way I did it just felt easier!

How’s your other half bearing up?

Thanks for asking. She's getting better gradually, but still a long way to go. She can move around with only one crutch now, which is quite a big thing in terms of freedom (if only because she can carry a cup of tea!). There's still a lot more bone growth needed before the femur is fully repaired, but we saw an x-ray a few weeks ago and compared to one back in late May it was amazing how much more bone there was.

She has needed quite a lot of rest time to let the leg: after any day of walking around exploring somewhere in Brittany there have generally been a couple of days of rest and recovery, but we've both still really enjoyed having the break (and Carolyn has enjoyed the sunshine). All the rest days have given me lots of time for box making too!
 
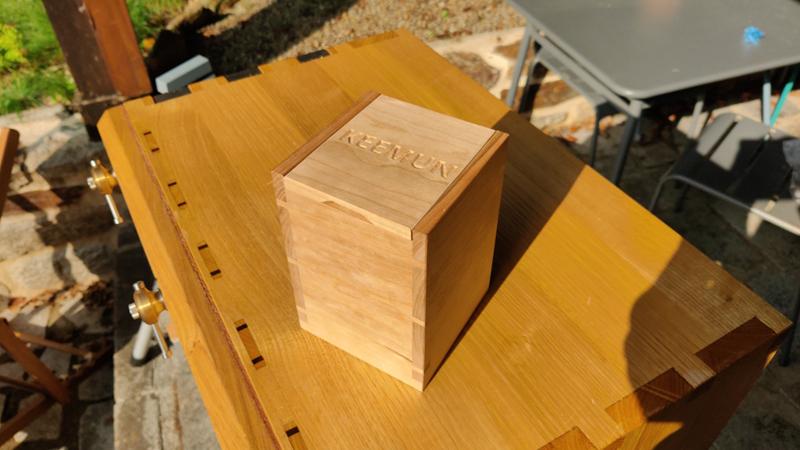
Well, today is the last full day in Brittany. Tomorrow morning we'll be packing everything into the car and making our way north, ready for an early morning ferry from Normandy on Tuesday morning. Since the last instalment, I've made one more simple box (another tea caddy, this time from cherry). I didn't take any in-progress photos as the box is much the same as the previous tea caddy in construction (except that I mitred the bottom dovetails to make ploughing the grooves a bit easier).

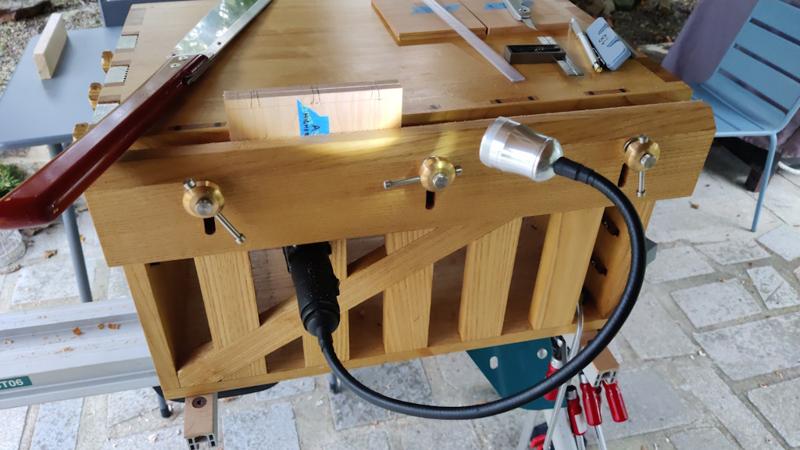
The one in-progress photo I did take was on a slightly overcast day when I found an unusual but quite effective way of lighting the workpiece, by clamping the bracket for the light to the back of the chest under the vice:

2024-09-22-01-clamped-lamp_800.jpg


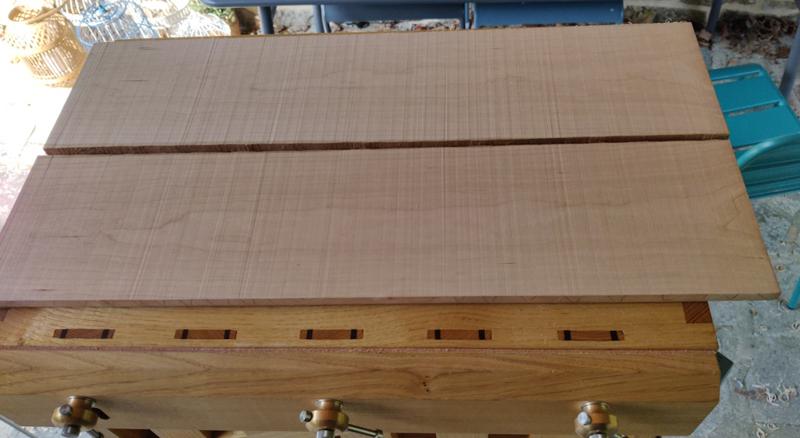
Anyway, the tea caddy started off as the right-hand end of these two planks of cherry...

2024-09-22-02-cherry-boards_800.jpg


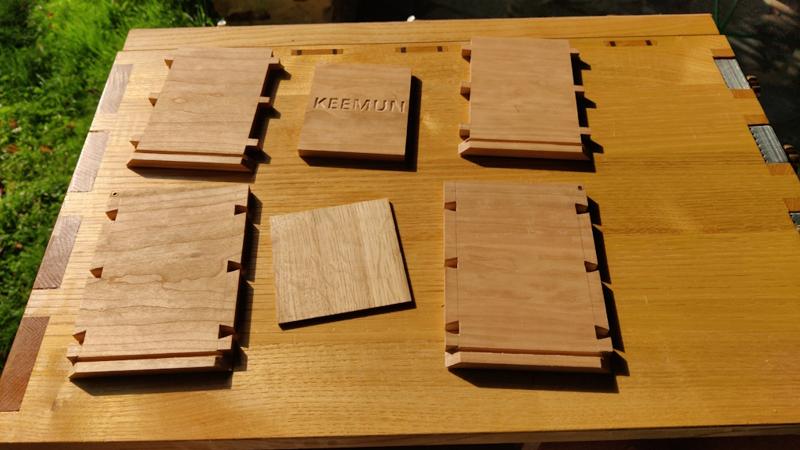
... which were turned into most of these bits:

2024-09-22-03-cherry-bits_800.jpg


You might notice that the box base looks a bit different. I didn't fancy the idea of planing 9–10 mm thick cherry down to 3–4 mm for a base and I had a bit of 3 mm thick oak of about the right size, so I decided it would be simpler to just use that. No-one will see it once the box is full of tea!

The finished box:

2024-09-22-04-keemun-box_800.jpg


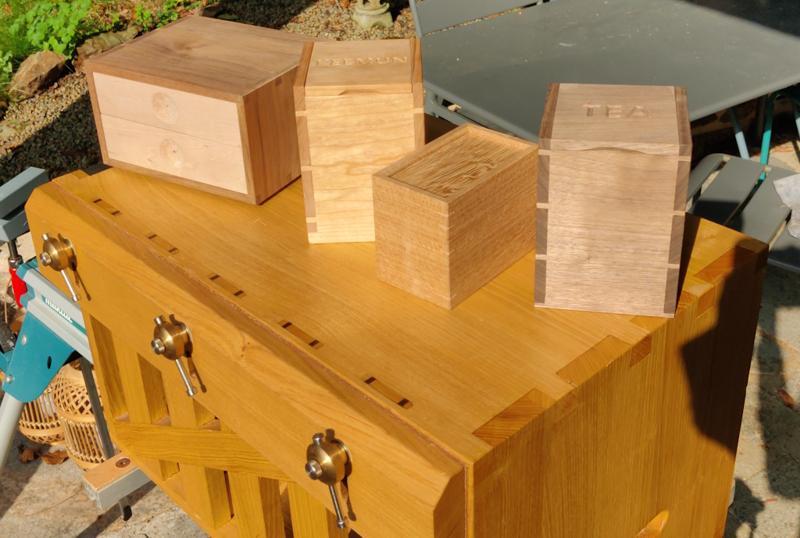
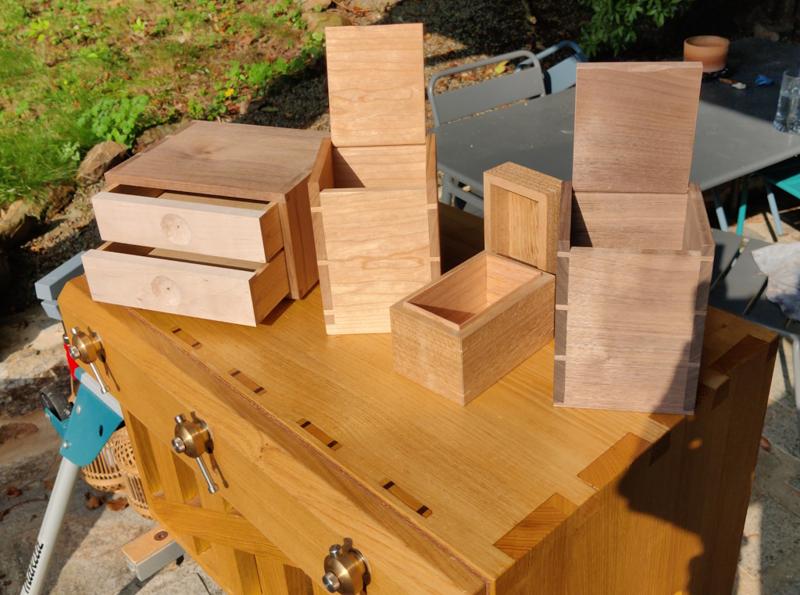
As this is the end of this trip to Brittany, in which I've done a lot more woodwork than I would normally expect as a result of Carolyn needing time to rest and recover as her broken femur heals, I thought it would be a good time to gather all the boxes together and take a couple of photos:

2024-09-22-05-all-boxes-closed_800.jpg


2024-09-22-006-all-boxes-open_800.jpg


When I get back to England, I'll turn and fit the knobs for the drawer box and then apply some finish (probably Mike's Magic Mix for the oak box and the drawer box and mineral oil for the tea caddies).
 
I am glad Caroline is getting better, I remember using two crutches and going up and down stairs on my bum luckily, I had a second set so I didn’t need anyone to carry them up.

Pete
 
Ooh, don't let her hear you call her that, she'd never forgive you :ROFLMAO:
When I was at the 'chalk face' in the 80's I recollect there was a very pleasant, very bright, Yr9 pupil in one of my classes who's name was Carolyn. I made the very unfortunate mistake, just the once, of calling her Caroline when taking the register in class. I received a withering reply and suffice to say I never made the same mistake again! - Rob
 
Wonderful box making.
Good to hear of Carolyn's recovery. I, too, had a nasty femur break, result of a motorcycle crash.
I carried a pin..440 mm long..driven into the marrow, for a year and a half. Give her my best.
 
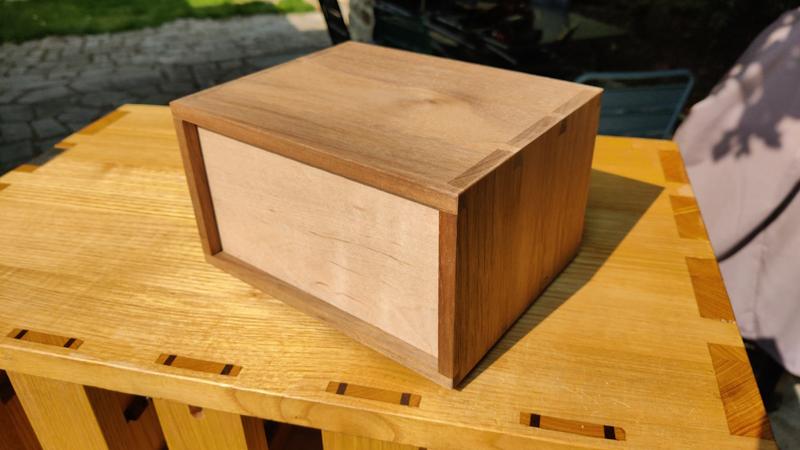
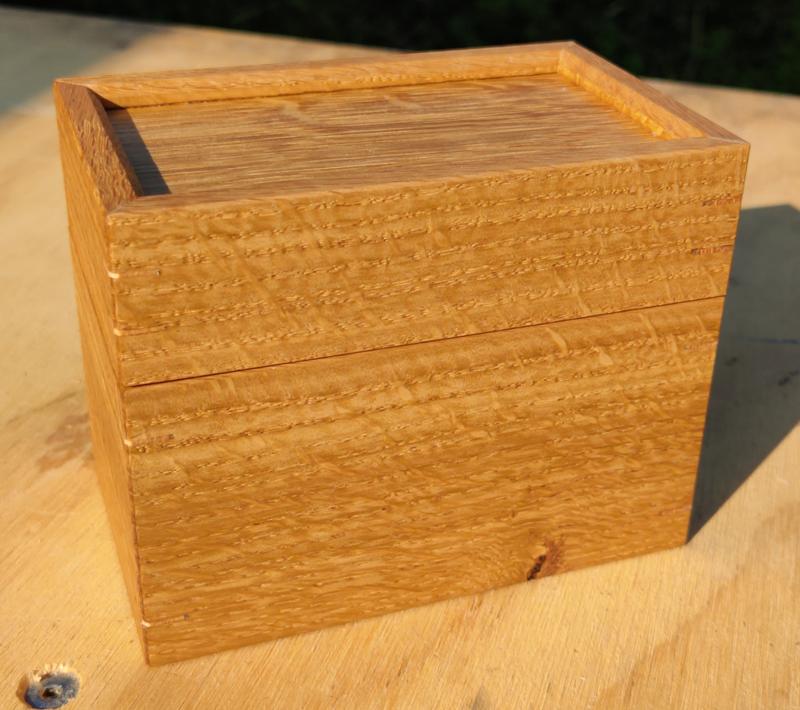
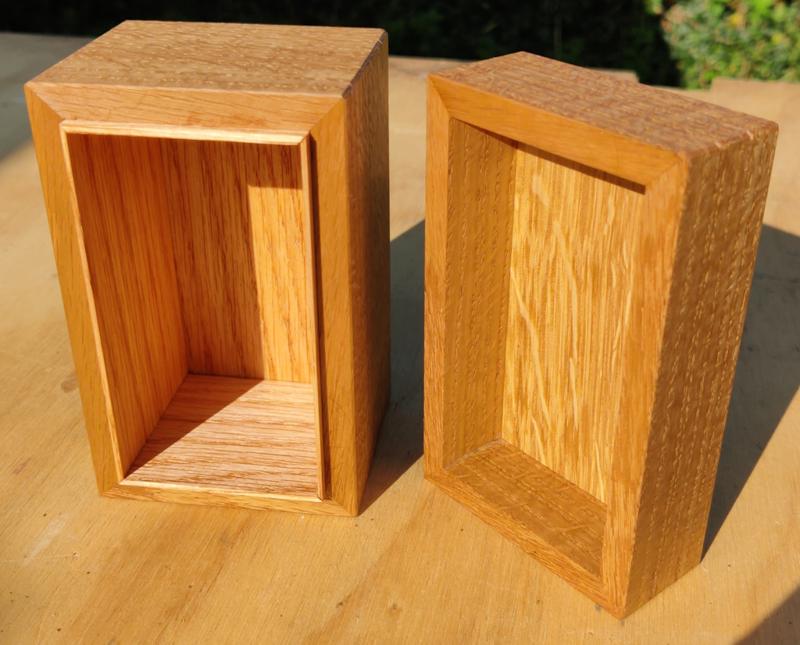
I'm back in England again now and, after a couple of days of work I had some weekend time to finish off the boxes. The oak box just needed some MMM finish applied:

2024-09-28-oak-box-closed_800.jpg


2024-09-28-oak-box-open_800.jpg


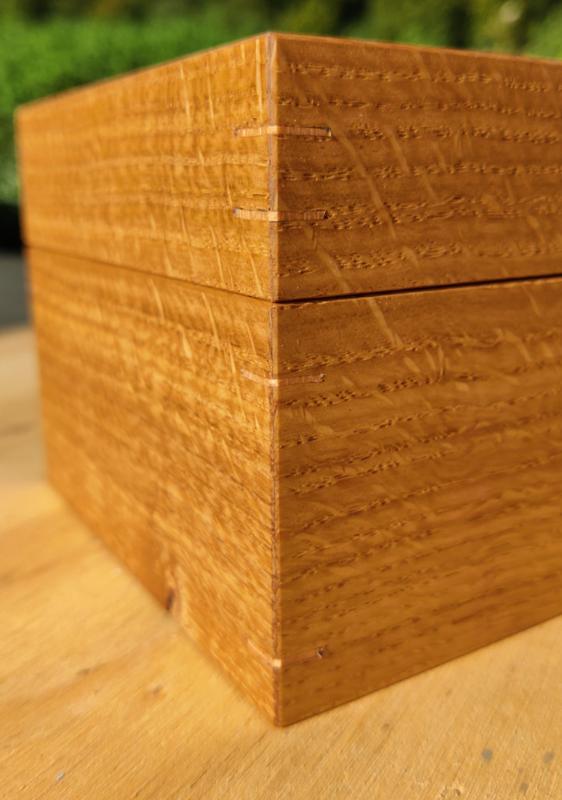
2024-09-28-oak-box-splines_800.jpg


The tea caddies were also quite simple, just needing some mineral oil:

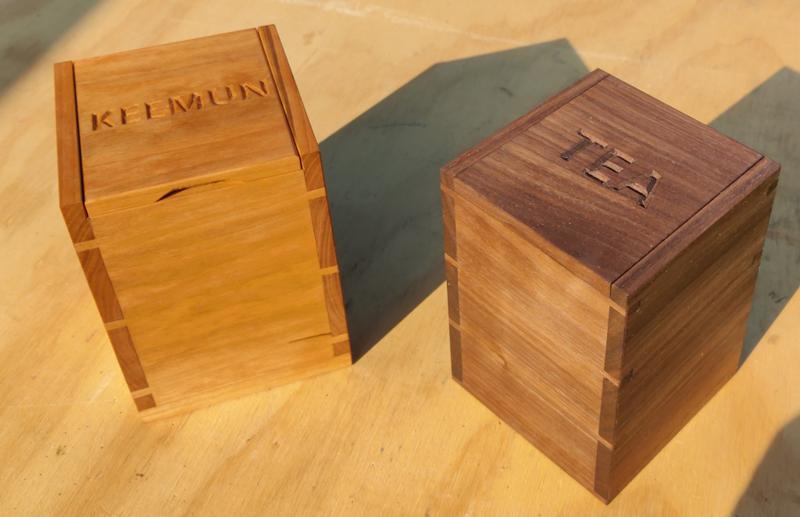
2024-09-28-caddies-closed_800.jpg


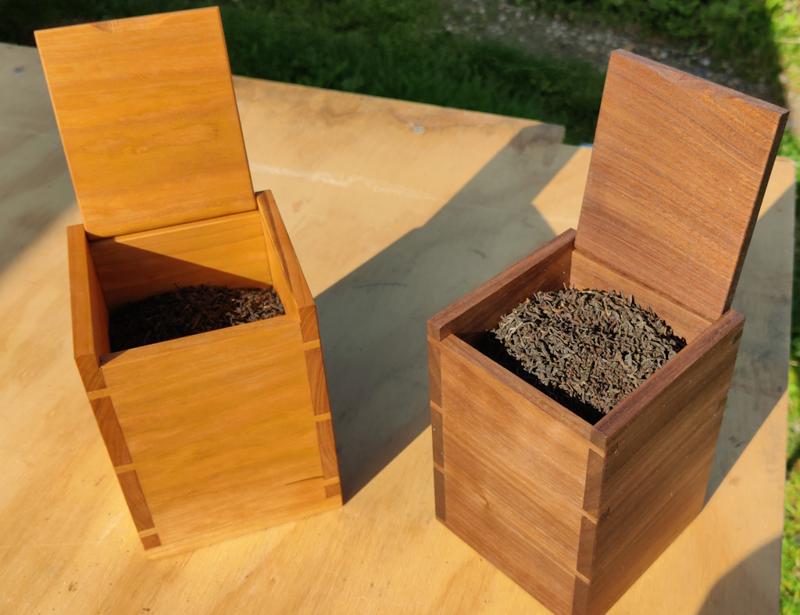
2024-09-28-caddies-open_800.jpg


The drawer box needed a bit more work as it was still lacking knobs. I started with a bit of American Black Walnut I had lying around:

2024-09-28-drawerbox-01-walnut-piece_800.jpg


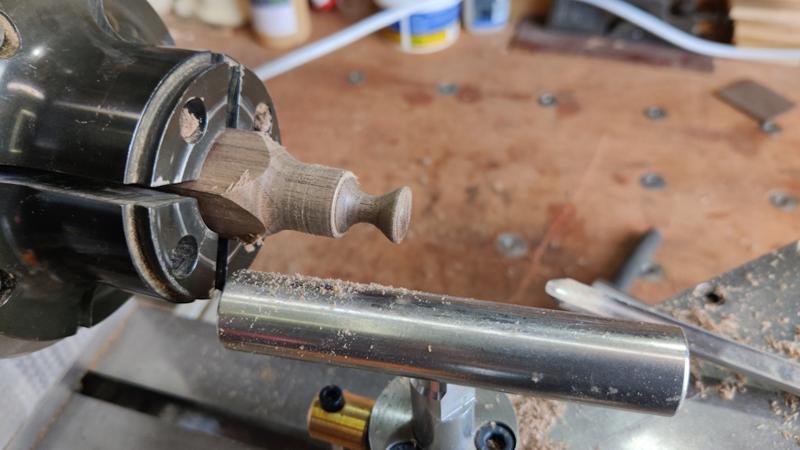
After holding it in a chuck on my home-made woodturning lathe, I roughed it down to a cylinder with a roughing gouge and then used a spindle gouge to make a shape that looked about right to me:

2024-09-28-drawerbox-02-turned-end_800.jpg


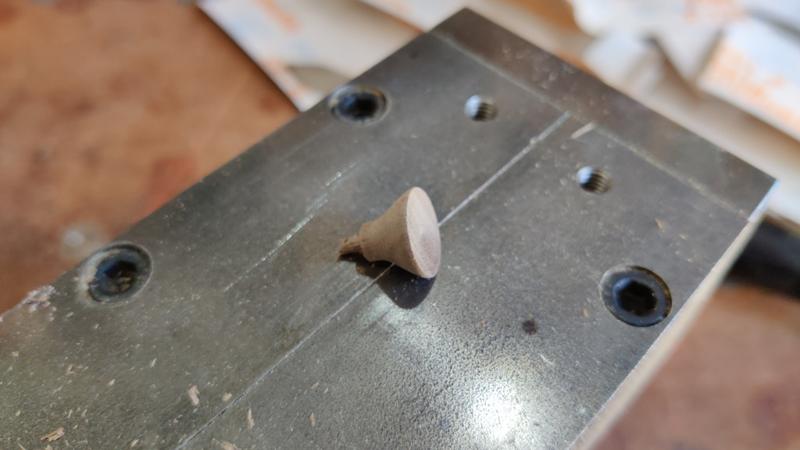
That got parted off with a parting tool:

2024-09-28-drawerbox-03-parted-off_800.jpg


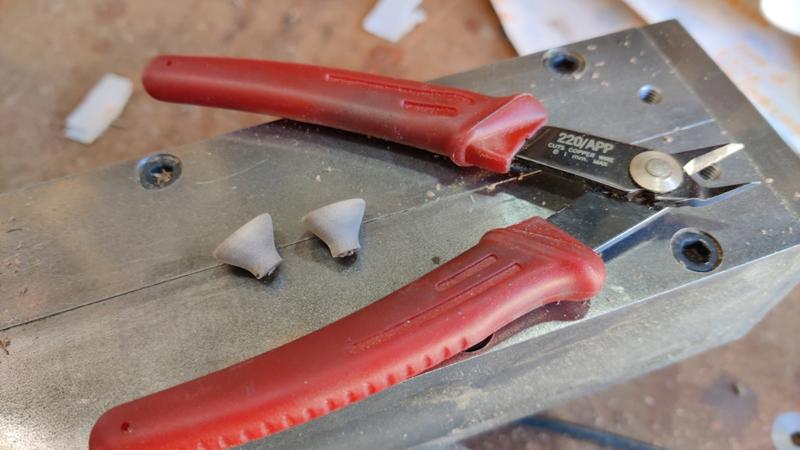
The next job was to make another one that looked at least approximately the same, something I've never tried to do before. It seemed to go very well though: I'm sure there are differences, but they're definitely close enough by my eye. Once I'd parted off the second one I removed the little pip on the back with some side cutters as it seemed the easiest way:

2024-09-28-drawerbox-04-duplicated-and-snipped_800.jpg


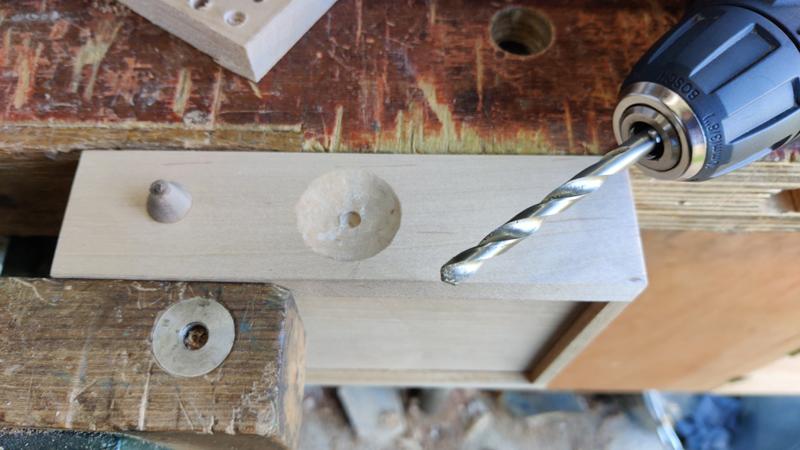
The hole in the front of the drawer then got drilled a bit bigger, only going a couple of millimetres deep:

2024-09-28-drawerbox-05-drilled-bigger_800.jpg


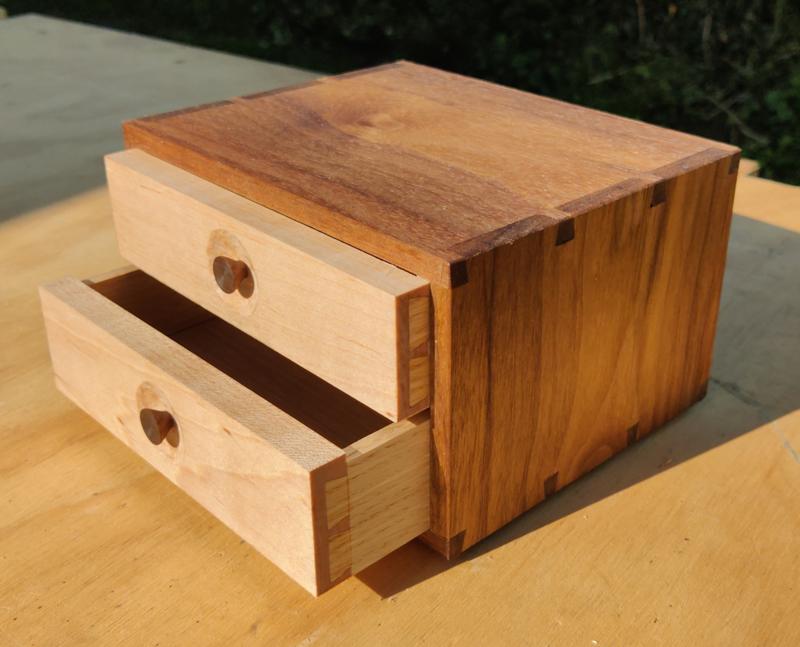
With the knobs made and the holes drilled, they could be glued into place (they were a very tight fit in the drilled hole, so I didn't bother to clamp them) and I could apply some Mike's Magic Mix:

2024-09-28-drawerbox-06-finished-1_800.jpg


2024-09-28-drawerbox-07-finished-2_800.jpg


I was quite pleased with the fit of the drawers: it's the first time I've tried to make anything with multiple drawers in an enclosed carcase so the first time I could try closing one drawer and watching the other one open from the air pressure:

 
Very smart!

And you seem to have brought some Brittany sunshine back with you for the photos.
 
Well that was quite the surprise...

1729088442230.png

I'm not quite sure of the logic of winning "Tool of the Week" for the tool chest and "Tool of the Month" for the drawer liners, but I'm not complaining. From the blurb they wrote I think the Studley comparison is stretching things a little too much:

1729088489564.png
 
Back
Top