• Hi all and welcome to TheWoodHaven2 brought into the 21st Century, kicking and screaming! We all have Alasdair to thank for the vast bulk of the heavy lifting to get us here, no more so than me because he's taken away a huge burden of responsibility from my shoulders and brought us to this new shiny home, with all your previous content (hopefully) still intact! Please peruse and feed back. There is still plenty to do, like changing the colour scheme, adding the banner graphic, tweaking the odd setting here and there so I have added a new thread in the 'Technical Issues, Bugs and Feature Requests' forum for you to add any issues you find, any missing settings or just anything you'd like to see added/removed from the feature set that Xenforo offers. We will get to everything over the coming weeks so please be patient, but add anything at all to the thread I mention above and we promise to get to them over the next few days/weeks/months. In the meantime, please enjoy!

Holiday Toolchest

Two more methods of opening the drawers, which had I thought of them before you put the drawers together might have worked - sorry!
One knob with a magnet in it, kept somewhere and metal embedded in the drawer fronts.
A bit depth encroaching this one, push to open sprung devices at the backs of the drawers.
Or from the wierd side of my brain, imagine a hinge with holes only on one side completely set into the drawer front with a recessed area below the hinge, you would use the recess to enable you to pull up the top flap of the hinge to pull the drawer open, in effect it’s like the old one Andy showed. Sketch?
 
Cabinetman":3l0yqgcj said:
Two more methods of opening the drawers, which had I thought of them before you put the drawers together might have worked - sorry!
One knob with a magnet in it, kept somewhere and metal embedded in the drawer fronts.
A bit depth encroaching this one, push to open sprung devices at the backs of the drawers.
Or from the wierd side of my brain, imagine a hinge with holes only on one side completely set into the drawer front with a recessed area below the hinge, you would use the recess to enable you to pull up the top flap of the hinge to pull the drawer open, in effect it’s like the old one Andy showed. Sketch?

Interesting ideas, thanks Ian. The weird side of your brain idea is particularly intriguing (I can imagine what you're describing). I'm not sure whether it's quite right for this chest but definitely one to file away for some time.

The embedded metal idea would be doable (the drawer bottoms are removable, so I could remove them and dig a deeper hole in the groove in the front), but I think it would suffer from the fact that I'd be bound to lose the magnet (and the magnet may struggle a bit with the heavier drawers).
 
Andyp":2swnwubi said:
“Flush ring pull handle” is what I think you need.

I just googled that and yep, that's definitely one for the shortlist.

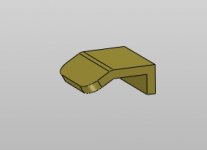
Another option that occurred to me in the shower this morning is a simple-ish bent bit of brass, something like this:

option_1.jpg

As it would naturally sit at the top of each drawer, it wouldn't conflict with any of the shooting board hardware. I've drawn that as a blind pocket with screws holding it in place, but it could also be made like this...

option_2_loose.jpg

... and just glued in place:

option_2_fitted.jpg

The latter would be slightly more challenging to fit, but would do away with screws as there's a mechanical pulling action.

After work today, I couldn't resist a quick look at the yesterday's Dutchman:

01_glued_in.jpg

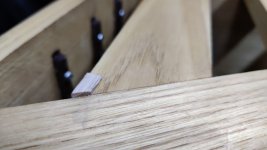
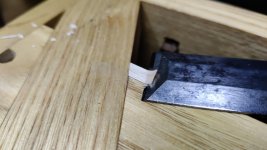
I removed the bulk of the waste with a plane, but then took the last cut with a chisel:

02_paring.jpg

The end result:

03_pared.jpg

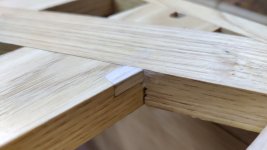
It's hard to say yet what it will look like once finish is applied, but I'm pretty sure it'll look better than it did before. You can see another "blemish" in that image: that half-lap was a bit shabby in the corner. I'm not going to worry about that: it's a smaller gap than it looks to be in that photo and it's very hard to see unless you're looking up from underneath the chest.
 
Dr Al.

Whilst I am enjoying this, you don’t half like making life difficult for yourself.

I think this is what Andyp was referring to:

https://www.inbrass.co.uk/acatalog/rect ... pulls.html

I have used one of these on the drawer on my workbench, so I can clamp wood over it, along the apron.
You do need some depth of wood to let it in though. Or accept that it will protrude on the backside, and trim it appropriately.

The link above is from a shop in the northern New Town, about a 10m walk down the hill from my place; happy to buy some and send them to you – probably cheaper than using their online service. They do round ones as well – might make fitting easier. Oh, hang on, you don’t want that, do you?

You can get versions with a catch as well (intended for Georgian shutters), but given they start at £90odd, I would think they would not be appropriate.

Failing that I'd go for a leather or fabric tab.

Per ardua…
 
Tiresias":34pf0npb said:
Dr Al.

Whilst I am enjoying this, you don’t half like making life difficult for yourself.

I like to think of it as setting myself challenges so I learn more skills :D

Tiresias":34pf0npb said:
I think this is what Andyp was referring to:

https://www.inbrass.co.uk/acatalog/rect ... pulls.html

I have used one of these on the drawer on my workbench, so I can clamp wood over it, along the apron.
You do need some depth of wood to let it in though. Or accept that it will protrude on the backside, and trim it appropriately.

The link above is from a shop in the northern New Town, about a 10m walk down the hill from my place; happy to buy some and send them to you – probably cheaper than using their online service. They do round ones as well – might make fitting easier. Oh, hang on, you don’t want that, do you?

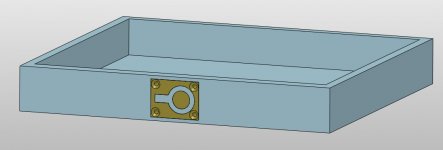
I am including it in the list of ideas, but at the moment, that's what it is: a list of ideas. I want to consider all the different options before making a decision. It's certainly not as easy as "just pick this, it's the best option". Apart from anything else, the smallest one on the link you shared looks like this if I put it in the CAD model:

pull.jpg

Which, apart from looking a bit pants, also is so deep into the front of the drawer that I'd not only have to carve out most of the drawer front, but I'd also have to carve a bit out of the drawer bottom (as it overlaps with the groove) and I'd have to figure out a way to cover up those screw holes as there wouldn't be enough material in the drawer front for the screws to screw into.

At the moment, my favourite ideas are (in no particular order), a simple finger hole, a leather tab or a brass thing at the top of the drawer. Believe it or not, part of the reason for those being preferences is that I think they'd be a heck of a lot easier to fit than a big flush ring pull handle.

I'm sure smaller ones exist (and I could possibly make my own), but I want to explore all the options before making a decision and make sure it's something I'm going to like the look of when I'm finished.
 
If you go down the finger hole route then a brass outer ring might look nice and protect the exposed end grain in the hole.
 
Andyp":xtr0f5nb said:
If you go down the finger hole route then a brass outer ring might look nice and protect the exposed end grain in the hole.

Ooh, nice idea. I do like a bit of brass & walnut together.
 
Dr.Al":2y3mcwma said:
Sounds great, I'll look forward to reading all of your WIPs then :lol: :lol:

Ask and you shall receive. Separate thread.
 
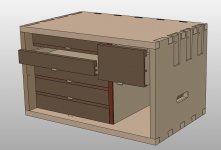
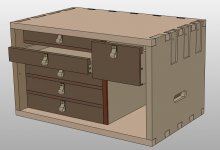
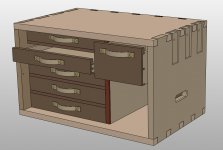
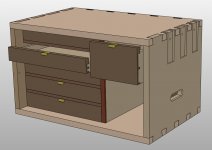
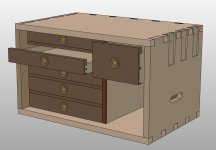
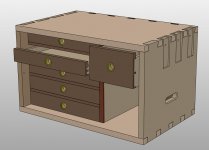
It probably won't surprise you that I've been doing a bit more thinking about drawer pulls. To try to get my head round things, I thought I'd do a CAD model of a few of the more plausible options and try and see what they might look like.

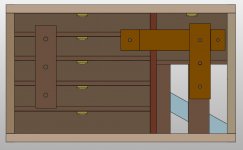
As part of that, I also set the model up with the shooting board attached to the front and then hid the main part of the shooting board. That's useful to see where the fences sit (the fence on the left and the horizontal one on the right will be flush with the drawers; the vertical one on the right is about 8 mm from the drawer face).

keep_out_zones.jpg

One thing I hadn't clocked until creating that drawing is that the bottom drawer isn't held in place - it can slide forward until it hits the face of the shooting board. For that matter, the same is true of the plane tote in the bottom right. It might also be partly true of the top drawer as the shooting fence is mitred at that end.

I'll have to think of a solution to that. It might be as simple as adding a couple of pillars to the corners of the shooting board, something like this:

pillars_on_shooting_board.jpg

I'll have to have a little play and see whether that's going to cause problems with my hand (or the plane) hitting the pillar on the top-left of the image above when shooting. An alternative could be to install a swivel latch like the sort you get on a shed door (e.g. this sort of thing), but it would need to be right down the bottom of the middle support (or the plane tote would slide out under it) and the space constraints may make it impractical. Yet another option could be as simple as one or more handy bits of wood (doe's feet etc) that happen to add up to the right thickness and could be stored in front of the bottom drawers (whether that's plausible or not will depend on the chosen drawer pull style).

Anyway, let's put that aside for now and go onto drawer pull options. Here are the ones I've modelled, in rough order of increasing difficulty to make.

First up is a simple leather tab, glued and/or nailed/screwed into a pocket in the underside of each drawer front:

under_drawer_leather_pulls.jpg

The biggest advantage I see of this one is that it would be very easy to make. A little bit chopped out of the bottom of the drawer front, with the added advantage of being underneath the drawer so if it's a bit shabby no-one will notice! The main disadvantage is the bottom-left drawer: the leather tag will lie directly on the base of the chest, making it slightly more awkward to grab and pull.

Next up is a leather loop:

leather_loops.jpg

This would be also very straightforward to make. I've listed it second in the difficulty stakes as I'd probably want to make a brass pin or something like that, so there's a bit more work involved. The main disadvantage of this one is that my first impression of it was "that looks a bit naff". The loop for the right-hand drawer will be squished a bit by the mitre fence (the vertical one in the first CAD model at the top of this post), but I don't think that would be a problem: the 8 mm clearance should be enough.

Not much more complicated, but looking an awful lot better would be some leather handles:

leather_handles.jpg

Again quite easy to make (but twice as many brass pins to make!). The CAD model makes it look quite good (I'm sure that's subject to how well I do at the leatherwork!). The handle on the right-hand drawer is modelled about as low as it can go. It'll get squished a bit by the mitre fence (depending on how far the loop sticks out, which I guess could lead to a permanent deformation in time.

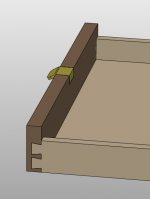
Next up is brass tags at the top of the drawer.

brass_pulls.jpg

A bit harder to make again as I'd have to bend some bits of brass to consistent angles. I'm sure I could do that without too much difficulty though. Once the brass bits were made, they would be quite easy to fit. I've only included one version of these, but they could either pull on the back of the drawer or be screwed into the top, as shown in the models I posted yesterday.

This is probably the easiest so far in terms of actually pulling the drawers out: just reach in with hand palm side up, lift very slightly and pull. That's not to say that any of the others are going to be exactly difficult (with the possibly exception of the leather tab at the bottom of the bottom drawer).

It could also be made out of leather (i.e. like the first one but with the pull in the top of each drawer), but I think the cut-out for the leather wouldn't look as good as a cut-out for brass and it wouldn't be quite as easy to pull the drawers out as the brass option (grab the leather rather than just lift-and-pull the brass).

I was torn regarding the order of the last two (i.e. which was easier and should go first), but I think I'll go with some indented knobs for the next one:

recessed_brass_knob.jpg

The knobs are brass (so I can use my metal lathe to make them!); the indents are carved with a gouge or similar. How easy they are to make depends entirely on how I find the process of carving the curved indents. As the brass knobs don't protrude at all beyond the front surface of each drawer (they're the same length as the depth of the carved indent), there's no concerns with interference.

Finally, we have some brass-lined holes (they could also be unlined, but I thought I'd just model the brass-lined version):

lined_holes.jpg

The brass parts would be easy to make, but drilling the holes could be a little fraught. I'd want to start drilling the hole from the front and then finish from behind, but with the drawer already assembled I don't think I'd be able to get a drill bit to the back and achieve a clean hole. I think I'd have to clamp some scrap firmly behind the hole and then try to drill just from one side.

Main disadvantage of this one is the (probably small) risk of small things finding their way out through the hole.

I haven't included the flush ring pull handle as at the moment that feels like the hardest of all the options (either making something custom or finding an extremely thin and small one and then fitting it without it looking rubbish).

Anything I've missed? Any aesthetic opinions on the images above?

Thanks for reading.
 
Andyp":1ovfhhsd said:
For the finger holes. Are the drawers deep enough, front to back, to get an angled drill chuck in there?

Yes, probably, but I'm not sure whether they would be deep enough for the diameter of the chuck to get the bit centred on the hole. Also, I'm not sure how well angled drill chucks work when attached to hand drills ;)
 
You're worried about tear out. I reckon a small pilot hole from the front would be enough to centre a sharp sawtooth or forstner bit on the inside held in your fingers and twisted back and forth sufficiently enough to score the surface and prevent tear out with aforementioned scrap held firmly in place and then drilled from the front.
Caveat, of course I have never actually tried this.
 
I'll offer a practical thought if I may.

Carving recesses in the drawer fronts would have been a better idea before the drawers were assembled. You could have more easily secured the work and in the unlikely event of something going wrong, you wouldn't need to rebuild a whole drawer.

And as discussed above, even getting clean holes is a bit trickier with an assembled drawer.

So if I were you, one of the unobtrusive little tab options would be what I would choose. If I wanted more bling, I'd choose the brass, but if there's any risk of knocking knuckles against netal, one of the leather options would win.
 
AndyT":26xgqnkw said:
I'll offer a practical thought if I may.

Carving recesses in the drawer fronts would have been a better idea before the drawers were assembled. You could have more easily secured the work and in the unlikely event of something going wrong, you wouldn't need to rebuild a whole drawer.

And as discussed above, even getting clean holes is a bit trickier with an assembled drawer.

So if I were you, one of the unobtrusive little tab options would be what I would choose. If I wanted more bling, I'd choose the brass, but if there's any risk of knocking knuckles against metal, one of the leather options would win.

That's definitely good advice; making the drawer pulls before assembling the drawers would have been a very sensible option (but not entirely in keeping with my making-it-up-as-I-go-along approach to this project :lol: )

The practical advice is definitely sound; however I also want to be happy with the aesthetics of the outcome: I've been working on this tool-chest since January and have a fairly long way to go yet so I'd rather pick options that are pleasing rather than purely going on the grounds of practicalities. Of course if an option really isn't viable then I will have to ditch it, but I don't want to jump straight into the "that's too hard so I won't try" attitude.

Apart from anything else, this project was partly intended as an opportunity to stretch my skills, so picking a harder option isn't necessarily a bad idea.

I think what I'll do (while still pondering on - and seeking advice on - the aesthetics) is cut a bit of scrap the same size as the front of the smallest drawer. I can then try the carved rebate while forcing myself to only hold it in a way I would be able to hold a finished drawer. If it turns into a disaster then it'll definitely go on the impossible pile and I'll have to choose from one of the other options. Likewise if it just looks rubbish.

I might do the same with the lined hole as that one feels quite difficult too. Depending on how things go, I might also try making a leather handle as I've no idea how easy the leatherwork will be. I'm not sure whether I'll try making a brass bent pull yet as they'll probably be quite tedious and if I'm going to do it, it would make sense to make 6 in one go.

That doesn't mean I won't pick one of the other options, it's just nice to understand how hard it's going to be (and it'll be good practice anyway).
 
I asked the expert on aesthetics (aka my other half) what she thought about the various models and her favourite was the little leather loops (which I hate!) followed by the brass hooks at the top, then a toss-up between the recessed brass knobs and the leather handles (the latter of which she was concerned would look rubbish after they sagged after a bit of use).

Having just had a try at making a recessed brass knob in a bit of scrap, I'm feeling inclined to abandon that idea, although I might have another go before making a final decision.

Anyway, for the completeness of the record, this is what I did...

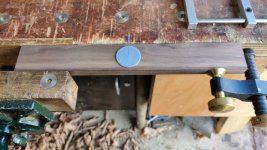
I started with a bit of American Black Walnut that was mostly sapwood but had a reasonable amount of heartwood on one face. I sawed & planed it until it was the same size and thickness as the front of the top drawer (which I figured was likely to be the most difficult one given it's so shallow).

I couldn't find my pair of compasses, so I let the 3D printer knock up a quick disc with a hole in it for me to drawer round and, after finding the centre of the board, I drew the outline of the recess.

01_marking_outline.jpg

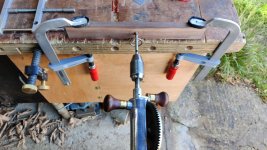
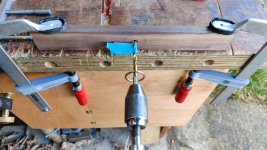
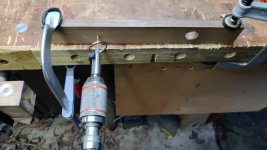
To set the depth of the recess, I used a 10 mm Forstner bit, which conveniently had a body (if that's the right term) that was 8 mm long, exactly the same as the depth I was aiming for. I put it in my egg whisk drill thing and drilled to depth:

02_forstner.jpg

I then put a bit of masking tape around a 6 mm twist drill and deepened the hole a few millimetres further (still not coming out the back of the "drawer front"):

03_twist.jpg

I'm torn on whether to rely on glue or drill the rest of the way through 3 mm and then come from the other side with a (hand-held) countersink, but for now I thought I'd stick with the blind hole option.

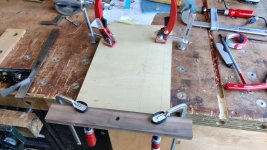
A handy bit of plywood was marked with a pencil line at the inside depth of the top drawer and then clamped to the bench. The offcut of ABW could then be clamped to that, with the clamps positioned in a similar manner to what would be possible if the drawer sides and bottom were there:

04_clamped.jpg

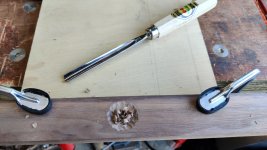
I then grabbed a handy (8/10) gouge and started to attack it:

05_starting_to_gouge.jpg

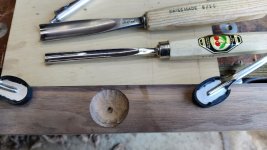
After getting most of the way there, I switched to a larger (8/20) gouge to be a bit closer to the radius of the recess, but I didn't get on very well with it and eventually went back to the small one. After much embuggerance, this is what it looked like:

06_gouged.jpg

I think one of the problems with this sort of recess is that the eye is very good at spotting any out-of-roundness, so imperfections in the carving stick out like a sore thumb. Perhaps it would be better if I put a shallow knife cut around the template before starting and then I could work up to that line (and possibly finish with some careful knife cuts).

Another potential and rather debatable issue (highlighted by my other half) is that the rest of the box has a very smooth (planed) finish, whereas the gouged recess looks a bit rough-and-ready.

Anyway, as the test piece was exactly the same size as the top drawer front, I could slot it into the drawer gap and see what it would look like in practice (with a hastily knocked up brass knob to go with it):

07_test_fit.jpg

Close-up:

08_closeup.jpg

I'm definitely not convinced, but at the moment I'm not sure whether the issue is my carving skills or whether it's just a bad idea from the start. It occurred to me that another option would be making the recess with a big Forstner bit, but I think it would look a bit pants so I probably won't even bother to CAD-model that option.

I am inclined to have another go and see if I get any better on a second attempt. I'll also give the top-of-drawer brass hook things a go and see what that looks like.

At least all of these attempts are in bits of scrap, so I haven't ruined any of my finished drawers... yet :lol:
 
Well I never thought that was going to be easy!
Not sure why you didn’t just cramp it straight to the bench though, much less movement that way.
I still think a leather tab let into the top edge of the drawer as you were going to with the brass would work best.
It’s still going to be smashing whichever.
 
Cabinetman":3d4c5d9o said:
Well I never thought that was going to be easy!
Not sure why you didn’t just cramp it straight to the bench though, much less movement that way.

True, but I wouldn't have been able to do that with the assembled drawers, so I wanted to do the trial under similar constraints to how the real recesses would be cut.

Cabinetman":3d4c5d9o said:
I still think a leather tab let into the top edge of the drawer as you were going to with the brass would work best.

My gut feel is that the leather tab on the top drawer will be quite hard to grab compared to just tucking a finger under a brass tab and pulling. I'll give a try on the offcut though & make a decision after trying a few more of the options.

Cabinetman":3d4c5d9o said:
It’s still going to be smashing whichever.

Aww, thanks
 
Dr.Al":1bpjmm51 said:
Cabinetman":1bpjmm51 said:
Well I never thought that was going to be easy!
Not sure why you didn’t just cramp it straight to the bench though, much less movement that way.

True, but I wouldn't have been able to do that with the assembled drawers, so I wanted to do the trial under similar constraints to how the real recesses would be cut.

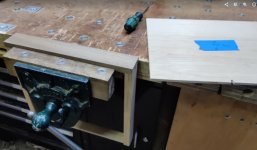
Thinking about it now, I could have done the carving in the vice, which might have been better. The drawer bottoms are, of course, removable (held in by one screw at the back), so I could have removed the bottom and just clamped the drawer front like this:

drawer_in_vice.jpg

Having said that, it really wasn't moving in any noticeable way when I was carving with my plywood board set-up, so I think any errors / out-of-roundness is entirely down to my (lack of) skill and not the rigidity of the set-up.
 
What! Brass lined finger holes didn’t even make the short list? :shock: :)

I admire your perseverance Al in sticking with hand tools. A dremel would have made short work of smoothing that recess.
 
Andyp":26xyo7i3 said:
What! Brass lined finger holes didn’t even make the short list? :shock: :)

I haven't ruled it out completely, but no: it didn't make the list of Carolyn's preferred options.

Andyp":26xyo7i3 said:
I admire your perseverance Al in sticking with hand tools. A dremel would have made short work of smoothing that recess.

... and one small slip and it would have made short work of ruining it too :lol:
 
Umm. Why not embrace the gouge marks, as a feature. I have a bowl/dish we picked up in Kiwi that has an effect like this ie freehand narrow angled radial gouge marks around a smooth central part – you’d just be inverting that. I’ll take a photo this weekend, ‘cos it’s a bit difficult to describe.

Or dip a cricket ball in glue and then sand (or abrasive of your choice), mount it on a drill, and use that to smooth it out. Now, abrasives and cricket balls. Rings some sort of antipodean bell.

Failing that my vote would be for leather tabs, and if you are worried about clearance, put them in a slot in the centre of each drawer. I think I have a jewellery box (which is essentially what you are making…) like that. Or, how about the tassel from a loafer as a pull. Just to prove you don’t take yourself too seriously.
 
Quite right Al, I forgot you were simulating the drawer.
Part of the detritus on my bench are some chunky bits of wood that fit between the vice bars and thinnish bits of wood like your drawer front for just this purpose.
Ian
 
I spent a few hours early helping Malcolm with his Micro-Adjust Rebate Jig thingy discussed in this post. I then had some other bits and bobs to do so only ended up making it out to the workshop at about 4pm.

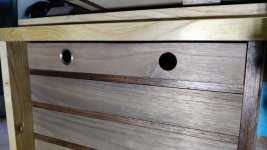
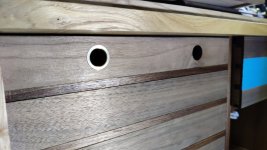
Given it was a relatively late start, I thought I'd try something quite simple, so I went with the option of holes. I used the same walnut offcut as trialled yesterday, but turned it round and made two non-central holes, one brass lined and one not. If I picked this option for real, I'd go with a central (at least left-to-right central, anyway) hole, but I obviously couldn't do that in the test piece as it already had the carving in the middle.

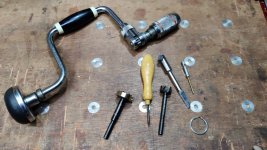
This was the armoury I assembled before starting the job:

01_armoury.jpg

After marking the (very approximate as I wasn't trying very hard) centre (vertically) of the board, the first job was to drill all the way through with a 2 mm drill bit:

02_drill_2mm.jpg

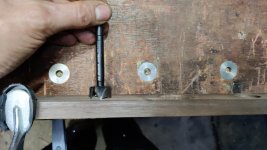
I then followed AndyP's advice and held a 22 mm Forstner bit in my hand and turned it a few times to cut into the surface by a tiny amount (a fraction of a millimetre; I probably should have gone deeper):

03_turn_22mm_by_hand.jpg

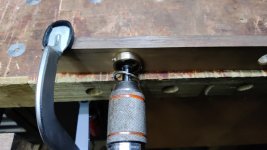
With that done, I could get the 25 mm Forstner bit and drill 3 mm into the outside face (using a hastily produced brass depth stop - how do people cope without a metalworking lathe in their workshop? :D )

04_drill_25mm.jpg

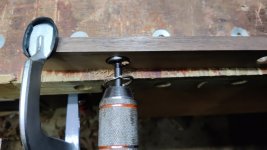
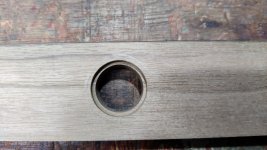
Finally, the 22 mm Forstner bit went in the drill brace and I drilled through, going very very slowly once I saw the point of the bit appear through the 2 mm pilot hole:

05_drill_22mm.jpg

The end result was the outside of the board looking like this...

06_outside_view.jpg

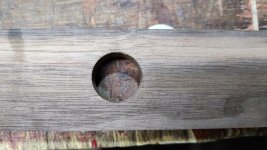
... and the inside looking like this:

07_rear_view.jpg

There was a small bit of what I think was probably the wood breaking away on the inside face:

08_small_tear_out.jpg

That might have been there before I started (I didn't take any photos), or it might have been from the hand-turned 22 mm cut or the drill brace turned 22 mm cut; I've no idea. It's probably not the end of the world and could possibly be protected against by cutting a bit deeper on the from-the-back stage. Alternatively I could clamp some scrap rigidly to the back of the drawer front, which should protect it even better I think.

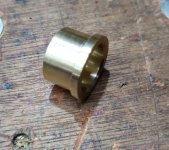
Another quick bit of lathe work produced a brass thingy with an 18 mm through-hole (sized to fit my finger :) ) which could be pushed into the hole. It ended up a tight enough fit that I could probably fit it without glue and not worry about it coming out.

09_brass_thingy.jpg

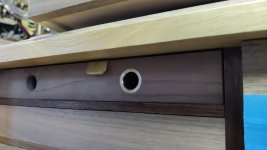
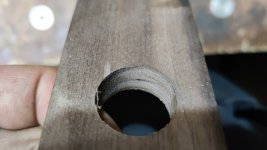
A second hole was also drilled, but that one was just 22 mm all the way through. The board could then be inserted into the drawer-slot in the chest for some photos (it was dark by this point, so the lighting isn't great in the photos):

10_two_holes_1.jpg

11_two_holes_2.jpg

As I said at the start, I wouldn't do this as two holes (there's no need), just one in the centre. Having holes to the side was just a handy way of using the same bit of wood again.
 
Ahem...

Dr.Al":1beajkll said:
Alternatively I could clamp some scrap rigidly to the back of the drawer front, which should protect it even better I think.

Andyp":1beajkll said:
Do you think a backing piece, firmly clamped, might have helped with that tear out?

Yes, I do :lol: :lol: :lol:
 
I am sure that I suggested scoring the inside with drill bit in hand AND using a backing piece.
So did you forget the backing piece then. ;) :)
 
Having seen Dr Al work, I don't know how anyone can manage without a metalwork lathe in the workshop. ;)

And I did not influence the choice of a hole. Honest! ;)

And he did a brilliant job for me which I will write up in due course. Away now for a few days.
 
Cabinetman":xxdlg98m said:
I like the brass but I had imagined it being thinner in section, in fact I imagined it silly thin and impossible to make probably.

Making it really thin would be difficult (but not impossible I guess). Probably easiest in that case to just buy some brass tube.

There would be more of a risk of sharp edges though (and I'm not convinced it would look that good, but perhaps I'll give it a try).

Cabinetman":xxdlg98m said:
What is the keyring on the drill for Al?

It's a trick I learnt from youtube. It's quite easy to see whether you're drilling perpendicular to the board left-to-right, but it's quite hard to see whether you're drilling perpendicular up-down. If you lift the back of the drill a bit, the keyring slides towards the front, if you drop the back it slides towards you. Keep it in the middle and you're drilling straight.
 
As a result of my visit yesterday, i got to see the Holiday Toolchest in the flesh!

It's really good. Much better dovetails than I've ever done.
 
I was supposed to be meeting my parents & brother today, but when my father went out to his car he found a big puddle of oil underneath so we decided to postpone the meet-up until he can get it sorted. That gave me a free day, so I got on with experimenting with drawer pulls.

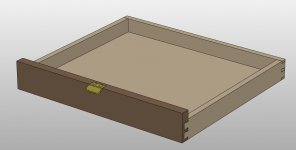
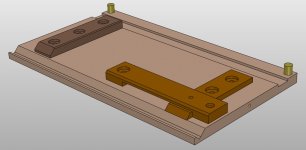
This time, I decided to have a go at making the top-of-drawer brass things shown in this CAD model:

file.php


I figured that making one of these would be almost as much work as making 6, so I decided to just make 6 in one go and accept that they might all end up in the bin.

I started by getting some 6 mm silver steel and turning a point on it. I did this on two pieces, cutting one at a 45° angle (giving a 90° included angle) and cutting one at a 30° angle (giving a 60° included angle). For this type of cut, I find it much easier to use a boring bar type cutter on the back of the workpiece and run the lathe in reverse. I find being able to run the lathe backwards useful for lots of different applications and it's one of the reason why I'd never get a metalworking lathe with a screwed-on chuck (which would unscrew and fall off if you tried to take a cut while running the lathe backwards).
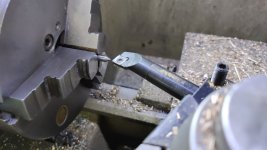
01_turning_a_point.jpg

I then milled away slightly less than half of the cutting tip, before heating them to cherry red, quenching in water, then heating to a straw colour and quenching again. Finally I rubbed the flat surface of both pieces on an oilstone to bring them both fairly close to half thickness.
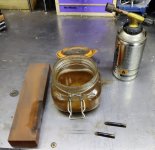
02_hardened_and_tempered.jpg

Once that was done, I put another scrap of aluminium in the milling machine vice and used the fly cutter to skim the surface flat, much like I did when making the little lock inserts. This time I used a brand new bottle of superglue to hold the (3 mm thick) brass down and held it in place with some clamps.
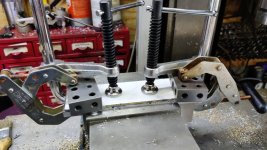
03_glued_and_clamped_brass.jpg

I then went and had a cup of tea to give the glue chance to thoroughly cure.

A 10 mm end mill was used to square up the front and rear edges (with clamps holding the brass down in case of superglue issues and also with lots of WD40 sprayed over the cutter to keep things cool):
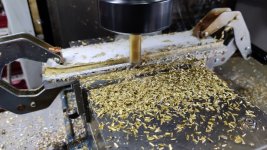
04_milling_outside.jpg

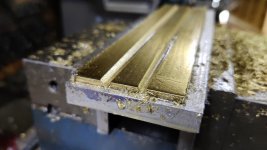
The little silver steel engraving cutters were then used to make a couple of grooves along the length of the brass piece (lowering the cutter 0.25 mm at a time to err on the side of caution).
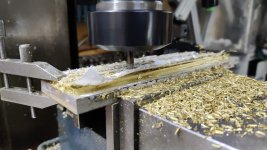
05_milling_grooves.jpg

Groovy:

06_groovy.jpg

Finally, 4 mm end mill was used to split the length of brass into pieces (going down 0.5 mm at a time until the pieces were separated):
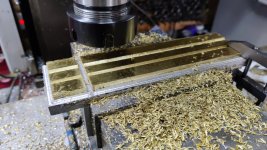
07_separating.jpg

That went well up until the very last cut on the very last piece, during which the piece separated from the aluminium base. Thankfully it was the last cut (so only the last 0.5 mm or thereabouts of cut) and right at the exit end of the cut, so it just meant a little bit needed finishing off with a file, but no big deal.
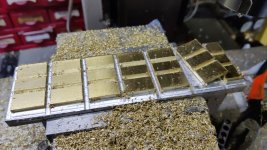
08_one_fell_off.jpg

To make a radius on the corners, I used a magnum sharpie to cover the brass and then drew around an M4 washer, which looked to be about the right radius to me:
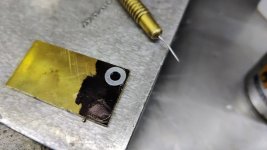
09_radius.jpg

I then used a bench-top belt sander thing to grind it down to the line.

I was originally planning on silver soldering the joints, but I decided to just use soft solder instead as it's quicker and easier. After a thorough clean with acetone, I painted a bit of flux onto the grooved bits:
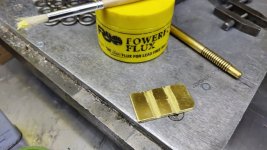
10_flux.jpg

I then put the brass bit in the vice and bent it by hand until the grooved edges touched.

Next up was putting a tiny snip of plumbing solder onto each joint...
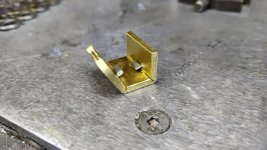
11_solder.jpg

... and applying some heat from a blowtorch. After applying the heat for a minute or so I realised that doing this on a big lump of aluminium was probably a stupid idea, so I moved it onto some stainless steel washers and the solder melted really quickly.
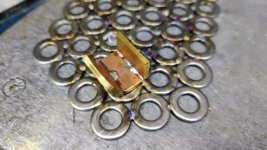
12_soldered.jpg

While that was cooling down, I took one of the other fledgling hook things over to my mock-up piece and marked up for cutting out:
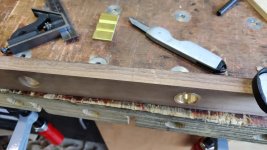
13_marked.jpg

A dozuki, 18 mm chisel and Stanley router plane were used to cut the top bit out:
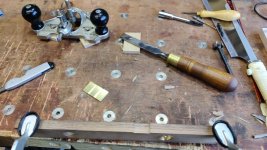
14_chopped.jpg

For the back, I used a short chisel for all the vertical bits (my standard chisels wouldn't fit in the depth of the drawer, which would be getting in the way if this were a real drawer):
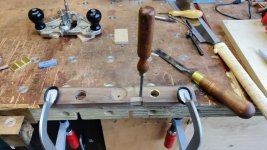
15_short_chisel.jpg

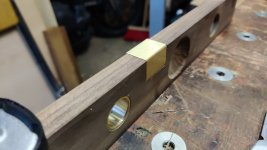
By this time, the brass bit had cooled down, so I filed the excess solder down and then gave the outside a quick polish with the angry grinder. I could then do a trial fit:
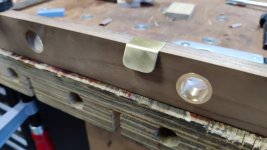
16_fitted.jpg

Rear view:

17_rear.jpg

In place:

18_in_place.jpg

In the photos, it looks like there isn't enough of a gap to get your fingers behind, but in reality there's plenty. That's not to say that it wouldn't be better with less of a bend at the front, but it definitely works as-is.

A quick test of what it would look like lower down (using a pile of rulers to make up for the fact that the offcut was sized for the top drawer, not the middle one):
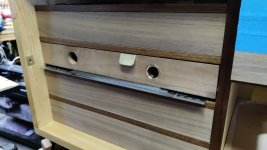
19_lower_down.jpg

While there was a bit of daylight, I also turned the offcut round and fitted it into the chest, so Cabinetman/Ian can get a look at a slimmer brass bit.
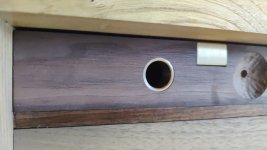
20_slim_ring.jpg

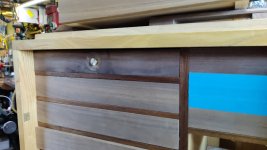
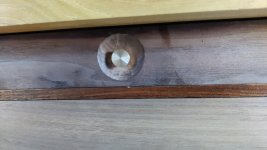
I've shown Carolyn all the various options and we agree that the current front-runners are the wider brass lined hole and the brass hooky tab thing, i.e. the two that are visible towards the right of this picture:

View attachment 2
 
Back
Top