• Hi all and welcome to TheWoodHaven2 brought into the 21st Century, kicking and screaming! We all have Alasdair to thank for the vast bulk of the heavy lifting to get us here, no more so than me because he's taken away a huge burden of responsibility from my shoulders and brought us to this new shiny home, with all your previous content (hopefully) still intact! Please peruse and feed back. There is still plenty to do, like changing the colour scheme, adding the banner graphic, tweaking the odd setting here and there so I have added a new thread in the 'Technical Issues, Bugs and Feature Requests' forum for you to add any issues you find, any missing settings or just anything you'd like to see added/removed from the feature set that Xenforo offers. We will get to everything over the coming weeks so please be patient, but add anything at all to the thread I mention above and we promise to get to them over the next few days/weeks/months. In the meantime, please enjoy!

Holiday Toolchest

Cabinetman:dlogqmfh said:
Yes you’re right about the finger hole one, won’t the bent bits rub on the shooting board that lives there? Or have I got it wrong?

Shouldn't do as they're at the top of the drawers. These are the shooting board fences:

keep_out_zones-jpg.23139


The fences are 18 mm thick, so as long as the bent bits don't stick out more than 18 mm, it should be fine.
 
Last edited:
Loving you work Dr Al.
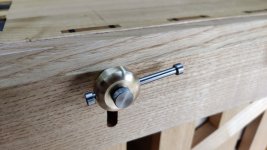
Just a silly idea, a small brass knob. see photo of my tool case in use daily since 1985
786996c5661f1b0e3577f5a0e56cbfa1.jpg


Sent from my Redmi Note 9S using Tapatalk
 
I think the brass hooky-thing has promise, but might possibly look better if it were rounded off. Take the corners off and file them round to the biggest radius that will fit, I reckon. Better yet, scallop out a bit of the drawer front from behind the hook, to give the finger somewhere to go, and for a bit of visual interest. Just a thought.......
 
FWIW although I find the brass ring more aesthetically pleasing that hole has one major drawback to me. If there is something in the drawer resting up against the hole you will not be able to hook your finger in to pull out the drawer. :eusa-think:
 
Tiresias":h7ofj4ia said:
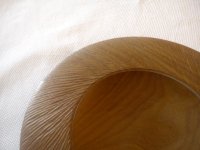
Umm. Why not embrace the gouge marks, as a feature. I have a bowl/dish we picked up in Kiwi that has an effect like this ie freehand narrow angled radial gouge marks around a smooth central part – you’d just be inverting that. I’ll take a photo this weekend, ‘cos it’s a bit difficult to describe.

This is what I meant. Reverse it, put the ripples in the bowl, as it were, a small turned knob will cover the meeting point of the gouge tracks. Good dark wood mini knob, possibly with an ivory dot at its centre.

DSC05575.jpg

Could look quite neat. And would involve an additional amount of amusing faff.
 
Jonathan":2g3ykf1p said:
Loving you work Dr Al.

Thanks!

Jonathan":2g3ykf1p said:
Just a silly idea, a small brass knob. see photo of my tool case in use daily since 1985
786996c5661f1b0e3577f5a0e56cbfa1.jpg

That's not a silly idea at all. For some inexplicable reason, I had it in my head that round knob = wood = need wood lathe. There's no particular reason that a brass knob wouldn't work.

The only potential issue is what it would look like with the right-hand drawer knob offset a long way towards the top rather than being relatively central. It might look fine, it might not.

I'd also have to figure out how to make a nice shaped knob (I'd rather make rather than buy); aesthetics aren't really my specialism!

Mike G":2g3ykf1p said:
I think the brass hooky-thing has promise, but might possibly look better if it were rounded off. Take the corners off and file them round to the biggest radius that will fit, I reckon.

That's a good thought Mike, thanks. I'll give that a go with one of the other bits I've already milled the grooves into.

Mike G":2g3ykf1p said:
Better yet, scallop out a bit of the drawer front from behind the hook, to give the finger somewhere to go, and for a bit of visual interest. Just a thought.......

That one might need a bit more thought - I don't think it's necessary (especially if I lean the hook out a bit more) and it might be stretching my aesthetic carving skills a little. I'll have a ponder though and see if I can get my head round what it might look like. :eusa-think:

Andyp":2g3ykf1p said:
FWIW although I find the brass ring more aesthetically pleasing that hole has one major drawback to me. If there is something in the drawer resting up against the hole you will not be able to hook your finger in to pull out the drawer. :eusa-think:

That's true. The drawers are going to be quite full so it is quite likely there will be something resting against the hole :eusa-think:

Tiresias":2g3ykf1p said:
Umm. Why not embrace the gouge marks, as a feature. I have a bowl/dish we picked up in Kiwi that has an effect like this ie freehand narrow angled radial gouge marks around a smooth central part – you’d just be inverting that. I’ll take a photo this weekend, ‘cos it’s a bit difficult to describe.

This is what I meant. Reverse it, put the ripples in the bowl, as it were, a small turned knob will cover the meeting point of the gouge tracks. Good dark wood mini knob, possibly with an ivory dot at its centre.


Could look quite neat. And would involve an additional amount of amusing faff.

Wow, that looks beautiful. Might be stretching my skills a bit far beyond their limits though :lol:
 
One of the other tasks on my (fairly long!) list of things to do on the tool chest is to figure out a good way to identify the drawers.

This might seem like an odd requirement, but this chest is unusual in that it is expected that the drawers will be regularly removed and placed on a nearby table or whatever while the chest itself is used as a workbench. The drawers differ in height by only a few millimetres (the top-left one is 45 mm high and the bottom-left one is 53 mm high - the ones in between are spread in between those sizes).

The combination of regularly removing drawers and them all being fairly similar sizes means it would be helpful to know which drawer is which so they can be quickly returned to their appropriate slots.

There are a few approaches I've thought of (so far) for solving this problem, one of which is pertinent.

  1. Integrate it into the drawer inserts / tool holder things somehow (this has the advantage of meaning I can put it off and think of it later, but the disadvantage that I'll have to think about it later :D )
  2. Carve numbers into the top of the drawer fronts. The drawer fronts are only 15 mm thick, so this would be some very fine carving and could be extremely challenging (and potentially leave some fragile bits of wood).
  3. Make an engraved brass piece and set that into the drawer, either into the drawer insert, the top of the drawer front or the rear of the drawer front (in the latter case I'd have to be confident it wouldn't get hidden by adjacent tools).
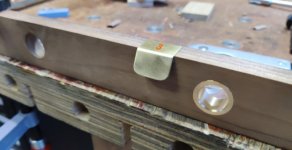
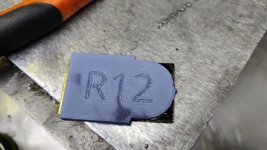
  4. Integrate a number into the drawer pull. For example, if I'm using the brass hook pull thing, I could engrave a number into the top, something like this (but probably not in orange :) ):

number.jpg

I'm not sure that there's a good way of integrating a number into any of the other drawer pull styles, so that's one advantage of the brass hook thing. Having said that, it's not essential that it's integrated into a drawer pull, so it doesn't rule out the other options.
 
There is a reason, IMHO, why carpenters in days gone by used roman numerals for identification. From 1 to 100 you only need straight lines which can be easily and effective made with a light tap of a straight chisel.
 
Andyp":z1gdulct said:
There is a reason, IMHO, why carpenters in days gone by used roman numerals for identification. From 1 to 100 you only need straight lines which can be easily and effective made with a light tap of a straight chisel.

That's a good point!

As there are only 5 drawers, you could simplify even further and use dots, arranged like the spots on a dice.
 
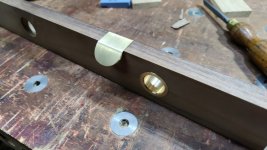
Carolyn needed an early night tonight and I was feeling restless, so I popped out to the garage to have a go at a more rounded hook per Mike G's suggestion.

Before going out, I'd 3D printed a little marking thing to make it quick & easy to draw a curve with a scribe (I was impatient and didn't wait for the ink to dry before marking it, hence the dirty marks on the 3D printed bit):

01_3d_printed_gauge.jpg

With the curve marked, I used the little belt sander (one of these, which is intended for small wooden things but has only ever been used for grinding metal in my workshop 8-)) to remove the waste down to the scribed line.

Then it was just a case of flux, bend, solder, file the soldered joints and clean up the outside (with 600 grit wet & dry instead of the angry grinder this time).

02_test_piece.jpg

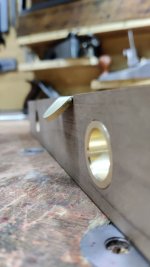
I didn't bend the hook part all the way to close the groove this time, to see what it would look like with a shallower angle (better in my opinion, plus there's more space for getting a finger under it now). If I adopt this angle, I'll have to make a new cutter for making the groove and obviously have to remake all the brass hooks, but I was expecting that anyway and it's no big deal.

Another view:

03_another_angle.jpg
 
You are aware that there is a secret society devoted to the ‘let’s make Dr Al do something ridiculous’ meme.
I could tell you the members, but then I would have to kill you. The 39 steps are a secret society devoted to… Argggh.
 
Tiresias":22dldald said:
You are aware that there is a secret society devoted to the ‘let’s make Dr Al do something ridiculous’ meme.

Now that's just mean :cry: :) :eusa-snooty: :eusa-shifty:

I'm still pondering on options and I don't think I've got any closer to a decision at the moment. If anything I'm probably leaning towards the brass-lined holes with a separate (thin) brass insert in the top of each drawer front with a number engraved into it. I'll probably try making the brass inserts at the weekend and then can decide what I think of them.

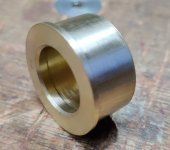
In the meantime I did a little bit more brass turning. In theory, this would have been an option for a drawer pull, but in practice it needs to be slightly bigger diameter than the other drawer pull and that means that it would interfere with the drawer bottom.

This is what it looks like anyway:

turned-piece.jpg

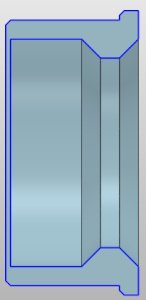
The difference with the drawer pull inserts is that the hole is blind. This is what it looks like in cross-section (very, very roughly):

cross-section.jpg

The reason it's a larger diameter is that the "lip" near the opening needs to be big enough to get a finger into (and hence is the same size as the through-hole in the drawer pull I made before). As there's a second (larger) opening behind the lip, the other diameters need to increase accordingly.

So why did I make this? When the shooting board is in place like this...

file.php


... there's no obvious way to get it out. You can just about grip the two knobs and pull, but it's not especially easy. Alternatively you can unlock the knobs and push one of the drawers from behind, but I'd quite like to be able to pull it from the front. I don't really want the chest to be open at the front (as a through-hole pull would be) and I want to be able to skim the shooting board surface with a smoothing plane if required, so I don't want a brass piece that goes all the way through.

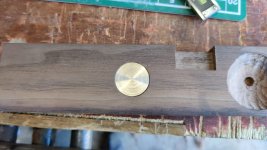
If I set that turned brass piece into the outside face of the shooting board, I'll be able to stick my finger in and pull on the lip. It's only 14 mm thick, so won't interfere at all with the shooting board face if it's mounted flush with the outside of the (20 mm thick) shooting board (it has to be mounted flush as otherwise the shooting board won't lie flat). Again, this isn't really viable with the drawer fronts as they're much thinner and have the drawer base sitting in a groove that would interfere with the brass piece.

I didn't take any photos of the process of making the brass thing, but the process was much the same as other brass turned things I've already photographed in this WIP.

Oh, and to keep the "secret society" happy, I'm also wondering about doing something else that will definitely fit into the absolutely ridiculous category. I'm thinking about carving some sort of pattern (I have no idea what: my artistic skills are close to zero) into the outside (non-shooting) face of the shooting board.

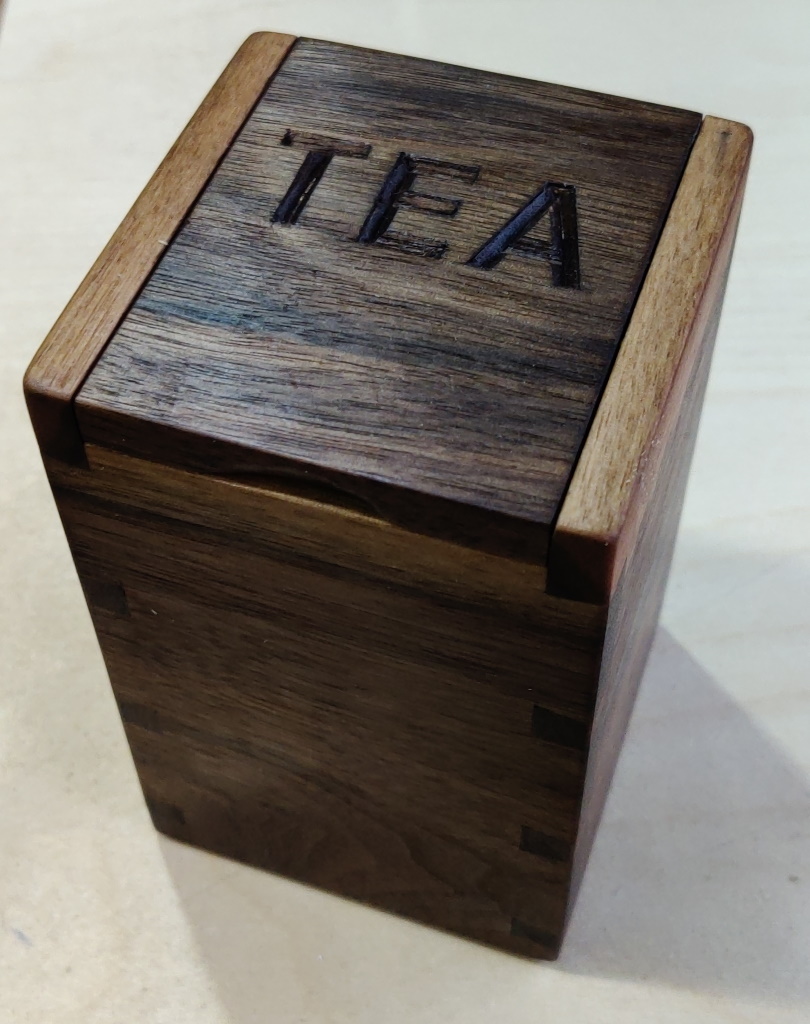
It's a big wide panel with not-especially interesting grain and I'm thinking it might break up the look of it a bit to have some sort of chip-carved pattern in the front. You'll note that the only chip carving I've ever done before was carving some simple text (e.g. TEA) into a couple of box lids, so this is definitely biting off more than I can chew...

Anyway, I'd welcome thoughts on patterns (or if you think it's stupid idea then please do say!)
 
Brilliant Idea Al.
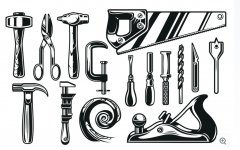
Instead of a “pattern” why not carvings to illustrate the contents.

Search “woodwork tools vector art” for some profiles which for a man of your calibre should be a doddle to reproduce.
 

Attachments

  • IMG_2859.jpeg
    IMG_2859.jpeg
    401.4 KB · Views: 39,108
Andyp":3ulq52lp said:
Brilliant Idea Al.
Instead of a “pattern” why not carvings to illustrate the contents.

Search “woodwork tools vector art” for some profiles which for a man of your calibre should be a doddle to reproduce.

I'm starting to suspect that this "secret society" might be real :lol:

While I must admit that I like the idea, I think it would be sensible for my first attempt at an elaborate bit of chip carving to be something abstract: at least that way it might still look okay if/when I make a mistake!
 
Before suggesting patterns for carving, could you let us know what gouges you've got? Chip carving is a simple process of striking straight down to make a cliff-face, and then carving along near-horizontal to meet the face of the cliff. So, your pattern is set by the vertical strikes, and are thus determined by what sort of gouge collection you have.
 
There's a secret cnc society that would import those drawings and mill those images. ;)
 
Mike G":oirollf1 said:
Before suggesting patterns for carving, could you let us know what gouges you've got? Chip carving is a simple process of striking straight down to make a cliff-face, and then carving along near-horizontal to meet the face of the cliff. So, your pattern is set by the vertical strikes, and are thus determined by what sort of gouge collection you have.

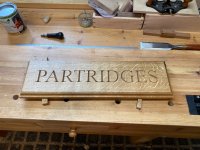
I recently did some carving for the first time to make a house name for my in-laws:

IMG_2664.jpeg

My only disappointment was that I discovered I could do all the curves and serifs with one gouge - a lovely small fish-tailed gouge I picked up in an antique/junk shop in Hungerford recently - so I didn't have an excuse to buy lots of carving gouges.

IMG_2688.jpeg

I guess I could have done it faster if I had a few larger gouges with different radii?

(Sorry for the thread digression...)
 
Mike G":3b8o4jjd said:
Before suggesting patterns for carving, could you let us know what gouges you've got? Chip carving is a simple process of striking straight down to make a cliff-face, and then carving along near-horizontal to meet the face of the cliff. So, your pattern is set by the vertical strikes, and are thus determined by what sort of gouge collection you have.

I think I mostly understood that :?

I'm not really sure what I have in my gouge collection, but I'll pop out to the garage later and get some photos.

NickM":3b8o4jjd said:
I recently did some carving for the first time to make a house name for my in-laws:
View attachment 1

That's lovely, and a lot more impressive than my first attempt:

teacaddy_1.jpg
 
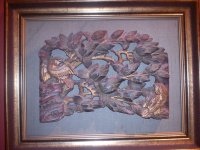
Well, this has not been approved by the Black Stone gang, but, if none of the Faroese carvings appealed to you -what is wrong with Olav the mighty btw – why not

DSC05581.jpg

I seem to have acquired quite a collection of these. This one was bought In Hong Kong in the early 2000s, Probably mainland China 1800s.

Or, how about a monogram of your, or, indeed also your partner’s, initials.

Or you could use your emblem of arms (or if you are not armigerous, make one up). My own personal ‘badge’ of a sleeping mouse on a bed of vaccinium myrtillus, with the motto quare anxietas, is, I think, an exemplar.

Or runes, and cuneiform can be quite good too. And allow you to be spectacularly rude, without being vulgar. Although I rather like vulgar. .

Purely a personal opinion, but I would avoid Celtic knots or anything Mauri. Unless of course you have a direct connection. I interviewed someone for a trainee position once. Had a visible Mauri tattoo. I asked about it. The closest he had been to NZ was possibly walking past a cinema that was showing ‘Once were Warriors’. Didn’t get the job.
 
Mike G":38aw6uh4 said:
Before suggesting patterns for carving, could you let us know what gouges you've got? Chip carving is a simple process of striking straight down to make a cliff-face, and then carving along near-horizontal to meet the face of the cliff. So, your pattern is set by the vertical strikes, and are thus determined by what sort of gouge collection you have.

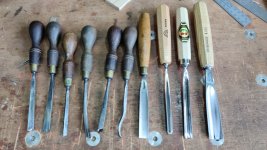
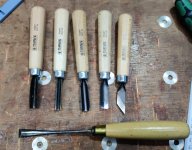
This is everything vaguely gouge-y that I have:

gouges.jpg

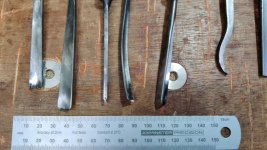
On the far right is a big Pfeil 8/20 thing. Next to it is a Kirschen 8/10. Then a Stubai V-Chisel.

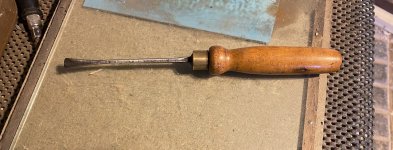
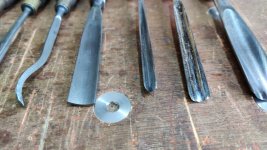
In the middle with a straight-ish handle is a junk shop find that had a seriously deformed tip (bent over and with a big notch missing). I've ground it square, but haven't got round to grinding a new bevel onto it. It's marked with a faint number 3 on the back.

The rest are a set that I inherited from my father. They include two straight gouges, one bent gouge, one bent square-edge chisel (visible on the left of the image below), a v-chisel and a double-bevel chisel. I've no idea how the gouges would be numbered, but they're all smaller than the 8/ ones on the right.

Close-up of the tips of some of them (I took a photo of the tips of the ones on the left, but it came out very blurry!). You can see the square end ground on the #3.

ground_flat.jpg

I've also got flat chisels in lots of sizes from 2 mm up to 50 mm, as well as a few single bevel skewed chisels and a small fishtail flat chisel.
 
Here's a close-up of the tips of the ones on the left:

tips.jpg

Left-to-right: narrow gouge, wider gouge, double bevel straight, curved gouge, v-chisel, curved straight.

I also remembered that I have these bent sheet steel Narex ones as well (pictured alongside the Bristol Design flat fishtail chisel I mentioned):

narex.jpg

Amazing how these things accumulate when you can't resist buying tools whenever you see them.
 
Chip carving is a branch of carving that cuts a triangular wedge out of the wood, it is normally done with a knife held at an angle of approx 60 degrees. There's lots of videos on youtube should you want a go.
 
Mr P":37yuttjr said:
Chip carving is a branch of carving that cuts a triangular wedge out of the wood, it is normally done with a knife held at an angle of approx 60 degrees. There's lots of videos on youtube should you want a go.

It might be I've got my terminology wrong. The point is I want to carve some sort of decorative pattern into the front of the chest. First challenge is to find/choose a pattern; second is to learn to carve in whatever method is appropriate.
 
Dr.Al":1wamxf0o said:
It might be I've got my terminology wrong. The point is I want to carve some sort of decorative pattern into the front of the chest. First challenge is to find/choose a pattern; second is to learn to carve in whatever method is appropriate.
No worries, that's called relief carving or if it's geometric shapes sometimes referred to as strapwork.
 
I'm still no closer to having the faintest idea where to start with a pattern for the carving, but I can carry on with thinking about drawer pulls.

Having made the lipped pull that might go in the front of the cabinet, I thought I'd revisit my assertion:

Dr.Al":3972s66f said:
In theory, this would have been an option for a drawer pull, but in practice it needs to be slightly bigger diameter than the other drawer pull and that means that it would interfere with the drawer bottom.

If I reduce the wall thickness and have a very small lip, then it should be possible to still keep the 18 mm opening and the 22 mm outer diameter (of the bit that goes all the way through the drawer front).

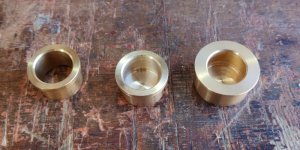
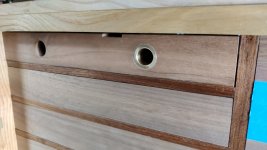
On that basis, I turned another brass insert - visible in the middle of this picture:

three_inserts.jpg

Although the lip is relatively small, it still feels like it gives enough of a grip that it would give me something to pull on, so I think it could work from a functional point of view.

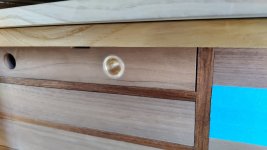
As the outside sizes are the same as the one with the through hole, I could fit it into the same hole as the last attempt so it was nice and quick to see what it looks like:

fitted.jpg

Compare and contrast with the through-hole version:

compare.jpg

What the new one would look like when viewed from the inside of the drawer (in practice the drawer bottom would be very close to the lip of the brass thingy):

rear_view.jpg
 
Malc2098":31kefsp8 said:
Nice. From the front.

I'm going to interpret that as "and not from the rear". I think I probably agree with you but I am still slightly on the fence.

I feel like I've ground to a halt a bit with drawer pull thoughts and carving pattern thoughts (especially the latter: I've got no idea where to start with that). However, there are plenty of other jobs that still need doing.

Sorry if you're all bored to tears with pictures of bits of brass being turned...

Remember these knobs I made a while ago?
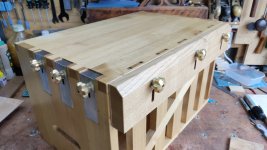
01_original_knobs.jpg

The ones on the planing stops work really well. The ones on the vice jaw are fine, but they're quite slow to use. The planing stop knobs only really need turning about a quarter of a turn and then the planing stop can be slid up or down. The ones on the vice have a much longer screw and there will be many times when the screw needs to be completely removed. At the moment, the quickest way to do that is to stick an Allen key in the hex hole and spin the Allen key with a finger. I'd rather it were possible to spin them without reaching for a tool.

With that in mind and carving ideas getting nowhere fast, I thought I'd make some new knobs for the vice (I'll keep the ones on the planing stops as I quite like the look of them and, as I said, they work fine).

Thanks to a bit of (with-permission) skip diving many years ago, I have a rather large stock of 31.75 mm (1¼") brass bar, so that seemed like a good place to start.

First of all, I stuck a length of it in the chuck and skimmed the outside face to bring it down to 30 mm. I did this with a tool mounted upside down in the tool holder and the lathe running backwards. Brass goes everywhere when you turn it and making the cuts with the lathe running backwards means it's fired down into the bed of the lathe rather than up into the air and over everything.
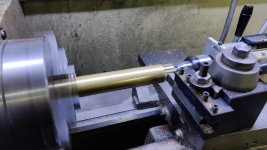
02_turning_30.jpg

After cutting off the 30 mm section, I put it in the vice of the milling machine and spot drilled, drilled and reamed four holes, equally spaced along the length of the bar:
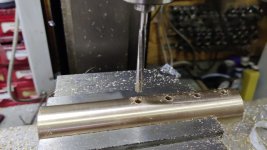
03_reaming.jpg

The bar was then put in my largest (30 mm) collet in the lathe and I put a piece of 5 mm bar in a tool holder so I could line it up with the hole and then zero the lathe's trav-a-dial.
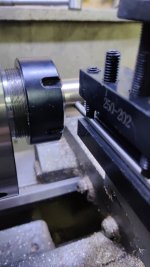
04_lining_up_reamed_hole.jpg

I could then use consistent positions for all the later operations and be confident that all the knobs would be the same.

The first job was to face the end of the bar, then use a cutter with a large diameter tip to form the rear of the knob:
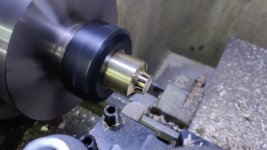
05_forming_rear.jpg

After a quick chamfer, I then spot drilled 6 mm, drilled 5 mm & then tapped the hole.
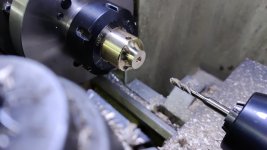
06_tapping.jpg

That should have been an M6 tap, but I stupidly put an M5 tap in the chuck. It still pulled it's way into the 5 mm hole so I didn't notice until I'd made all the knobs. Thankfully it hadn't really cut much material away, so I could just run an M6 hand-tap into the hole and the resulting thread was perfectly serviceable.

A bit of scrap steel was put in the chuck, drilled & tapped M6 (I got it right this time :lol: ) and, with a small undercut to bear against the OD of the tool and a bit of threaded rod inserted in the tapped hole, I had a simple mandrel to hold the knobs-to-be for cleaning up of the outside face.

Again, they were faced to length and I then used a hastily ground form tool to make a curve on the rim:
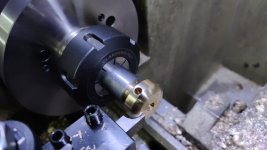
07_form_tool.jpg

With that, the knob bodies were complete. I made four of them even though I only need three: I felt like there was a high chance I'd mess something up on one of them so it seemed a safe bet to make a spare!

More brass turning next, but this time a very simple job: turning some tiny little brass "wear pads". These are 4 mm diameter for 1 mm and then 2 mm diameter for a further 2 mm and are easily the smallest things I've ever turned on the lathe.

I started with a bit of 4 mm brass bar, faced the end and then reduced the end diameter to 2 mm for a 2 mm length. My smallest ER40 collet is a 3 mm one. It'll collapse down to 2 mm, but for holding really short things, it's best to put another short length of the same diameter at the rear of the collet. If I tried to put a short 2 mm diameter bar in the rear of a 3 mm collet, it'd fall out long before I got the collet tightened, so it's much better to use a 2 mm collet directly.

Fortunately, I have a straight-shanked ER32 collet chuck, which I could hold in an ER40 collet. I could then use a 2 mm ER32 collet to hold the tiny brass bit (with another one of the tiny brass bits in the back of the collet):
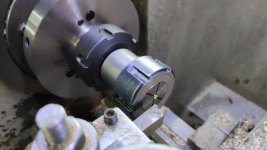
08_tiny_brass_bit.jpg

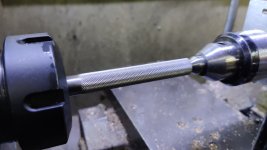
That was all the brass turning done for now; next up, some stainless steel. I started with a bit of 12.7 mm 303 stainless and skimmed the outside diameter down to about 12 mm. I then ran a knurling tool along the length of the bar:
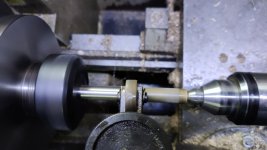
09_knurling_steel.jpg

The result:

10_knurled.jpg

The end was reduced in diameter to 6 mm and threaded M6 (with a threading die). The reduced diameter section isn't really long enough for a good die-cut thread, but it'll serve the purpose perfectly well. While it was in the chuck, I also drilled a 2 mm hole in the end:
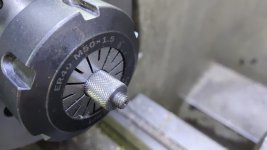
11_turned_end.jpg

After making three of those, I drilled and tapped an M6 hole in a bit of scrap and used that to hold the thumbscrews in place so I could tidy up the outside face:
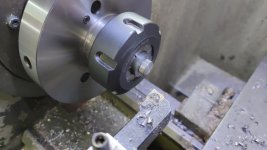
12_flip_and_face.jpg

The only other jobs were cutting some lengths of stainless M6 threaded bar and 5 mm stainless round bar to length and tidying up the sawn ends in the lathe. Also making some very short pieces of 8 mm stainless bar with a 5 mm blind hole drilled in one end. I didn't take any photos of those processes.

All of that gave me this pile of bits:
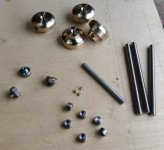
13_bits.jpg

You'll notice that there's only one of the lengths of 5 mm stainless round bar: that's because that's all the 5 mm stainless round bar I've got. I've ordered some more, so I'll be able to finish the parts later in the week.

This is a close-up of those tiny "wear pads" - the smallest things I've ever made I think:
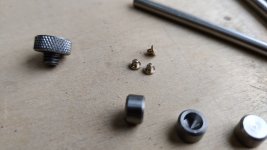
14_tiny_inserts.jpg

They get glued (with Loctite 603) into the end of the knurled stainless thumbscrews:
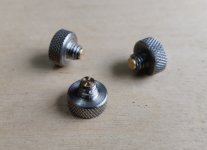
15_wear_pads_fitted.jpg

The brass pad presses against the 5 mm stainless round bar, stopping it moving but hopefully not damaging the surface of the stainless bar (because brass is softer).

Due to the lack of 5 mm round bar, I could only fully assemble one of the knobs, but here it is:
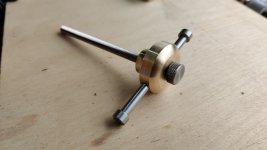
16_assembled.jpg

I've glued the threaded bar into all the knobs, so I could fit them in place in the vice jaws:
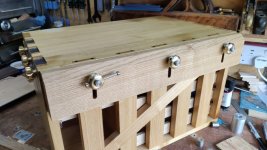
17_in_situ.jpg

Close-up of the finished one:

18_in_situ_close_up.jpg

The little knurled thumbscrew can be used to lock the bar in a roughly central position and then it's really quick to shove a finger up against the bar and spin it round and round. With the knurled thumbscrew loose, the bar can go to either end for a bit more torque if needed (or to keep the bar from sticking up above the surface of the chest).

I'm not sure what I'll do next. There's still a long list of jobs to do, but I think I want to sort out drawer pulls and a carving pattern quite soon and I'm feeling thoroughly stuck on both of them.
 
I think I may have said this before, but if anyone wants to know if having a lathe provides the most satisfying digressions on any workshop project, here's the proof you need! :eusa-clap:

Nice knurling btw.

I thought you had found a nice practical finger pull, but if you are still hesitant and want another option, have you thought about milling a longer version, to take two or three fingers? A single wide pull in the centre might look better than two separate round ones.
Commercial versions of such flush drawer pulls are easily found, but they're probably too big and clumsy for this project.
 
AndyT":3i1w0ktf said:
I thought you had found a nice practical finger pull, but if you are still hesitant and want another option, have you thought about milling a longer version, to take two or three fingers? A single wide pull in the centre might look better than two separate round ones.

It's probably worth noting that I've never intended there to be two separate round ones: just one round one in the centre. The reason all the photos show offset round holes is that I'm using the same piece of scrap that I used to test the recessed brass knob, so I had to put the test holes somewhere other than where the recessed knob was. On the real drawers, it would be slap-bang in the middle of the drawer front.

Something like this:

file.php


Andyp":3i1w0ktf said:
I like the idea of AndyT’s three fingered milled brass pull. Shouldn’t be difficult to make.

I think you underestimate how much more complicated it is to make a rounded rectangle (slot) with even wall thickness all round compared to making a cylinder. The milling operation would be complex and not a lot of fun really, especially having to do it 6 times for 6 drawers. There's then the extra accuracy required in getting the drilled holes (in the wood) for the slot ends perfectly aligned. I've done it for the locking knobs, but only because I couldn't think of a better way.

At the risk of disappointing the secret society, I'm afraid a milled slot thing isn't even making the shortlist!
 
Back
Top